The Purpose of a Soldering Iron in Electronics Repair
In the world of electronics repair, you may find yourself facing a tangled mess of wires, circuit boards, and components. At the heart of resolving these issues lies a crucial tool: the soldering iron. Understanding what a soldering iron does and its purpose can significantly enhance your ability to manage electronic repairs effectively.
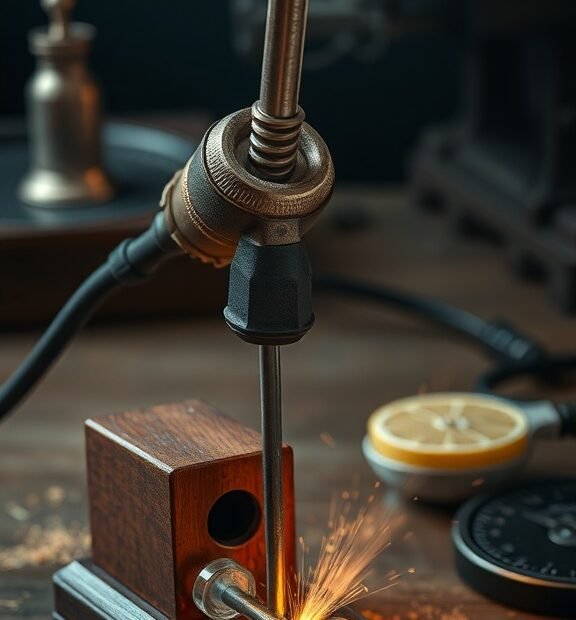
A soldering iron is primarily used to heat and melt solder, a fusible alloy, to join electronic components together. This connection is vital for forming a robust and reliable electrical circuit. Whether you are fixing a broken device or assembling new electronic projects, the soldering iron plays an indispensable role in ensuring secure connections, which is crucial for function and longevity.
Here are some key purposes of a soldering iron in electronics repair:
- Creating Electrical Connections: Soldering is essential for connecting various components, such as resistors, capacitors, and ICs (integrated circuits) on circuit boards. A good solder joint ensures that electricity flows correctly through the circuit.
- Repairing Damaged Components: If a wire or component is damaged, a soldering iron can help you reconnect or replace them. This process is often faster and more efficient than buying new parts.
- Building Prototypes: When developing new electronic projects or prototypes, a soldering iron is necessary for assembling and experimenting with different configurations of components.
- Modifying Devices: If you want to upgrade your electronics or modify existing devices, soldering allows you to add new functionality or capabilities by installing additional components.
One of the most important aspects of using a soldering iron is understanding how to achieve proper solder joints. A good solder joint should be shiny and smooth, indicating a solid connection. Here are some steps that ensure you get the best results:
- Preparation: Always start by cleaning the surfaces you intend to solder. This helps in removing any dirt, grime, or oxidation that could interfere with the soldering process.
- Heat the Iron: Plug in your soldering iron and allow it to reach the appropriate temperature, typically between 350 and 400 degrees Celsius.
- Apply Solder: Once the iron is heated, touch the tip to the joint you wish to solder, then introduce solder to the connection point. The solder will melt and flow into the joint.
- Remove the Iron: After a few seconds, remove the solder and then the soldering iron, allowing the joint to cool naturally.
Safety is also a critical consideration when using a soldering iron. Remember to work in a well-ventilated area to avoid inhaling harmful fumes. Additionally, always handle the tool with care, as the tip can reach high temperatures that might cause burns. Wearing safety glasses is also advisable to protect your eyes from any accidental splashes of molten solder.
When it comes to choosing the right soldering iron, there are various types available. Here are a few factors to consider:
- Wattage: Depending on the projects you will tackle, you might opt for a soldering iron between 20 to 60 watts. Higher wattage allows for faster heating, but it can also damage sensitive components if not used carefully.
- Tip Size: Different projects may require different tip sizes. A finer tip is useful for detailed work on small components, while a wider tip is better for larger connections.
- Temperature Control: Consider getting a soldering iron with adjustable temperature settings, which can provide better control depending on the materials you’re working with.
A soldering iron is not just a simple tool; it is an essential device in the toolkit of anyone involved in electronics repair. By understanding its purpose and mastering its use, you position yourself for success in tackling a wide range of electronic challenges with confidence.
Essential Tips for Effective Soldering Techniques
Soldering is a vital skill in electronics, crafting, and various DIY projects. Mastering this technique means you can connect components effectively, ensuring durable and reliable connections. Here are essential tips to help you improve your soldering skills and achieve the best results.
Choose the Right Tools
Before you start, ensure you have the right tools. The basic tools for effective soldering include:
- Soldering Iron: A good-quality soldering iron with adjustable temperature is crucial.
- Solder: Use rosin-core solder, which is ideal for electronics. It melts well and helps create strong joints.
- Wire Cutters: For trimming excess leads and wire.
- Soldering Iron Stand: This safely holds your iron when not in use.
- Sponge or Brass Sponge: For cleaning the soldering iron tip.
Prepare Your Workspace
A clean, organized workspace can significantly enhance your soldering experience. Follow these steps:
- Good Lighting: Strong lighting helps you see small components clearly.
- Stable Surface: Use a sturdy table that won’t shake as you work.
- Anti-Static Mat: Prevents electrostatic discharge, which can damage sensitive electronics.
Master the Technique
Understanding how to solder correctly can make a big difference. Here are effective soldering techniques:
- Heat the Joint: Place the soldering iron on the joint you want to solder. Allow it to warm up for a second or two.
- Apply Solder: Feed solder into the joint—not directly to the iron. This ensures even distribution. The solder should flow smoothly around the joint.
- Remove the Heat: Take away the soldering iron and let the solder cool. Avoid moving the components during cooling to ensure a strong bond.
Keep Your Tools Clean
Clean tools lead to better solder joints. Always clean the tip of your soldering iron before and after each use. Here’s how:
- Wipe with a Damp Sponge: This helps to remove old solder and oxidation.
- Use a Brass Sponge: For a more thorough cleaning, a brass sponge maintains the tip’s condition without damaging it.
Use the Right Temperature
Temperature control is vital. An iron that’s too hot can damage components, while one that’s too cool won’t melt the solder. A temperature between 350°C to 400°C (about 662°F to 752°F) is typically effective for electronics. Adjust as necessary based on the components you are working with.
Practice on Scrap Materials
Before tackling your main project, practice on scrap materials. This gives you a chance to develop your skills without the risk of damaging important components. You’ll learn how to control the soldering iron, apply solder correctly, and recognize when you have made a good connection.
Pay Attention to Your Solder Joints
Good solder joints are shiny and have a smooth appearance. Here’s what to look for:
- Shiny Finish: A dull joint often indicates a cold solder joint, which is weak.
- Proper Coverage: The solder should cover the pad and lead without excessive build-up.
Protect Yourself
Soldering involves heat and molten metal, so it’s important to protect yourself. Always wear safety glasses to shield your eyes from any solder splashes. Use heat-resistant gloves if necessary, especially when working with large components that retain heat longer.
By following these essential tips, you can enhance your soldering techniques significantly. Practice regularly, maintain your tools, and stay organized. With time and experience, you’ll become proficient at creating durable and effective solder joints, leading to successful projects.
Conclusion
Understanding the purpose of a soldering iron in electronics repair is essential for anyone interested in working with electronic devices. This handy tool plays a crucial role in connecting components to create functional circuits. Whether you are fixing a broken device or building something from scratch, effective soldering techniques ensure solid connections that lead to a successful project.
To achieve the best results, mastering essential tips for effective soldering can make a significant difference. Preparing your workspace, selecting the right solder, and maintaining a clean soldering iron tip are just a few key practices that enhance your soldering skills. Additionally, practicing the correct soldering technique, such as applying the appropriate amount of heat and solder, will prevent cold joints and ensure reliable connections.
As you gain experience, remember that patience and practice are vital elements of improving your soldering abilities. Embracing these techniques not only enhances your skill set but also empowers you to tackle various electronics repair projects with confidence. So, whether you’re a hobbyist or aiming for a career in electronics, prioritizing the purpose and effective use of a soldering iron will help you achieve greater success in your endeavors. With the right knowledge and practice, you can transform complicated repairs into approachable tasks, ultimately leading to better results in your electronic projects.