Creative Alternatives: What Can I Use as a Soldering Iron?
Soldering is an essential skill in electronics and crafting, but sometimes, you may find yourself without a soldering iron at hand. Don’t worry! There are some creative alternatives that can help you achieve similar results. Whether you’re working on a quick project or a more detailed repair, these options might just save the day.
So, what can you use as a soldering iron? Let’s explore some handy alternatives that are surprisingly effective.
1. Soldering Pencil
A soldering pencil is not exactly a soldering iron, but it works similarly. These pencils heat up and can be used to melt solder effectively. If you have one lying around from a previous project, it can be your best friend!
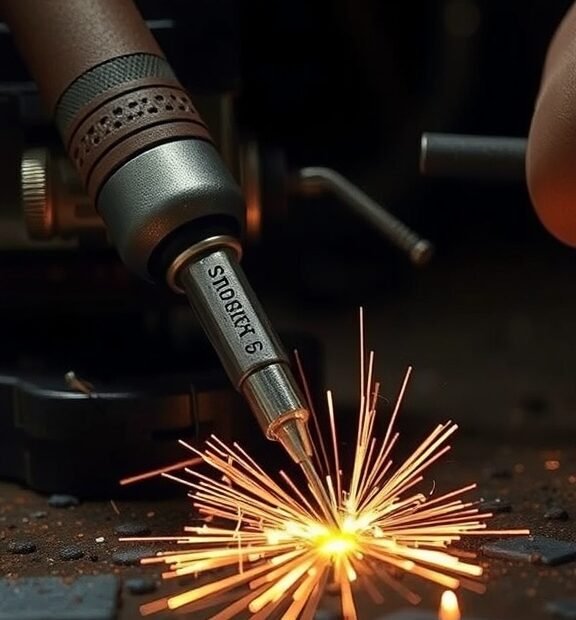
Soldering Stations | Easy 60 Day Return
2. Hot Glue Gun
Your hot glue gun may be more versatile than you think. While it won’t melt solder like a soldering iron, it can provide a strong bond for lightweight electronic components. For projects that don’t require precision, this method can be a quick fix.
3. An Old Lighter
With a little creativity, you can use an old lighter. Instead of holding the flame, you could use the tip of the lighter itself. However, be cautious and ensure that you’re only using this method for non-sensitive components, as it can produce uneven heat and may damage delicate parts.
Soldering Stations | Easy 60 Day Return
4. Metal Spoon or Fork
A metal spoon or fork can serve as a makeshift soldering tool. By heating it on a stove or over a flame, you can use the tip to melt solder. Just be sure that the tool is clean and does not have any leftover food residue, as this can interfere with the soldering process.
5. Soldering Iron Alternatives
- Iron Nail: A metal nail can be heated and used for quick, lightweight soldering tasks.
- Copper Wire: If you have copper wire, you can coil it around a metal object and heat it with a torch or lighter to melt solder.
- Old Electronics: Salvaged electronic devices often have components that can be repurposed for soldering.
These tools can work for basic soldering, but it’s essential to understand their limitations. For delicate electronics or more advanced work, consider investing in a proper soldering iron. They come in various voltages and styles, equipped with tips designed for specific tasks.
Soldering Stations | Easy 60 Day Return
6. Using a Blow Torch or Lighter for Heating
If you have a blow torch or a simple lighter, these can also work. However, be careful! The heat can be intense, which might damage sensitive components. Always keep your torch at a safe distance from anything that could catch fire.
7. Electric Stove or Hot Plate
If you have access to an electric stove or a hot plate, these appliances can be adapted for soldering tasks. Place your solder and wire directly on the hot surface to melt and create a bond. Just ensure you’re using heat-resistant materials to avoid burning yourself.
Soldering Stations | Easy 60 Day Return
When using these alternatives, ensure you’re taking safety precautions. Always work in a well-ventilated area and wear safety goggles to protect your eyes from splashes or fumes.
8. Combination of Tools
Sometimes, combining methods can yield the best results. For instance, heat a metal spoon with a lighter while securing the wires with a hot glue gun. This way, you can get a better bond and keep components connected while the solder cools.
Soldering Stations | Easy 60 Day Return
9. Caution is Key
While these methods can be useful, they are not a replacement for a soldering iron. They offer temporary solutions and might work best for light tasks or experimentation. If you’re planning to work on more serious electronics projects, investing in a quality soldering iron will save you time and effort in the long run.
Exploring these various alternatives can broaden your crafting skills and provide you with the tools you need in an emergency. So, if you find yourself asking, “What can I use as a soldering iron?” remember that creativity can unlock various possibilities. Try these options, and you may discover that soldering doesn’t have to be limited to just one tool!
The Basics of Soldering: Tools and Techniques for Beginners
Soldering is an essential skill in various fields, from electronics to craftwork. As a beginner, understanding the tools and techniques can make your soldering experience smooth and rewarding. So, let’s dive into the basics of soldering, including the tools you need and the techniques that will help you succeed.
Soldering Stations | Easy 60 Day Return
Essential Tools for Soldering
When starting with soldering, having the right tools can significantly impact your outcome. Here’s a list of essential tools you’ll need:
- Soldering Iron: This is the main tool you’ll use. It heats up to melt solder and create connections between components.
- Solder: This is the metal alloy used to join electrical components. Lead-free solder is recommended for beginners for safety.
- Wire Cutters: These are used to trim excess wire after the soldering process. Sharp cutters can make clean cuts.
- Soldering Iron Stand: A stable stand keeps your soldering iron secure when not in use, preventing burns and accidents.
- Soldering Flux: This chemical helps improve the flow of solder and prevents oxidation. Use it for more reliable joints.
- Solder Wick: Also known as desoldering braid, this tool helps remove excess solder or correct mistakes.
- Safety Glasses: Protect your eyes from solder splashes and debris while soldering.
Basic Soldering Techniques
Now that you have the necessary tools, let’s explore some basic soldering techniques that will help you get started.
Soldering Stations | Easy 60 Day Return
1. Preparing your Workspace
Before you begin, ensure your workspace is clean and well-lit. A clutter-free area allows you to work without distractions and mistakes. Place your soldering tools within easy reach for efficiency.
2. Tinning the Soldering Iron
Tinning is the process of melting a small amount of solder onto the tip of your soldering iron. This helps transfer heat better and improves solder flow. To tin your iron, heat it up, then touch the solder to the tip. It should melt and coat the tip evenly.
Soldering Stations | Easy 60 Day Return
3. Heating the Joint
When soldering, it’s crucial to heat the joint where the two components meet. Place the soldering iron on the connection and wait a second or two to heat both the wire and the pad. This step ensures that your solder will blend well and form a solid connection.
4. Applying Solder
While maintaining the heat, bring the solder to the joint. Let it melt and flow into the connection rather than adding the solder directly to the iron. This method allows better control and minimizes mistakes.
Soldering Stations | Easy 60 Day Return
5. Removing the Soldering Iron
Once you see the solder has flowed into place, remove the solder first, then the soldering iron. This sequence lets the solder solidify correctly, forming a sturdy joint.
6. Inspecting the Joint
After the joint cools down, inspect it for a shiny appearance, which indicates a good connection. If the solder is dull, you may need to reheat and apply more solder. Practice makes perfect, so don’t rush through this stage!
Soldering Stations | Easy 60 Day Return
Safety Precautions
Safety should always be a priority when soldering. Here are some precautions you should take:
- Always wear safety glasses to protect your eyes.
- Work in a well-ventilated area to avoid inhaling fumes.
- Keep flammable materials away from your workspace.
- Be mindful of the hot soldering iron to avoid burns.
Practice Makes Perfect
As you embark on your soldering journey, remember that practice is key. Start with small projects, like simple electronics kits, to build your skills. Over time, you’ll gain confidence and precision, allowing you to tackle more complex soldering tasks.
Soldering Stations | Easy 60 Day Return
By familiarizing yourself with the tools and techniques outlined above, you’re well on your way to becoming a proficient solderer. Embrace the learning process, and enjoy the rewarding experience of creating solid connections in your projects!
Conclusion
Exploring alternative tools for soldering opens up a world of creativity and problem-solving. You don’t always need a traditional soldering iron to fix electronics or craft projects. From wood-burning tools to stovetops and even metal spoons, these creative alternatives can provide the heat needed to join components effectively. Just remember to practice safety, as inappropriate tools can pose risks.
For beginners, understanding the basics of soldering is crucial. Familiarizing yourself with essential tools and techniques can turn what seems like a daunting task into an enjoyable activity. Start with simple practice projects, and don’t hesitate to experiment with the creative alternatives mentioned. With patience and practice, soldering can become a rewarding skill that not only helps you repair gadgets but also enhances your DIY capabilities.
Soldering Stations | Easy 60 Day Return
Using available resources and negotiating with what you have can give you a greater sense of accomplishment in your projects. The key is to be resourceful and innovative. Each attempt, whether using an improvised tool or the right equipment, will further your understanding and technique. Embrace these challenges as learning opportunities. By keeping an open mind and a willingness to learn, you’ll find that soldering is not just about the tools you use, but also about your creativity and adaptability in problem-solving. Celebrate your successes, and always keep experimenting!