Techniques for Soldering Stainless Steel with a Soldering Iron
Soldering stainless steel can be a bit challenging due to its unique properties, but with the right techniques, you can successfully join stainless steel pieces using a soldering iron. Understanding how to solder stainless steel with soldering iron is essential for anyone looking to make durable and sturdy connections. Here’s how to do it effectively.
Appropriate Materials
Before jumping into the soldering process, it’s important to gather the right materials:
- Soldering Iron: Choose a high-quality soldering iron with a temperature range of 350°C to 450°C.
- Solder: Use a lead-free solder suitable for stainless steel. A silver-bearing solder is a good choice.
- Flux: Apply a suitable flux to promote better bonding. A phosphoric acid-based flux works well with stainless steel.
- Cleaning Tools: Have sandpaper or a metal file handy to clean the surfaces before soldering.
Preparing the Stainless Steel
Preparation is vital for good soldering results. Follow these steps:
- Clean the Surface: Use sandpaper or a file to remove any dirt, rust, or oxide layer on the stainless steel surfaces. This will help the solder adhere better.
- Apply Flux: Once cleaned, apply a thin layer of flux to the areas you plan to solder. The flux minimizes oxidation during heating.
- Position the Parts: Align the stainless steel pieces you want to solder. Ensure they stay in place, as movement can cause weak joints.
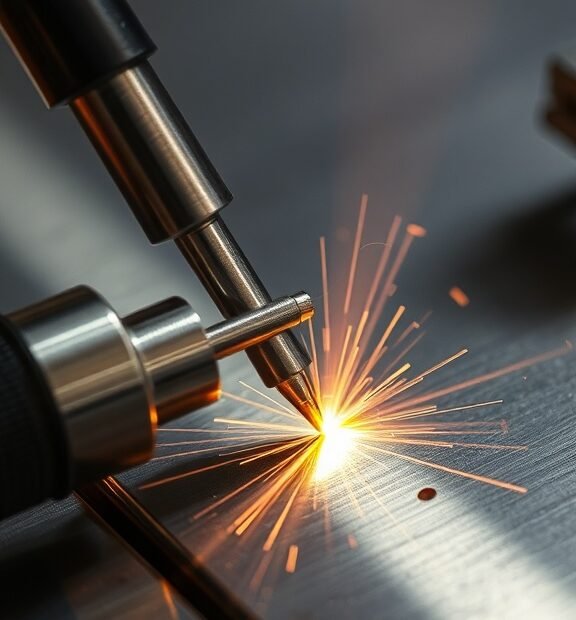
Heating the Iron
Next, you need to heat your soldering iron. Set it to a temperature of around 400°C to effectively melt the solder without overheating the metal. It’s crucial to avoid overheating as this can warp or damage the stainless steel.
Soldering Technique
Now that everything is prepared, it’s time to solder. Use this technique:
- Touch the Iron: Place the tip of the iron against the stainless steel joint you intend to solder. The heat from the iron will transfer to the metal, warming it up.
- Add the Solder: As the joint heats up, bring the solder to the joint, not the iron. The solder should melt and flow into the joint, filling any gaps.
- Remove Heat Slowly: Once the solder flows properly, remove the solder first, then the soldering iron. This ensures that the solder sets correctly without unexpected movement.
Cooling and Cleaning
After soldering, allow the joint to cool naturally without any sudden temperature changes. Rapid cooling can lead to cracking. After it has cooled down, clean any excess flux from the joint using a damp cloth.
Testing the Joint
To ensure a strong bond, test the connection. Apply pressure on the soldered joint to see if it holds firmly. Weakness in the joint can indicate poor technique or insufficient heat. Always remember that practice makes perfect, and soldering can improve with experience.
Safety Measures
When learning how to solder stainless steel with soldering iron, it’s crucial to prioritize safety. Follow these guidelines:
- Wear Safety Goggles: Protect your eyes from flux fumes and any solder splashes.
- Use Heat-Resistant Gloves: Prevent burns by wearing gloves while handling heated materials.
- Work in a Ventilated Area: Ensure adequate airflow to avoid inhaling harmful fumes from the solder or flux.
By applying these techniques for soldering stainless steel with a soldering iron, you can achieve strong, reliable connections in your projects. Remember to practice and refine your skills, and don’t hesitate to experiment with different soldering rods and flux types to find the combination that works best for your specific needs.
Common Mistakes to Avoid When Soldering Stainless Steel
Soldering stainless steel can be a rewarding skill, but it’s also fraught with challenges. Many people, especially beginners, encounter a few common mistakes that can lead to unsuccessful joints. By knowing what to avoid, you can enhance your soldering skills and produce durable, high-quality connections. Here are some of the pitfalls to watch out for.
Choosing the Wrong Solder
Not all solders are created equal, especially when working with stainless steel. A common mistake is using a solder that is not suitable for high-temperature materials. Standard lead-based or tin solders may not adhere well and can weaken the joint. Instead, opt for solder specifically designed for stainless steel. A silver-based solder often yields better results due to its superior bonding capabilities.
Poor Surface Preparation
Surface preparation is crucial in soldering. Stainless steel tends to have a protective oxide layer that can inhibit adequate solder flow. Failing to clean the steel properly can result in weak or barren joints. Follow these steps to prepare your stainless steel surface:
- Use a stainless steel brush to remove the oxide layer.
- Clean the area with a solvent like acetone or alcohol to eliminate oils and contaminants.
- Ensure the surfaces to be joined fit well, with minimal gaps.
Ignoring the Right Temperature
Temperature control is vital. If your soldering iron is too hot, it can damage the stainless steel, while a too-cool iron won’t melt the solder properly. Familiarize yourself with the recommended temperature settings for both the solder and the stainless steel you’re using to achieve optimal results. Typically, a temperature between 400°F to 600°F is adequate for most applications.
Overheating the Joint
Another common error is overheating the joint. While it’s important to reach the right temperature, overstaying the heat can result in oxidation or warping in the stainless steel. This can create a poor bond and affect the integrity of your project. Move your soldering iron in a steady motion to apply heat evenly and reduce the risk of overheating.
Failing to Use Flux
Using flux is a key step in the soldering process that some novice solderers overlook. Flux helps prevent oxidation during heating and improves solder flow. When working with stainless steel, choose a flux that is compatible with your specific solder. Apply it generously to the joint before heating to ensure prolonged adhesion and improved bonding strength.
Improper Soldering Technique
Many beginners make the mistake of thinking that soldering is a one-step process. In reality, it requires technique and finesse. Ensure you are using proper soldering technique by following these guidelines:
- Heat the base metal first, not the solder. Allow the base to reach a suitable temperature before introducing solder.
- Apply solder directly to the joint rather than the soldering iron. This ensures that the solder flows appropriately into the joint.
- Don’t rush the process. Watch for the solder to flow into the joint and allow it to cool without disturbance.
Neglecting Post-Soldering Cleanup
Once you’ve successfully soldered the joint, you might be tempted to call it a day. However, neglecting post-soldering cleanup can lead to future issues, such as corrosion. After the joint cools, remove any remaining flux residue with appropriate cleaners. A simple water rinse followed by gentle scrubbing can help maintain the integrity of the joint and the overall appearance of your stainless steel piece.
By avoiding these common mistakes when soldering stainless steel, you can significantly improve your soldering results and create dependable, high-quality connections. Remember, practice and patience are key components of mastering this skill. Take your time, learn from any setbacks, and soon you’ll be soldering stainless steel like a pro!
Conclusion
Successfully soldering stainless steel with a soldering iron is a rewarding skill that enhances your metalworking projects. By mastering the techniques outlined, you’ll find that achieving strong, durable bonds becomes much easier. Always remember to prepare the surface adequately by cleaning and applying flux, as this step is crucial for effective soldering.
Avoiding common mistakes is just as important as employing the right techniques. Steer clear of overheating and ensure your materials are adequately clamped for stability. Pay close attention to the type of solder and flux you choose; selecting the wrong materials can lead to weak joints and frustration.
Practice is essential. The more you work with stainless steel, the more comfortable you’ll become with the process. You’ll learn to adjust your methods based on the specific demands of each project, leading to even better results over time.
By following these guidelines, you will not only improve your soldering skills but also gain confidence in tackling more advanced metalworking tasks. Remember, patience and attention to detail are your best tools. With dedication, you’ll transform your soldering capabilities and take your metalworking to the next level. Whether you’re a DIY enthusiast or a professional, these insights will help you achieve beautiful, lasting results when soldering stainless steel. Embrace the learning process, and enjoy the satisfaction that comes from creating robust, reliable joints with your soldering iron.