Essential Steps on How to Solder Copper Pipe with a Soldering Iron
Soldering copper pipes is a useful skill, especially for plumbing projects around your home. It involves joining two pieces of pipe with a melted alloy (solder) that solidifies to create a strong bond. If you’re looking to master the art of soldering copper pipes using a soldering iron, follow these essential steps to ensure a successful outcome.
Gather Your Materials
Before you begin, it’s important to have all the necessary tools and materials ready. Here’s what you will need:
- Copper pipe and fittings
- Soldering iron
- Solder (60/40 or lead-free)
- Pipe cutter
- Emery cloth or sandpaper
- Flux
- Heat-resistant surface or workbench
- Safety glasses and gloves
- Wet rag or sponge
Prepare the Pipe
Start by cutting your copper pipe to the desired lengths using a pipe cutter. After cutting, it’s essential to clean the ends of the pipes where they will connect. Use emery cloth or sandpaper to remove any burrs or oxidation from the surface. This step is crucial because a clean surface allows for better adhesion of the solder.
Soldering Stations | Easy 60 Day Return
Apply Flux
Once your pipe ends are clean, apply a thin layer of flux to both the pipe ends and the inside of the fitting. Flux helps prevent oxidation during the soldering process and promotes the flow of solder into the joint.
Assemble the Joint
Insert one end of the copper pipe into the fitting, making sure it’s fully seated. Ensure that it’s aligned properly, as this will affect the integrity of the joint. If necessary, dry-fit the pieces before applying heat to ensure everything fits together neatly.
Soldering Stations | Easy 60 Day Return
Heat the Joint
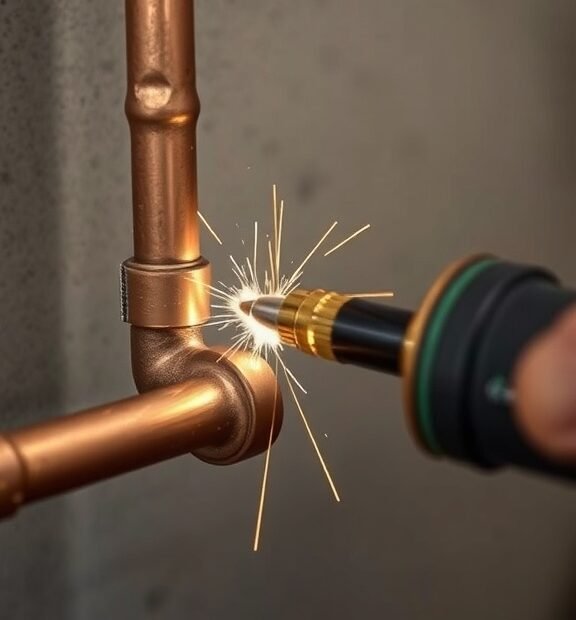
Put on your safety glasses and gloves before using the soldering iron. Plug in your soldering iron and allow it to heat up fully. Once ready, place the tip of the soldering iron against the joint where the pipe and fitting meet. Hold it there for a few seconds to heat up the copper. You’ll know it’s ready when you see the flux start to bubble.
Add the Solder
With the joint heated up, take your solder and touch it to the edge of the joint. If the joint is hot enough, the solder will melt and flow into the joint by capillary action. Make sure to avoid applying solder directly to the tip of the soldering iron; instead, always let it flow into the joint. Be patient and allow enough solder to fill the gap, ensuring a strong bond.
Soldering Stations | Easy 60 Day Return
Cool and Clean the Joint
Once you’ve added enough solder, remove the soldering iron. Allow the joint to cool naturally for a few minutes without disturbing it. After it has cooled, use a wet rag or sponge to clean off any excess flux residue, which can cause corrosion if left on the pipe.
Inspect Your Work
After the joint has cooled and is cleaned, inspect it for any leaks. You can do this by running water through the pipe or visually checking the joint. If you notice any solder gaps or unevenness, it may indicate that the solder didn’t flow correctly. In such cases, you may need to reheat the joint and add more solder.
Soldering Stations | Easy 60 Day Return
Safety Tips
Soldering can be hazardous if proper precautions aren’t taken. Here are some essential safety tips:
- Always wear safety glasses and heat-resistant gloves.
- Work in a well-ventilated area to avoid inhaling fumes.
- Keep flammable materials away from your workspace.
- Use a heat-resistant surface to protect your work area.
By following these essential steps on how to solder copper pipe with a soldering iron, you can complete your plumbing projects successfully. With practice, you’ll become more proficient, enabling you to tackle larger and more complex soldering tasks with confidence.
Common Mistakes to Avoid When Soldering Copper Pipes
Soldering copper pipes is a common task for DIY enthusiasts and professionals alike. However, it’s easy to make mistakes that can lead to leaks and other issues. To help you master the art of soldering copper pipes, let’s explore some common pitfalls and how to avoid them.
Soldering Stations | Easy 60 Day Return
One of the first mistakes to steer clear of is not cleaning the pipe and fitting before soldering. Copper surfaces need to be free of dirt, grease, and oxidation for proper adhesion. Use a wire brush or sandpaper to clean the surfaces thoroughly, ensuring a better connection between the pipe and the solder. Neglecting this step can lead to weak joints that may fail over time.
Another frequent error is using the wrong solder. Differentiating between lead-free and lead-based solder is crucial. For plumbing, always opt for lead-free solder to ensure safety and compliance with health regulations. Additionally, make sure the solder you select is appropriate for the pipe diameter and the intended application.
Soldering Stations | Easy 60 Day Return
It’s also vital to consider the flux. Skipping this essential step can result in poor adhesion and weak joints. Apply a liberal amount of flux to both the pipe and the fitting before soldering. The flux helps to clean the copper as the joint heats up, allowing the solder to flow smoothly into the joint. Using too little flux can leave your joints prone to leaks.
Don’t forget about the importance of proper heating. Some people make the mistake of overheating the joint, which can lead to burn damage to the pipe, while others don’t apply enough heat. Apply the flame evenly around the joint and monitor the color of the copper. The right temperature allows the flux to turn from a paste to a liquid, which identifies the right moment to introduce the solder.
Soldering Stations | Easy 60 Day Return
When you start soldering, another frequent mistake is moving the pipe before the solder has cooled and set. Patience is key here! Allow the solder joint to cool completely before touching or disturbing it. If you move the joint while it’s still molten, you could create a weak connection, leading to leaks.
- Test for leaks: After allowing your newly soldered joint to cool, it’s a good idea to test for leaks. Turn on the water supply slowly and visually inspect the joint. If you see drips, you’ll need to re-solder the joint properly.
- Use the right tools: Poor quality tools can complicate the soldering process. Invest in a good soldering iron, a pipe cutter, and quality fittings. This will make your work easier and yield better results.
- Don’t forget personal safety: Always wear safety glasses and gloves when soldering. The process involves heat and molten metal, which can be dangerous if not handled properly.
Another mistake to avoid is not allowing sufficient time for the joint to cool naturally. In your enthusiasm to finish the job, you might be tempted to speed up the cooling process with water. This can shock the joint and lead to cracks or weak spots. Let it cool down at room temperature to ensure a strong, durable joint.
Soldering Stations | Easy 60 Day Return
In addition, some individuals fail to follow the manufacturer’s instructions regarding soldering techniques. Each soldering product comes with specific recommendations. Never hesitate to read the labels and guidelines for the best practices related to your materials.
It’s important to practice your technique. Soldering is a skill that improves with practice. Try soldering pieces of scrap pipe before working on your actual project. This will help you build confidence and enhance your soldering abilities.
Soldering Stations | Easy 60 Day Return
Avoiding these common mistakes when soldering copper pipes can save you time, effort, and money in the long run. By ensuring that the surfaces are clean, using the appropriate materials, and practicing patience, your soldered joints will be reliable and long-lasting. Remember, mastery often comes from attention to detail and dedication to the craft.
Conclusion
Successfully soldering copper pipes using a soldering iron is a valuable skill that can save you time and money in plumbing projects. By following the essential steps outlined, you’ll ensure a strong, leak-free joint. Remember to prepare your pipes properly, use the right amount of solder, and apply heat evenly to achieve the best results.
Equally important is learning from common mistakes that many make when starting out. Avoid over-heating the copper or using too much flux as these can lead to weak connections or messy joints. Pay attention to cleanliness; dirty pipes can prevent a proper solder joint from forming.
Soldering Stations | Easy 60 Day Return
Taking care to follow these guidelines will enhance your soldering experience. Don’t rush the process; allow your joints to cool properly before testing for leaks. Practice will also make a significant difference; the more you solder, the more comfortable and proficient you will become.
With patience and these techniques at your fingertips, you’ll be well-equipped to tackle any copper pipe project with confidence. Enjoy the rewarding feeling of completing your own plumbing tasks, knowing that a well-made solder joint can last for years to come. With these insights, you’re now ready to confidently approach your next soldering job and create connections that stand the test of time.