Essential Steps on How to Prepare a Soldering Iron for Effective Use
Before diving into any soldering project, it’s essential to prepare your soldering iron correctly. This preparation ensures safety, effectiveness, and the longevity of your soldering tool. Here’s a comprehensive guide on how to properly prepare your soldering iron for effective use.
Gather Your Materials
Start by assembling everything you will need. A well-prepared workspace makes the soldering process easier. Here’s what you need:
- A quality soldering iron
- Solder (lead-free or lead-based)
- Soldering iron stand
- Soldering iron cleaner (sponge or brass wool)
- Safety glasses
- Wire cutters and strippers
- Electronics or circuit boards for practice
Inspect Your Soldering Iron
Before pluging in your soldering iron, visually inspect it for any signs of damage. Look for cracks in the handle, frays in the cord, and ensure the tip is not oxidized or bent. A good-condition soldering iron is safe to use and gives the best results.
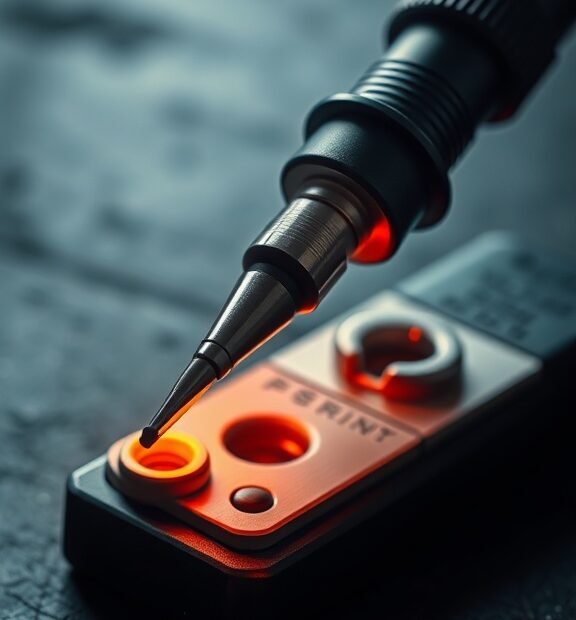
Clean the Tip
The soldering iron tip needs to be clean for effective soldering. A dirty or oxidized tip can lead to poor heat transfer and could ruin your work. To clean the tip:
- Wet the sponge or brass wool with water. If using a sponge, squeeze out excess water. Do not let it soak.
- Turn on your soldering iron and let it heat up.
- Once hot, gently wipe the tip on the damp sponge or brass wool. This removes any oxidization and debris.
- After cleaning, apply a small amount of fresh solder to the tip to form a protective coating.
Setting the Temperature
Understanding how to prepare a soldering iron also involves setting the right temperature. Most soldering tasks are performed effectively at temperatures between 350°C and 400°C (662°F to 752°F). If your soldering iron has a temperature adjustment feature, set it between:
- 350°C for thin wires and delicate components
- 400°C for heavier tasks like soldering thicker wires or circuit boards
Always consult the solder manufacturer’s recommendations, as different types of solder may require varying temperatures.
Establish a Safe Work Area
Safety is paramount when using a soldering iron. Find a clean, stable, and well-lit workspace. Make sure the surface can withstand high temperatures. Keep flammable materials away from your workspace, and always wear safety glasses to protect your eyes from any solder splashes or fumes.
Practice Proper Technique
Once your soldering iron is prepared, it’s time to practice proper soldering techniques. Hold the soldering iron like a pen, ensuring a firm grip. When soldering, keep the tip in contact with both the component lead and the circuit board pad. This ensures that heat transfers effectively. After a few seconds, introduce solder to the joint. Remove the solder, followed by the soldering iron, and allow the joint to cool naturally.
Maintain Your Soldering Iron
After completing your project, proper maintenance of your soldering iron is essential. Always clean the tip before storing it away to prevent oxidation. If you’re looking at long-term care, consider tinning the tip by applying fresh solder once it’s cleaned. Store the soldering iron in a safe place, preferably in a stand, to prevent damage and potential hazards.
Taking these steps to prepare your soldering iron will enhance your soldering experience. By ensuring that your iron is clean, set to the correct temperature, and used in a safe environment, you can complete your projects with confidence and precision. Remember, practice makes perfect, and with a prepared soldering iron, you are well on your way to achieving excellent results.
Common Mistakes to Avoid When Preparing Your Soldering Iron
Preparing your soldering iron correctly is crucial for any soldering project. However, several common mistakes can hinder your success. By understanding these pitfalls, you can ensure a smooth and effective soldering experience.
First, one of the primary mistakes many beginners make is neglecting to clean the soldering tip. Over time, oxidation and residue can accumulate on the tip, making it less effective. Always start by cleaning the tip with a damp sponge or a brass cleaning pad. This removes dirt and debris, making it easier for the solder to flow when you begin your work. Remember to clean the tip frequently during your project to maintain optimal performance.
Another mistake is failing to tin the soldering tip before use. Tinning involves melting a small amount of solder on the tip, which helps to ensure good heat transfer. It can also protect the tip from oxidation. To tin properly, apply a small amount of solder to the heated tip after cleaning. Swirl it around briefly before wiping away any excess. This simple step can significantly improve your soldering results.
It’s equally vital to watch your temperature settings. Using a soldering iron that’s too hot can damage electronic components, while one that’s too cool may result in poor joint formation. Always check the specifications of the solder you are using. Most electronics solder works best at temperatures around 350-400 degrees Celsius (662-752 degrees Fahrenheit). Adjust your soldering iron accordingly to achieve the best results.
Additionally, a common oversight is using the wrong solder for the job. For electronics, rosin-core solder is usually the best choice because it contains a flux that helps to improve adhesion and flow. Lead-free solder is another option, but it requires higher temperatures and can be more challenging to work with for beginners. Always choose a solder that suits your specific needs and double-check that it’s compatible with your components.
Another mistake novices make is not securing their workpieces properly. When soldering, ensure that the components you are joining are stable and held firmly together. This prevents movement during the soldering process and ensures better connections. Use clamps or a helping hands tool to keep everything in place, allowing you to focus on applying the solder.
- Not cleaning the soldering tip: Clean the tip with a damp sponge or brass pad before use.
- Failing to tin the tip: Apply solder to the clean tip to improve heat conduction.
- Incorrect temperature settings: Use the recommended temperature for your solder type.
- Choosing the wrong solder: Opt for rosin-core solder for electronics, if applicable.
- Not securing workpieces: Use tools to hold components steady while soldering.
Moreover, inexperienced solderers often ignore safety precautions. Always make sure to work in a well-ventilated area, as solder can produce harmful fumes. Wearing safety glasses can also protect your eyes from splatters. It’s better to be prepared and safe than risking injury or health problems down the line.
Some people overlook the importance of proper storage for their soldering iron. After using your soldering iron, turn it off and let it cool down completely before storing. Replace the cap if your soldering iron has one, and always keep it in a safe place to prevent damage or accidental burns. Proper storage extends the life of your soldering iron and ensures it’s ready to use when you need it next.
Many beginners fail to practice or test their techniques before starting their actual project. Taking time for practice can build your confidence and improve your skills significantly. You can practice on scrap components to ensure you’re comfortable with the soldering process. Understanding how different soldering techniques work will give you a good foundation for any project you undertake.
By avoiding these common mistakes when preparing your soldering iron, you will enhance your soldering experience and achieve better results. Remember to clean, tin, and use the right tools and precautions to make the most out of your soldering endeavors.
Conclusion
Preparing a soldering iron properly is key to achieving successful soldering projects. By following the essential steps outlined in this article, you can ensure that your soldering iron is ready for effective use. Always start with a clean iron, as residue can hinder your soldering performance. Remember to use the appropriate temperature settings for the type of solder and materials you’re working with. Keeping your soldering tip tinned is crucial for maintaining good heat transfer and preventing oxidation.
Avoiding common mistakes can make a significant difference in your soldering outcomes. One of the biggest pitfalls is neglecting to clean the tip regularly. This oversight can lead to poor connections and frustration. Additionally, using the wrong technique, such as applying excessive heat or using too much solder, can result in messy joints or damage to components.
By being mindful of these steps and avoiding common errors, you set yourself up for success in your soldering tasks. Whether you’re a beginner or have some experience, these practices will enhance your confidence and help you achieve cleaner, more reliable solder joints. Remember, a well-prepared soldering iron is not just a tool; it’s an essential partner in your electronics projects. Embrace these techniques to make each soldering session more enjoyable and efficient. Happy soldering!