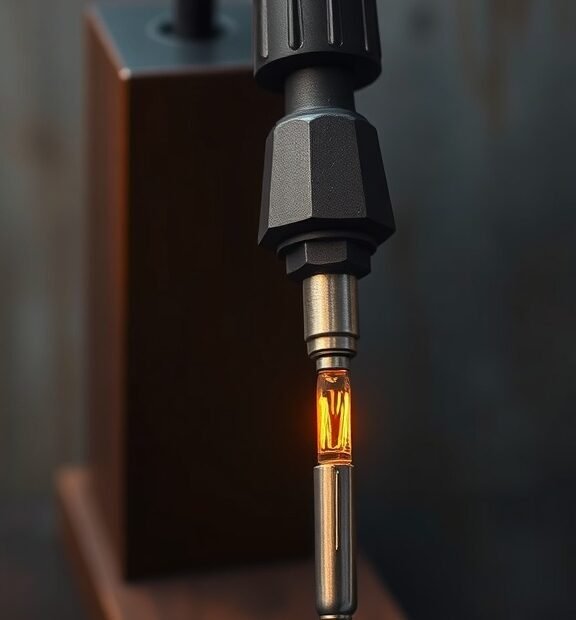
How to Make a Soldering Iron: A Step-by-Step Guide
Creating your own soldering iron can be an exciting project that combines creativity with practicality. Whether you’re working on electronics, crafting, or any DIY project that requires soldering, having a custom soldering iron can make your tasks much easier. Here’s a step-by-step guide on how to make a soldering iron effectively.
Materials You Will Need
- Heating element (like a nichrome wire or an old soldering iron tip)
- Power source (a battery or an AC power supply)
- Wood or plastic handle
- Metal or copper tube
- Insulating tape
- Heat-resistant glues
- Safety goggles
- Wire for connections
Step 1: Preparing the Heating Element
The heating element is crucial as it generates the heat needed to melt the solder. If you’re using nichrome wire, cut a piece that is approximately 10-15 cm long, depending on your handle length. If you’re repurposing an old soldering iron tip, ensure it’s clean and in good condition. You should avoid any tips with rust or corrosion, as they will affect the performance.
Step 2: Designing the Handle
The handle should be comfortable for you to hold and made from a material that can withstand heat. Wood works well because it’s an insulator. Cut a piece of wood or plastic to your preferred length, usually between 10 to 12 cm. Using a drill, create a hole in the center of the handle. This hole should be just wide enough to fit the metal tube snugly. The tube will contain the heating element.
Soldering Iron Kits & Accessories
Step 3: Inserting the Heating Element
Take the prepared heating element and insert it into the metal or copper tube. Make sure it fits tightly. The metal tube serves as a conduit for heat transfer, so it’s essential for the heating element to be securely positioned. You can use heat-resistant glue to fix the heating element within the tube if necessary.
Step 4: Connecting the Power Source
The next step is connecting the power source to the heating element. If you’re using batteries, make sure they provide adequate voltage, typically around 6 to 12 volts for a soldering iron. Connect the wires from the power source to the ends of the heating element. It is important to ensure a solid connection to avoid sparks or heat loss. Use insulating tape to secure the connections, preventing any accidental contact.
Soldering Iron Kits & Accessories
Step 5: Final Assembly
Once the heating element is in place and the power source is connected, insert the metal tube into the drilled hole of the handle. Ensure that the heating element does not protrude too much from the end, as this could increase the risk of burns. Use heat-resistant glue to secure the metal tube in the handle.
Step 6: Safety Checks
Before using the soldering iron, conduct thorough safety checks. Wear safety goggles to protect your eyes from any potential sparks. Double-check all connections to make sure they are secure and insulated properly. Ensure there are no loose wires that could cause a short circuit.
Soldering Iron Kits & Accessories
Step 7: Testing the Soldering Iron
Plug in your soldering iron or connect the batteries and allow it to heat up for a few minutes. Test its functionality on a small piece of scrap metal or wire to ensure it melts solder properly. If the iron heats up as expected, you have successfully made your own soldering iron!
Cleaning Up
After testing, always unplug or disconnect your soldering iron from the power source before cleaning up. Make sure to store it safely to avoid accidents. Regular cleaning and maintenance will increase the lifespan and efficiency of your soldering iron.
Soldering Iron Kits & Accessories
Making a soldering iron is a rewarding project that provides you with a valuable tool for various tasks. Just remember to prioritize safety throughout the process. With careful construction and testing, enjoy your new homemade soldering iron for all your projects! Happy soldering!
Essential Safety Tips for Using a Soldering Iron
Using a soldering iron can be a rewarding experience, but it comes with its own set of safety precautions. By following essential safety tips, you can protect yourself and make your soldering projects successful. Here are some important safety measures you should always keep in mind when operating a soldering iron.
Wear Proper Personal Protective Equipment
First and foremost, wearing appropriate personal protective equipment (PPE) is crucial. This includes:
Soldering Iron Kits & Accessories
- Safety goggles: Protect your eyes from accidental splashes of solder.
- Heat-resistant gloves: These will keep your hands safe from burns when handling hot soldering tools.
- Long-sleeved clothing: Wearing long sleeves can help shield your skin from any accidental contact with molten solder.
Work in a Well-Ventilated Area
Soldering generates fumes that can be harmful if inhaled. It is vital to work in a space that is well-ventilated. Open windows or use a fan to circulate air. If possible, invest in a fume extractor specifically designed for soldering to reduce exposure to toxic fumes.
Keep Your Workspace Organized
An organized workspace minimizes hazards. Follow these tips to maintain a safe soldering environment:
Soldering Iron Kits & Accessories
- Clear your workspace: Remove clutter to reduce the risk of accidentally knocking over the soldering iron or other tools.
- Use a dedicated soldering area: Designate a specific spot for soldering to keep all your tools in one place.
- Keep flammable materials away: Ensure that paper, wood, and other combustible items are at a safe distance from your soldering area.
Handle the Soldering Iron Safely
Understanding how to handle your soldering iron correctly is key to safety. Here are some important tips:
- Always use a stand: When not in use, place the soldering iron in a stand to prevent injury or damage.
- Always unplug when not in use: To avoid accidental burns or fires, unplug the soldering iron when you take breaks or finish your project.
- Let it cool down: After using the soldering iron, give it time to cool down completely before storing or handling it.
Choose the Right Materials
Selecting appropriate materials can also enhance safety. Make sure to use:
Soldering Iron Kits & Accessories
- Lead-free solder: This is a safer alternative to traditional lead solder and is healthier to use.
- High-quality soldering iron: Use a reliable soldering iron that meets safety standards to reduce the risk of malfunction.
Be Mindful of Your Surroundings
Pay attention to your environment while soldering. Here are some ways to stay aware:
- Be cautious of cords: Ensure that your soldering iron’s cord is not a tripping hazard.
- Beware of pets and children: Keep your workspace off-limits to pets and children to prevent accidents.
- Use a soldering mat: Lay a silicone mat on your work surface to catch spills and protect your table.
Know How to Respond to Injuries
No matter how careful you are, accidents can happen. It’s essential to know how to respond if you experience an injury:
Soldering Iron Kits & Accessories
- Burns: For minor burns, run cool water over the area for about 10 minutes. For severe burns, seek medical attention.
- Inhalation of fumes: If you feel dizzy or experience trouble breathing, move to fresh air immediately and consult a medical professional if symptoms persist.
By following these essential safety tips, you can create a safer soldering experience. Safety should be your top priority to ensure successful projects while protecting yourself and those around you. Always stay cautious and mindful of your practice, and your soldering sessions will be both enjoyable and secure.
Conclusion
Creating your own soldering iron can be a rewarding project that enhances your DIY skills while providing a tool for future electronic tasks. By following a step-by-step guide, you can assemble a functional soldering iron using materials that are often accessible and affordable. Remember that the key components, such as the heating element and power source, should be chosen carefully to ensure safe and effective operation.
Equally important is prioritizing safety when using your soldering iron. Understanding essential safety tips will not only safeguard you against potential injuries but also help protect your work environment. Always wear protective gear like goggles and heat-resistant gloves, work in a well-ventilated area, and keep flammable materials away from your workspace. These precautions are vital for a successful soldering experience, ensuring that you can focus on your projects without undue risk.
Soldering Iron Kits & Accessories
Embracing the process of building and using your own soldering iron can lead to much greater mastery and confidence in handling electronics. As you gain experience, you’ll also develop a deeper appreciation for the craft. Take the time to enjoy the learning curve; soldering is not just about the finished product, but also the journey involved in creating something with your own hands. So gear up, follow the steps, and let your creativity flow as you dive into the world of soldering.