How to Make a Battery Powered Soldering Iron: Step-by-Step Guide
Creating your own battery-powered soldering iron can be a rewarding project, especially if you need flexibility and portability. This guide will help you understand how to make a battery-powered soldering iron step-by-step. By following these clear instructions, you’ll have a handy tool for your electronic projects.
Materials You Will Need
- Battery (Li-ion or AA cells)
- Soldering iron tip
- Resistor (approximately 5-10 ohms)
- Wires (copper recommended)
- Switch
- Heat shrink tubing or electrical tape
- Insulated enclosure (optional)
Step 1: Prepare the Soldering Iron Tip
The first thing you need to do is get the soldering iron tip ready. If you have a specific tip in mind, ensure it is clean and free of any old solder. This will help you get a good connection when you start soldering.
Step 2: Connect the Resistor
Take your resistor and connect it to one end of the soldering iron tip. This step is crucial as the resistor helps limit the current flow and prevents the tip from overheating. Secure this connection with solder or by twisting the wires together, ensuring a solid connection.
Soldering Iron Kits & Accessories
Step 3: Attach Wires
Next, you will need to attach wires to both the resistor and the soldering iron tip. Use stranded copper wires as they are flexible and will enable better connectivity. Make sure to strip the ends of the wires to expose enough metal for a solid connection. Twist the wire ends around the exposed metal of the resistor and soldering iron tip. Don’t forget to insulate these connections with heat shrink tubing or electrical tape.
Step 4: Set Up the Switch
The switch is essential for turning your soldering iron on and off. Connect one wire from the battery to one terminal of the switch. Then, connect another wire from the second terminal of the switch to the resistor. This way, when you flip the switch, it will complete the circuit, allowing current to flow to the soldering tip.
Soldering Iron Kits & Accessories
Step 5: Connect the Battery
Now, it’s time to connect the battery. Attach a wire from the remaining terminal of the resistor back to the negative terminal of the battery. For the positive terminal, connect a wire going directly to the battery. Ensure all connections are tight and insulated to prevent short circuits.
Step 6: Choose an Enclosure
If you want a neat and tidy soldering iron, considering an insulated enclosure is a good idea. This will protect your connections and make the device safer to handle. You can use plastic project boxes available at electronics stores or any other safe material you find useful.
Soldering Iron Kits & Accessories
Step 7: Test Your Device
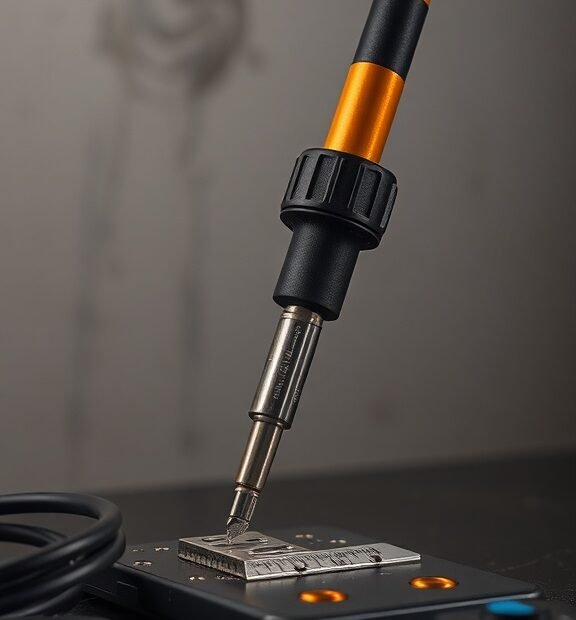
With everything connected, it’s time to test your battery-powered soldering iron! Ensure you are in a safe and dry environment. Flip the switch to the ‘on’ position. If everything is connected correctly, the soldering iron tip should heat up quickly. Be careful while handling it once it’s heated!
Tips for Successful Soldering
- Always pre-tin your soldering iron tip with solder before starting.
- Keep the tip clean; a dirty tip will not transfer heat effectively.
- Practice on scrap material before working on your main project.
Final Checks
After your tests, make sure everything is working as expected. Check for any excess heat around the connections, and if you notice any issues, disconnect the power immediately. Your device’s safety is paramount.
Soldering Iron Kits & Accessories
Now you know how to make a battery-powered soldering iron! This handy tool can make your soldering tasks much easier and more accessible, especially for intricate projects or repairs on-the-go. Enjoy your soldering adventures!
Advantages of Using a Battery Powered Soldering Iron for Portable Projects
When it comes to soldering, having a reliable tool is essential, especially for those who work on portable projects. A battery-powered soldering iron offers unique advantages that enhance your soldering experience. Here are some key benefits of using this versatile tool.
Enhanced Portability
One of the most significant advantages of a battery-powered soldering iron is its portability. Unlike traditional soldering irons that require a power outlet, battery-powered versions allow you to work in various settings. Whether you’re in a remote location or just need to move around a workshop, a wireless soldering iron gives you the freedom to solder wherever your project takes you.
Soldering Iron Kits & Accessories
Convenience and Ease of Use
Battery-powered soldering irons are generally easy to use. They often feature a straightforward design that makes switching on and off hassle-free. You simply point the tip to your soldering task, and you’re ready to go. This convenience is perfect for quick fixes or on-the-spot adjustments without the fuss of cords getting in your way.
Faster Heating Time
Many battery-powered soldering irons heat up quickly, allowing you to get to work without unnecessary delays. You don’t have to wait around for your iron to reach the right temperature; instead, you can dive right into your tasks, making these tools perfect for hobbies, repairs, or professional use.
Soldering Iron Kits & Accessories
Safer for More Users
Safety is a crucial consideration when working with heat and electronics. Battery-powered soldering irons often come with built-in safety features. For instance, many models automatically shut off when not in use for a specific period, which reduces the risk of burns or fire hazards. This feature makes them an excellent choice for beginners or younger users who may not be familiar with safe soldering practices.
Eco-Friendly Options Available
In today’s world, many users are conscious of their environmental footprint. Battery-powered soldering irons can be more eco-friendly, especially models that use rechargeable batteries. Instead of relying on disposable batteries that add to landfill waste, you can charge and reuse them multiple times.
Soldering Iron Kits & Accessories
Flexible Soldering Work
When you are working on intricate projects, accessibility often plays a vital role. Battery-operated soldering irons allow you to maneuver easily around complex components or in tight spaces. You don’t have to worry about a power cord limiting your movement, which means you can focus solely on your work.
Cost-Effective Solution
Investing in a battery-powered soldering iron can be cost-effective in the long run. While the initial price might be similar to other soldering tools, you save money on extension cords and energy bills since you are not drawing power from the electrical grid. This aspect is particularly important for those who frequently work on portable projects.
Soldering Iron Kits & Accessories
Key Features to Look For
- Battery Life: Consider how long the battery lasts. A longer battery life means less downtime.
- Heat Settings: Look for adjustable heat settings that allow you to fine-tune the temperature based on your project.
- Rechargeable Batteries: Opt for models with rechargeable batteries to save money and minimize waste.
- Quick Heating Time: Choose an iron that heats up promptly so you can begin working right away.
- Ergonomic Design: Consider ease of use and comfort, especially for longer projects.
Improved Accuracy
Battery-powered soldering irons often come with fine tips designed for precision. This advantage aids in achieving cleaner solder joints in tight spaces, allowing for improved accuracy during your work. Whether you’re soldering delicate electronics or creating intricate designs, precision is crucial, and a portable tool can help you achieve it.
Battery-powered soldering irons greatly enhance your soldering tasks, offering portability, safety, and efficiency. Their flexibility and ease of use make them an essential tool for anyone who enjoys working on portable projects, providing all the functionalities you need in one compact device.
Conclusion
Creating a battery-powered soldering iron is a beneficial project that can transform your approach to portable soldering tasks. By following the step-by-step guide, you learned how to assemble the necessary components effectively, ensuring a functional and reliable tool for your projects.
Soldering Iron Kits & Accessories
The advantages of using a battery-powered soldering iron extend beyond convenience. They offer flexibility in various environments, whether you’re working in a backyard, a workshop, or on the go. This type of soldering iron eliminates the need for an external power source, allowing you to work with confidence, knowing you can tackle projects anywhere, anytime. Additionally, their compact size makes them easy to store and transport, enhancing their practicality, especially for hobbyists and DIY enthusiasts.
Moreover, understanding how to make this device empowers you to customize and repair your soldering tool to meet your specific needs. You’ll find that this knowledge not only saves you money but also allows you to develop new skills and techniques in your crafting journey.
Soldering Iron Kits & Accessories
As you embark on your soldering adventures, remember that a battery-powered soldering iron can enhance your efficiency and creativity. With this tool in hand, your next portable project will be easier and more enjoyable. So gather your materials and start crafting and soldering with your newfound expertise! Embrace the freedom that comes with being able to work wherever your creativity takes you.