Techniques and Tips for Engraving Wood with a Soldering Iron
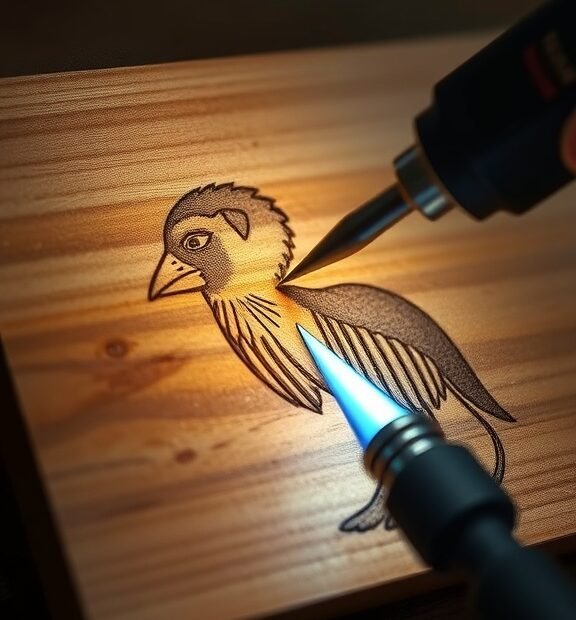
Engraving wood with a soldering iron is a simple and creative method to add a personal touch to your projects. Whether you want to create custom signs, artistic designs, or charming gifts, this technique allows you to achieve beautiful results with minimal investment. Here are some effective techniques and tips to help you succeed in engraving wood with a soldering iron.
Choosing the Right Soldering Iron
When it comes to engraving wood, selecting the right soldering iron is crucial. You’ll want an iron with a fine point for detailed work. The wattage will also play a role; a 30-60 watt soldering iron is ideal for wood engraving. Here are a few factors to keep in mind:
- Tip Size: A finer tip allows for detailed designs while broader tips can be used for shading.
- Temperature Control: A temperature-controlled soldering iron helps manage the heating, keeping the wood from burning too quickly.
Preparing Your Workspace
Having a well-organized workspace can significantly enhance your engraving experience. Make sure you have everything you need within reach:
- Protective surface under the wood to prevent damage.
- Safety gear such as goggles and a mask to avoid inhaling smoke.
- Good lighting to see your work clearly.
Selecting the Right Wood
Not all types of wood are suitable for engraving. Softer woods such as pine or basswood are recommended as they allow for easier carving. They also produce cleaner lines, making your design stand out. Before starting, consider the following types of wood:
- Pine: Easy to carve and inexpensive.
- Basswood: Offers a smooth surface and is excellent for beginners.
- Maple: A harder wood that provides a nice finish but requires more skill.
Setting Up Your Design
Creating a clear design is key to a successful engraving project. You can start with the following steps:
- Draw your design on paper first to get a feel for it.
- Transfer your design onto the wood using carbon paper or by sketching it directly.
- Consider practicing on a scrap piece of wood to refine your technique before moving onto your final piece.
Engraving Techniques to Keep in Mind
Once everything is set, it’s time to start engraving. Here are some techniques to make the process smoother:
- Strokes: Use careful, controlled strokes to avoid burning the wood excessively. Long, even strokes work best.
- Shading: For shaded areas, try using a slower motion or applying a slight pressure to the iron.
- Layering: Allow the wood to cool between layers if you are adding adjustments or highlights.
Post-Engraving Care
Once you finish engraving, the job isn’t quite over. Proper care can enhance the longevity and appearance of your work:
- Clean the surface of your wood to remove any soot or debris.
- Consider applying a protective finish, such as varnish or polyurethane, to seal your design.
- Store your engraved wood in a cool, dry place to maintain its quality.
Safety Tips to Follow
Safety should always be a priority when working with tools like a soldering iron. Keep the following tips in mind:
- Make sure to work in a well-ventilated area to avoid smoke inhalation.
- Keep the soldering iron on a heat-resistant surface when not in use.
- Always unplug the soldering iron when finished and allow it to cool before putting it away.
Engraving wood with a soldering iron can be an enjoyable and rewarding craft. With the right tools, safety measures, and techniques, you can create stunning pieces that reflect your creativity. Start small, practice often, and before you know it, you’ll have a collection of personalized wooden items that you can be proud of!
Safety Precautions and Best Practices in Wood Engraving Projects
Engraving wood is a rewarding and creative hobby, allowing you to personalize items and share your artistic flair. Before you start your project, it’s essential to prioritize safety and follow best practices. This ensures that your engraving experience is enjoyable and without accidents. Here are key safety precautions and best practices to keep in mind while working on wood engraving projects.
Wear Proper Safety Gear
Investing in the right protective equipment is crucial for your safety. Some recommended gear includes:
- Safety Glasses: Protects your eyes from dust and debris that can fly during the engraving process.
- Dust Mask: Safeguards your lungs from inhaling fine wood particles and fumes.
- Gloves: Keeps your hands safe from sharp tools and prevents burns if using heated tools.
- Ear Protection: If you’re using power tools that generate noise, consider wearing earplugs or noise-canceling headphones.
Work in a Well-Ventilated Area
Proper ventilation is essential when engraving wood. The process can release harmful fumes, especially when using heated tools. Make sure you:
- Open windows or doors to allow fresh air to circulate.
- Use fans to direct fumes away from your workspace.
- Consider an air purifier to filter particulates from the air.
Choose the Right Workspace
Your workspace should be organized and suitable for woodworking. A clutter-free surface allows you to work efficiently and safely. Here are some tips:
- Use a sturdy table or workbench that can handle the weight of your tools and wood.
- Keep tools organized and within reach to avoid reaching over sharp implements.
- Avoid working in cramped spaces, as this can increase the risk of accidents.
Handle Tools Safely
Using tools correctly is fundamental for a safe engraving experience. Always remember to:
- Follow the manufacturer’s instructions for each tool.
- Keep tools sharp. Dull tools require more pressure and can slip, leading to injuries.
- Store tools safely when not in use to prevent accidental cuts or burns.
- Always disconnect electric tools when changing bits or making adjustments.
Practice Good Technique
Engraving wood requires both skill and technique to achieve the desired outcome while staying safe. Here are best practices to follow:
- Use a steady hand: Ensure you have a firm grip on your tool, and support both the tool and wood properly.
- Engrave slowly: Take your time when engraving. Rushing can lead to mistakes and accidents.
- Experiment on scrap wood: Before starting on your final project, practice on scrap pieces of wood to gain confidence.
Be Mindful of the Material
Different types of wood respond differently to engraving. Consider the following:
- Soft woods engrave more easily than hardwoods, which may require more force and precision.
- Check for knots or imperfections in the wood that could cause issues when engraving.
- Be aware of any treatments or finishes on the wood that may impact how it reacts to heat or engraving tools.
Keep First Aid Supplies Accessible
Even with the best precautions, accidents can happen. Keep a well-stocked first aid kit close by, including:
- Adhesive bandages for minor cuts.
- Antiseptic wipes to clean wounds.
- Burn ointment for any minor burns incurred.
By following these safety precautions and best practices, you can ensure that your wood engraving projects remain enjoyable and safe. Remember, the key to a successful and fun engraving experience lies in preparation and proper technique.
Conclusion
When it comes to engraving wood with a soldering iron, mastering the right techniques can significantly enhance your crafting experience. Whether you’re a beginner or have some experience, taking the time to practice various patterns and styles will pay off in the quality of your finished pieces. Using different soldering tips, such as fine points for detailed work or broader tips for larger areas, allows for versatility in your designs. Don’t hesitate to experiment with various wood types too, as each can yield different results in terms of texture and engraving clarity.
Prioritizing safety is equally crucial when engaging in wood engraving. Always wear proper protective gear, such as safety glasses, to shield your eyes from flying debris. Ensure your workspace is well-ventilated to avoid any harmful fumes, and keep your tools organized to prevent accidents. Using a heat-resistant surface while working will protect your tabletop and help maintain stability during your projects. Following these best practices not only safeguards your health but also contributes to a more enjoyable wood engraving experience.
Engraving wood with a soldering iron opens up a world of creativity and personalization for your DIY projects. By combining the mentioned techniques with mindful safety practices, you’ll enhance both your skills and the quality of your work. So gather your materials, let your creativity flow, and enjoy the satisfying process of transforming a simple piece of wood into a unique work of art.