Techniques for Cutting Fabric with a Soldering Iron: A Step-by-Step Guide
Cutting fabric with a soldering iron may sound unconventional, but it is a useful technique that can save you time and give you clean edges. This method is especially beneficial for synthetic fabrics, which tend to fray easily if cut with traditional methods. Below, you’ll discover various techniques and steps for successfully cutting fabric with a soldering iron.
Materials You Will Need
- Soldering iron
- Cutting mat or heat-resistant surface
- Fabric of your choice
- Ruler or measuring tape
- Pencil or chalk for marking
- Protective gloves
Preparation Steps
Before you start cutting, it’s essential to prepare your workspace and materials properly:
- Choose a well-ventilated area: It’s important to work in a space where fumes can dissipate. Open a window or use a fan to ensure adequate airflow.
- Gather all your materials: Make sure you have everything you need within reach, including your fabric, measuring tools, and the soldering iron.
- Set up your cutting surface: Place a cutting mat or a heat-resistant surface on your work table to prevent damage to your furniture.
Marking Your Fabric
Before cutting, accurately mark your fabric to ensure precise cuts. Here’s how:
Soldering Stations | Easy 60 Day Return
- Measure the fabric: Use a ruler or measuring tape to determine the length and width you need.
- Make marks: Use a pencil or chalk to lightly outline your cutting lines. This helps you stay on track without damaging the fabric.
Operating the Soldering Iron
Now that you have your fabric prepared, it’s time to set up the soldering iron:
- Heat the soldering iron: Plug in your soldering iron and allow it to heat up. This usually takes a few minutes, depending on the device.
- Test the tip: Before cutting, it’s good to test the soldering iron on a scrap piece of fabric. This ensures it reaches the right temperature for a clean cut.
- Use protective gloves: Always wear gloves when handling a hot soldering iron to prevent burns.
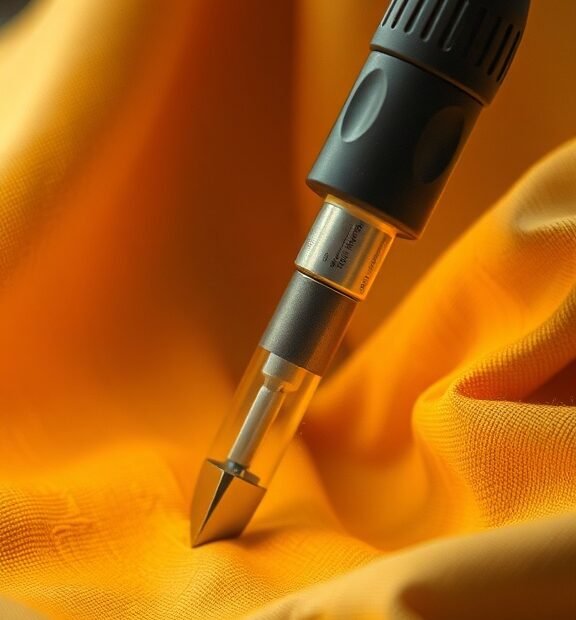
Cutting the Fabric
When you’re ready to cut, follow these steps closely:
Soldering Stations | Easy 60 Day Return
- Align the fabric: Align the fabric on the cutting mat according to the marked lines. Hold it firmly to avoid any slipping.
- Start cutting: Place the tip of the soldering iron on the fabric at the starting point of your marked line. Move the iron slowly along the line, allowing it to melt the fibers as you cut.
- Keep a steady hand: Maintain a steady pace to ensure an even edge. Rushing may cause uneven cuts or damaging the fabric.
- Finishing touches: Once you’ve completed the cut, you can use the soldering iron to go over any jagged edges for a smooth finish.
Cleaning the Soldering Iron
After cutting, it’s essential to clean the soldering iron tip to maintain its performance:
- Wipe the tip with a damp sponge to remove any fabric residue.
- Ensure the soldering iron is unplugged before cleaning and storing it safely.
Safety Tips
Using a soldering iron can be risky if you’re not careful. Keep these safety precautions in mind:
Soldering Stations | Easy 60 Day Return
- Always keep the soldering iron on a flat, heat-resistant surface when not in use.
- Be aware of your surroundings to avoid accidentally touching the hot tip.
- Consider using a soldering iron with a fine tip for more intricate cutting tasks.
By following these techniques for cutting fabric with a soldering iron, you can achieve precise, clean edges that will enhance your sewing projects. Whether you’re creating garments or crafting home decor, this method is efficient and effective. Happy crafting!
Safety Tips and Best Practices for Using a Soldering Iron on Fabric
Using a soldering iron on fabric can be a great way to cut and seal edges, preventing fraying and ensuring a clean finish. However, the process requires careful handling to avoid accidents and achieve desired results. Here are some important safety tips and best practices for you to keep in mind.
Choose the Right Soldering Iron
Before starting your project, ensure that you select the proper soldering iron for your fabric work. A fine-tipped soldering iron allows for more precision when cutting delicate materials. Consider a temperature-controlled option where you can adjust the heat to suit different fabrics.
Soldering Stations | Easy 60 Day Return
Workspace Preparation
Your workspace plays a significant role in ensuring safety. Follow these steps for a proper setup:
- Clear the Area: Remove any unnecessary items from your workstation to minimize clutter.
- Use a Heat-Resistant Surface: Place a cutting mat or an old tile as a base to protect your table from burns.
- Good Lighting: Ensure that your workspace is well-lit so you can see your cutting area clearly.
Wear Protective Gear
It’s essential to protect yourself while using a soldering iron. Here’s what to wear:
Soldering Stations | Easy 60 Day Return
- Safety Goggles: Protect your eyes from any potential splashes or hot particles.
- Heat-Resistant Gloves: Wear gloves that can shield your hands from burns.
- Apron or Old Clothing: An apron can prevent fabric contamination and shield you from heat.
Preparation of Fabric
Before using the soldering iron, make sure your fabric is clean and dry. Here are steps to prepare:
- Pre-Wash: Wash your fabric to remove any finishes that might catch fire or warp.
- Iron the Fabric: Ensure the fabric is wrinkle-free to allow for more precise cutting.
- Secure the Fabric: Use pins or weights to hold the fabric in place while you work.
Proper Technique for Cutting
When you’re ready to cut, maintain a steady hand. Here are best practices for technique:
Soldering Stations | Easy 60 Day Return
- Test the Iron: Always do a test cut on a scrap piece of fabric to find the right temperature and speed.
- Angle the Iron Appropriately: Angle the soldering iron to guide it along edges smoothly.
- Do Not Rush: Take your time to achieve cleaner cuts, which reduces the risk of mistakes.
Stay Alert
Being alert is crucial while working with a soldering iron. Here’s how to maintain focus:
- Avoid Distractions: Keep your phone and other distractions away while working.
- Take Breaks: If you feel fatigued or unfocused, take a quick break to refresh.
- Work in Short Sessions: Lengthy periods of work can lead to weariness and increased risk of accidents.
Safety Precautions When Finished
After completion, ensure you follow these steps to maintain safety:
Soldering Stations | Easy 60 Day Return
- Turn Off the Iron: Always turn off and unplug the soldering iron when you are finished.
- Let It Cool: Allow the iron to cool down completely before putting it away.
- Store Properly: Store your soldering iron in a safe space, ensuring it is out of reach from children or pets.
These safety tips and best practices into your soldering iron projects can help you achieve great results while minimizing risks. As you gain experience, remember that safety always comes first, ensuring not only your comfort but also a seamless fabric cutting experience.
Conclusion
Mastering the art of cutting fabric with a soldering iron opens up a world of creative possibilities for your sewing and crafting projects. By following the step-by-step guide on techniques, you can achieve clean, precise cuts that not only enhance the appearance of your fabric but also prevent fraying. Remember, practice makes perfect, so don’t hesitate to experiment with different types of fabric to see how they react to this method.
Safety is paramount when using a soldering iron on fabric. Make sure to always wear protective gear, such as gloves and eye protection, to shield yourself from burns and fumes. Ensuring that your workspace is organized can further reduce the risk of accidents while you work. It’s essential to frequently check that your soldering iron is in good condition and properly calibrated to avoid any unwanted mishaps.
Soldering Stations | Easy 60 Day Return
By incorporating these safety tips and best practices into your crafting routine, you can enjoy the benefits of a soldering iron confidently and creatively. Whether you are a beginner or an experienced crafter, using a soldering iron for fabric cutting can enhance your skills and take your projects to the next level. So gear up, embrace this innovative technique, and let your imagination run wild as you create beautiful, professional-looking fabric pieces!