The Heating Time of Soldering Irons: Factors Affecting Speed
Soldering irons are essential tools for electronics enthusiasts and professionals alike. One common question that arises is how long it takes for a soldering iron to heat up. The heating time can significantly vary based on several factors.
On average, a standard soldering iron can take anywhere from 30 seconds to 5 minutes to reach its operating temperature, depending on its wattage, type, and design. Understanding these factors can help you make informed decisions when purchasing or using a soldering iron.
Wattage of the Soldering Iron
The wattage is the first and most crucial factor that affects heating time. Higher wattage soldering irons heat up more quickly. Here’s a quick breakdown:
- 15-25 Watts: These lower wattage soldering irons take about 3 to 5 minutes to reach their optimal temperature.
- 30-60 Watts: Medium wattage soldering irons typically heat up in 1 to 3 minutes.
- 60+ Watts: High wattage soldering irons can achieve their working temperature in less than 30 seconds.
Type of Soldering Iron
The type of soldering iron you choose also plays a role in how quickly it heats up. There are two main categories:
- Basic Soldering Irons: These conventional devices heat up through resistive heating, which requires more time to reach the desired temperature.
- Temperature-Controlled Soldering Stations: These stations usually feature advanced technology allowing them to heat up faster and maintain consistent temperatures. They often reach full heat in about 30 seconds to 1 minute.
Material of the Soldering Tip
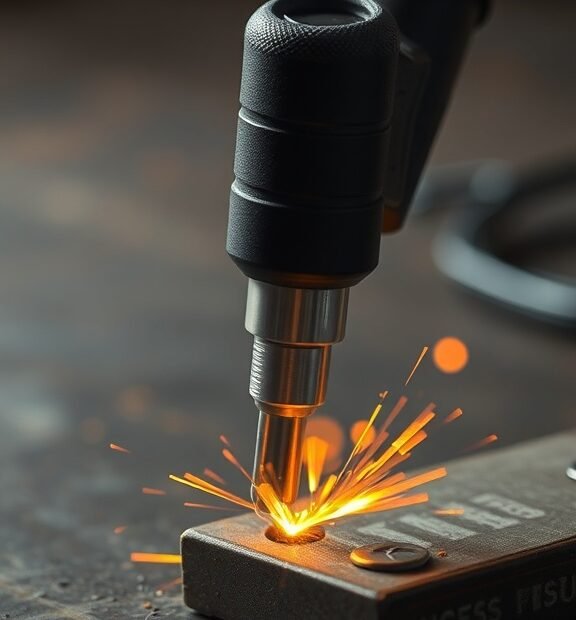
The material used in the soldering iron tip can impact heating time as well. Tips made from better conductive materials, like copper, heat up more quickly compared to those made from lower-quality metals. Copper tips can reach operating temperatures in about 30 seconds, providing consistent performance during your tasks.
Ambient Temperature
Another factor that influences heating time is the ambient temperature of your workspace. If you’re soldering in a cold environment, the iron may take longer to heat up. Conversely, a warmer workspace can speed up the heating process. Be sure to consider the temperature of your room when evaluating heating times.
Tip Size and Design
The size and design of the tip play a significant role in how quickly the soldering iron heats up. A larger tip requires more energy to reach a specific temperature compared to a smaller tip. If you primarily work on intricate electronics, consider using a smaller tip that heats up quickly and provides more precise control.
Usage Tips for Optimal Heating
Here are some practical tips to improve heating time and efficiency when using your soldering iron:
- Pre-Heat the Iron: Turn on your soldering iron aFew minutes before you begin your project. This allows it to reach optimal temperature while you prepare your materials.
- Keep the Tip Clean: A clean tip retains heat better. Use a damp sponge or brass tip cleaner to remove oxidation, ensuring efficient heat transfer.
- Avoid Long Idle Times: Try to minimize downtime with your soldering iron. Leaving it on for extended periods can cause the tip to oxidize and take longer to heat up.
Understanding these factors will help you determine how long a soldering iron takes to heat up. By choosing the right tool and maintaining it properly, you can optimize your soldering experience. Now that you know the essential elements that affect heating time, you’re better equipped to tackle your soldering projects efficiently and effectively.
Best Practices for Using Soldering Irons Efficiently
Using a soldering iron can be an essential skill for electronics enthusiasts, hobbyists, and professionals alike. However, mastering it goes beyond just heating up the soldering iron. Here are some best practices to help you use your soldering iron efficiently, ensuring that your projects come out clean and functional.
Understanding Your Soldering Iron
Before diving into techniques, it’s essential to recognize different types of soldering irons. Some are designed for quick heat-up times, while others maintain a consistent temperature longer. Knowing your tool will enable you to make the most of it. Typically, a soldering iron can take anywhere from 10 to 30 seconds to reach its peak temperature, depending on its wattage and type. A higher wattage means faster heating, so choose one that’s best suited for your projects.
Tip Maintenance
Keeping your soldering iron tip in good condition is crucial for efficient heating and soldering:
- Clean the Tip: Always clean the tip by wiping it on a damp sponge or brass sponge before and after each use. This removes oxidation and provides better heat transfer.
- Tinning: After cleaning, apply a small amount of solder to the tip. This process, known as tinning, protects the tip from oxidation and keeps it functioning smoothly.
- Inspect Regularly: Check your tip for wear and tear. A damaged tip should be replaced to maintain effective soldering.
Optimal Temperature Settings
Using the right temperature is vital to successful soldering. Too high can damage components; too low can result in weak joints. Most soldering is done between 350°C (662°F) and 400°C (752°F). Getting used to your specific soldering iron’s temperature settings will take some practice, but it’s essential for producing quality work.
Work on a Solid Surface
Your workspace plays a significant role in soldering efficiency. Set up on a stable, heat-resistant surface. Using a soldering mat can help protect your workbench and prevent heat transfer that might damage other components.
Proper Handling
When soldering, hold your iron like a pen for better control. This grip allows you to make precise movements, which is especially crucial for intricate work on tiny electronic components. Ensure your fingers are at a safe distance from the hot tip to prevent accidental burns.
Timing Your Soldering
When you solder, apply heat to both the component lead and the PCB pad simultaneously. Count to three while holding the soldering iron to ensure a proper connection. Quickly add solder to the joint and remove heat. Timing is essential: overheating can damage components and lead to poor connections.
Use the Right Solder
Choosing the right type of solder can make a big difference. For electronic components, use rosin core solder, which contains flux to improve connection quality. Avoid acid core solder as it can damage electronic parts. Different solder sizes can also be employed, depending on the scale of your project:
- Smaller Diameter (0.5mm to 1mm): Ideal for detailed electronics work.
- Larger Diameter (1.5mm or more): Best for larger components or heavy wiring.
Practice Safety
Safety should always come first. Ensure your workspace is ventilated to avoid inhaling fumes from the solder. Always use safety glasses to protect your eyes from solder splashes, and be mindful of your surroundings to prevent accidents with the hot iron.
Organize Your Tools
Keep your workspace organized. Having all your tools – solder, iron, multimeter, and tweezers – within reach not only saves time but also prevents errors during your projects. Create a systematic approach to your workspace layout, ensuring that everything is easily accessible.
By adhering to these best practices, you’ll enhance your soldering skills significantly. Proper maintenance, understanding of your tools, and a solid work environment are all vital for sacrificing variability in your soldering work. Continuous practice will develop your technique and improve your soldering outcomes, so keep at it! Whether you’re building circuits or repairing electronics, these tips will keep you efficient and effective.
Conclusion
Understanding how long a soldering iron takes to heat up is crucial for both beginners and seasoned makers. Several factors influence the heating time, including the type and wattage of your soldering iron, the design of its heating element, and the ambient temperature. Lower wattage tools may take several minutes to reach optimal temperatures, while high-performance models can be ready in just 15 seconds to a minute.
To ensure you’re maximizing efficiency during your soldering tasks, there are best practices to adopt. Always pre-set your soldering iron before starting your project, as this minimizes waiting time and keeps your workflow smooth. It’s advisable to maintain the soldering tip clean and well-tinned. This not only enhances heat transfer but also preserves the lifespan of your iron. Additionally, avoid lingering on your work surface, as overheating can damage both the iron and your components.
By knowing how long your soldering iron takes to heat up and following these best practices, you can enhance both your productivity and the quality of your soldering work. With a hint of preparation and care, you can create secure joints and intricate designs, making your soldering projects not only faster but also more effective. Whether you’re fixing electronics or tackling DIY projects, keeping these tips in mind will ensure you get the best results from your soldering iron. So, gear up and solder with confidence!