Factors Affecting How Long a Soldering Iron Needs to Heat Up
When you’re working on a soldering project, one of the most common questions is, “How long does a soldering iron need to heat up?” The answer isn’t straightforward because several factors play a role in determining heating time. These factors can influence how quickly you can get to soldering your components effectively. Let’s explore what affects the heating time of your soldering iron.
Type of Soldering Iron
The first aspect to consider is the type of soldering iron you are using. There are mainly three types: the standard soldering iron, soldering stations, and hot air rework stations. Each one has different heat-up times:
- Standard soldering iron: These typically heat up within 3 to 5 minutes.
- Soldering stations: These usually come with more advanced features and can take around 1 to 2 minutes to reach optimal temperature.
- Hot air rework stations: These may require up to 3 minutes or more since they need to warm up the entire air chamber.
Wattage
The wattage of the soldering iron is also a significant factor. Higher wattage means more power, allowing the soldering iron to heat up faster. Typically, soldering irons range from 15 watts to 100 watts. A 60-watt soldering iron, for example, can heat up significantly quicker than a 30-watt iron, often taking half the time or less.
Soldering Stations | Easy 60 Day Return
Temperature Settings
Many modern soldering irons come with adjustable temperature settings. If you’re using a lower setting for delicate components, the heating time will naturally be longer than if you’re at a higher setting. A common range for soldering iron temperatures is between 300°F to 900°F. If you set your iron to a higher temperature, it will generally heat up faster. However, always ensure that the temperature is appropriate for the materials you are working with to avoid damage.
Tip Material and Size
The type of soldering iron tip you use can also influence heating time. Tips made from different materials may conduct heat differently. For instance, copper tips heat up more quickly compared to iron-coated tips. Additionally, larger tips hold more heat but can take longer to reach the desired temperature, whereas smaller tips heat up faster but may not retain heat as effectively. Choosing the right size and type for your specific task helps reduce heat-up time.
Soldering Stations | Easy 60 Day Return
Ambient Temperature and Environment
Don’t underestimate the impact of the environment on how long a soldering iron takes to heat up. If you’re working in a colder room, it can take longer for your soldering iron to reach the desired temperature. The materials you use—like thicker wires or boards with high thermal mass—can also absorb heat from the tip. Working in controlled environments will help ensure quicker heating times.
Frequency of Use
If you frequently use your soldering iron, it is advisable to keep it plugged in and ready to go. Many soldering stations come with standby modes to maintain temperature without overheating. If you’re constantly reaching for your iron, reducing the downtime can significantly improve your workflow because the iron remains warm and requires minimal heat-up time.
Soldering Stations | Easy 60 Day Return
Maintenance
Regular maintenance of your soldering iron can make a big difference in how quickly it heats up. A dirty or oxidized tip not only affects the iron’s ability to conduct heat but can also slow down the overall heating process. Always ensure that you clean the tip regularly and replace it when it becomes worn out.
Understanding these variables can significantly enhance your soldering experience. By keeping these factors in mind, you can choose the right soldering iron and optimize its use, effectively cutting down on the wait time before you can start your soldering tasks. Being aware of how to manage each of these factors empowers you as a user and will help you achieve better results in your soldering projects.
Tips for Efficiently Using Your Soldering Iron After Heating Up
Once your soldering iron is hot and ready to go, knowing how to use it efficiently is key to achieving solid solder joints and avoiding mistakes. Here are some tailored tips that can help you make the most out of your heated soldering iron.
Soldering Stations | Easy 60 Day Return
Temperature Control
Maintaining the right temperature is essential. If the temperature is too low, solder won’t flow properly; too high, and you risk damaging components. Most soldering irons have adjustable settings, so familiarize yourself with yours and set it to the optimal temperature for your specific project. Keep a soldering temperature chart handy to reference the ideal temperatures for different types of solder and materials.
Use the Right Tip
The soldering iron tip significantly impacts your performance. Different tasks may require different types of tips. Here are some common options:
Soldering Stations | Easy 60 Day Return
- Fine Tip: Ideal for small components and precision work.
- Chisel Tip: Great for spreading heat across joints and can handle larger soldering jobs.
- Round Tip: Ideal for even heat distribution, suitable for through-hole soldering.
Changing tips based on your project can save you both time and frustration.
Preparation is Key
Before you start soldering, make sure everything is organized and within reach. Gather your materials, including wires, components, and solder, so that you can work efficiently. Clean the surfaces you will be working on and make sure all parts are free from dirt or oil, as this can prevent solder from adhering properly. A clean work area minimizes distractions, allowing you to focus on the task at hand.
Soldering Stations | Easy 60 Day Return
Practice Proper Technique
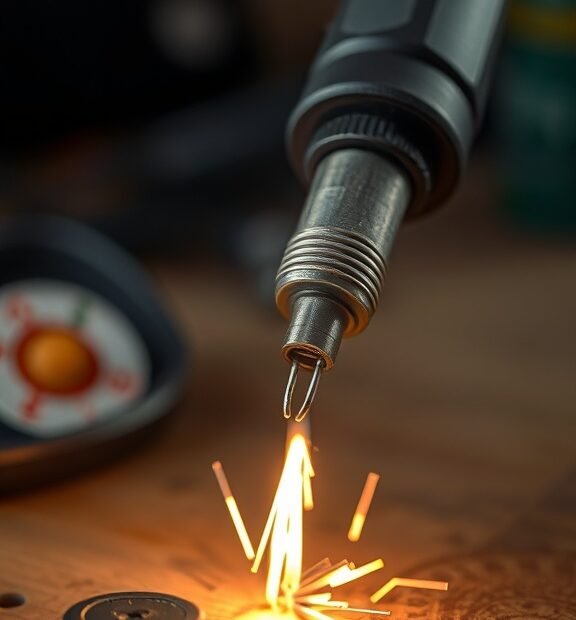
The way you hold your soldering iron matters. Keep it steady at a comfortable angle, ideally around 45 degrees, to allow for better heat transfer. When you touch the tip to the connection point, do so for just a second or two before adding solder. The heat from the iron should melt the solder, rather than expecting the solder to melt by itself. This technique ensures a clean and effective joint.
Don’t Rush
While it might be tempting to work quickly, taking your time pays off. Rushing can lead to overheating components or creating cold solder joints. Allow enough time for heat to transfer properly to the components. Patience during soldering ensures that you create strong connections, which will save you from future repairs.
Soldering Stations | Easy 60 Day Return
Keep Soldering Iron Clean
A clean tip allows for better heat conductivity and improved performance. Regularly wipe the soldering iron tip on a damp sponge or brass cleaning pad to remove old solder and oxidation. This step is crucial for maintaining the quality of your work and extending the lifespan of your equipment. If you notice any buildup of solder, you can gently file it away, but only do this when the iron is off and cool to touch.
Manage Your Solder
Using the right amount of solder is vital. Applying too much can create blobs, while applying too little may result in weak joints. Practice getting the right balance, and aim for a neat, conical shape when the solder cools. Knowing how to control the flow of solder from your spool or syringe will improve your efficiency and ensure quality results.
Soldering Stations | Easy 60 Day Return
Safety First
Soldering can be hazardous, so remember to prioritize your safety. Always work in a well-ventilated area to avoid inhaling fumes, and consider wearing safety goggles to protect your eyes from splashes or debris. Additionally, keep a fire extinguisher nearby and place tools safely away from hot surfaces to prevent accidents.
By following these tips, you can ensure that once your soldering iron is heated, you use it to its fullest potential. From maintaining the right temperature to practicing proper technique, every step you take can lead to more successful and efficient soldering. Keep these suggestions in mind, and watch as your skills improve with each project.
Conclusion
Understanding how long a soldering iron needs to heat up is essential for effective soldering. Factors such as the type of soldering iron, the wattage, and the ambient temperature all play a role in heating time. A standard soldering iron usually takes between 30 seconds to a few minutes to reach the optimal temperature, depending on its specifications. By choosing the right tool for your specific soldering tasks, you can significantly improve your efficiency and outcomes.
Soldering Stations | Easy 60 Day Return
Once your soldering iron is heated, utilizing it effectively can enhance your overall experience. Always remember to clean the tip before and after use, as this maintains temperature and promotes better soldering. Keep your solder and components close at hand, so you can work swiftly once the iron is ready. Also, consider using a soldering iron stand to ensure safety while allowing for easy access when you need it.
By being mindful of these tip and common factors influencing heat-up time, you can make better use of your soldering iron and improve the quality of your work. Efficient management of your time and tools will lead to cleaner, stronger solder joints and a more enjoyable soldering process overall. Whether you’re a beginner or a seasoned DIY enthusiast, this knowledge empowers you to tackle your projects with confidence. Embrace these tips, and you’ll soon find that your soldering endeavors become more productive and enjoyable.