The Impact of Using a Soldering Iron on Circuit Board Integrity
Using a soldering iron effectively is crucial for anyone working with circuit boards, whether in electronics repair or hobbyist projects. However, while soldering is a necessary skill, improper techniques can lead to serious issues. One of the main concerns is whether a soldering iron can damage a circuit board. Let’s break this down.
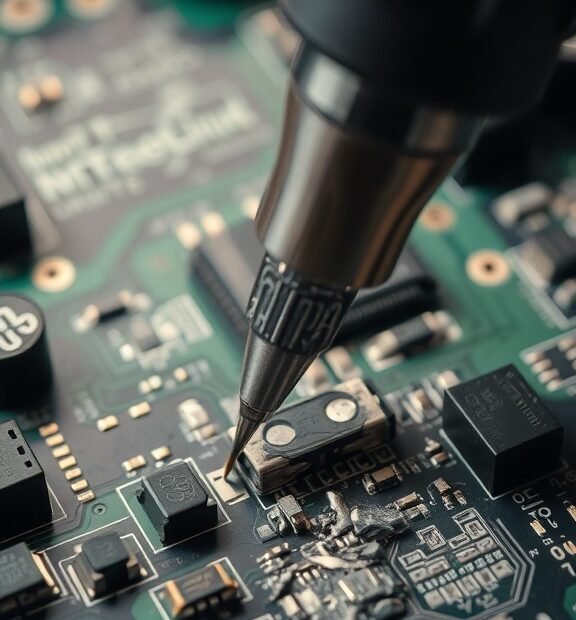
First, it’s essential to recognize how a soldering iron works. It heats up to a specific temperature to melt solder, which then joins different components on a circuit board. This process, while straightforward, must be approached carefully to avoid damaging the board. Here are some critical factors to consider:
- Temperature Control: Excessive heat is one of the most significant risks when using a soldering iron. Different components on a circuit board can withstand different temperatures. If you apply too much heat, you risk melting the solder mask or damaging sensitive components. Always keep your soldering iron at an optimal temperature (typically between 350°C to 400°C or 662°F to 752°F) to prevent potential harm.
- Heat Duration: The amount of time you allow the soldering iron to touch the board is also critical. Prolonged exposure can result in thermal damage. Aim to limit contact to a few seconds to avoid burning the traces or pads.
- Quality of the Soldering Iron: A low-quality or improperly maintained soldering iron can cause uneven heating. Using a soldering iron with a fine tip can help target small areas more accurately, minimizing the risk of heat damage. Make sure to clean the tip regularly to ensure efficient heat transfer.
- Wicking and Bridging: Improper soldering techniques can lead to issues like solder wicking or bridging. When solder “wicks” away from a joint, it can leave traces vulnerable. This can cause connections to fail, leading to circuit malfunctions.
Knowing how a soldering iron can damage a circuit board is crucial, but applying the right practices can help prevent this. Here are some effective strategies:
- Use the Right Tools: Invest in a good quality soldering iron with adjustable temperature settings. Having the right temperature control can significantly reduce the risk of damage.
- Practice Good Soldering Techniques: Make sure to heat the joint evenly and avoid prolonged contact with the circuit board. Gently apply the solder and remove the iron quickly.
- Utilize Equipment: Consider using a soldering station that has built-in temperature control and some form of extraction mechanism. This can help you manage heat application better.
- Test Your Skills: Practice soldering on scrap circuit boards before working on your actual projects. This helps increase your comfort and ensures you know how much heat to apply.
The materials of a circuit board also play a role. Most circuit boards are made of fiberglass, which is durable but can still be damaged. Heat-sensitive components, like capacitors and ICs, can fail if overheated. If you are dealing with multi-layer boards, be extra cautious since the layers can trap heat, resulting in damage that isn’t obvious at first glance.
Additionally, consider the type of solder you are using. Lead-free solder requires higher temperatures than traditional leaded solder, which might elevate the risk of damage for certain components. If you switch to lead-free solder, adjust your technique accordingly to mitigate these risks.
Always take precautions when soldering near sensitive areas. If you’re unsure about the risks associated with a specific component, look up the datasheet or seek guidance from experienced individuals. Being proactive will help ensure the integrity of your circuit board remains intact.
While a soldering iron can indeed damage your circuit board if not used correctly, understanding the risks involved and employing proper techniques can greatly mitigate this threat. Always practice caution and prioritize quality tools to maintain the health of your electronic projects.
Best Practices for Soldering to Prevent Circuit Board Damage
When you’re working on soldering circuit boards, you want to ensure that you do it right. Proper soldering techniques can help avoid damaging the circuit board, which can be costly and frustrating. Here are some best practices to keep in mind.
Choose the Right Soldering Iron
Selecting the appropriate soldering iron is critical. A soldering iron with a temperature control feature is ideal. This lets you adjust the heat to match the components you’re working with. Typically, for most electronic components, a temperature range of about 350°C (662°F) works well. Using a soldering iron that is too hot can damage the circuit board, so always verify your tool’s specifications.
Use Quality Solder
The type of solder you use makes a difference. Lead-free solder is popular due to its environmental benefits, but it requires higher temperatures. This might lead to circuit board damage if you’re not careful. Choose solder that is easy to work with, like a tin-lead mix if your project allows it. It has a lower melting point and ensures a stronger joint without excessive heat.
Keep Your Workspace Clean
A clean workspace contributes to soldering success. Dust, debris, or leftover flux can lead to poor connections or shorts, ultimately damaging the circuit board. Regularly clean your workspace and the components before soldering. This helps in achieving a reliable and safe connection.
Practice Proper Technique
Using the right technique is key. Here are some tips:
- Heat the joint, not the solder. Touch the tip of the soldering iron to the joint, wait a second, then feed solder into the heated joint.
- Do not apply too much solder. A little goes a long way, and excessive solder can create bridges that lead to shorts.
- Remove the solder before taking the iron away. This ensures a smooth finish and avoids prying the components off the board.
Mind the Time
Spending too long with the soldering iron on a component or circuit board can lead to overheating, which damages the board. Strive to keep your soldering time under five seconds for through-hole components. For surface-mounted components, it’s best to work quickly, ideally within three seconds. Plan your move to solder quickly and efficiently.
Cooling and Inspection
After soldering, allow the joint to cool undisturbed. Movement during cooling can cause a weak joint that may not bond properly. Once cool, visually inspect the joint. Look for shiny surfaces, which indicate a good connection. If the joint looks dull or has a blob-like appearance, reheat and adjust if necessary.
Use Additional Tools
Investing in a few extra tools can enhance your soldering experience:
- Soldering Mats: These keep your workplace organized and protect against heat damage.
- Desoldering Tools: If you make a mistake, desoldering pumps or wicks can help remove excess solder or faulty components.
- Magnifying Glass: Fine components can be challenging to see. A magnifying tool makes it easier to inspect your work.
Understand Component Limitations
Different components have different heat tolerances. For instance, certain sensitive components like capacitors and ICs can’t withstand excessive heat. Always read the datasheets for the components you’re soldering. This gives you insight into their heat limits and helps prevent damage.
Wear Safety Gear
Safety should be your priority when soldering. Wear safety glasses to protect your eyes from flux fumes or solder splashing. Consider a fume extractor to minimize inhalation of harmful substances during the soldering process. Proper safety gear ensures a comfortable and safe environment to work in.
Practice Makes Perfect
The best advice is to practice. The more you solder, the better you’ll become. Set aside time to work on scrap circuits or practice boards. This helps you refine your skills and learn more about how the equipment behaves with various components. In turn, this prevents accidental damage to circuit boards in the future.
By following these best practices for soldering, you can significantly reduce the chances of damaging your circuit board. Soldering may seem simple, but it requires careful attention and skill. With time and practice, you can master the art of soldering while keeping your circuit boards safe.
Conclusion
Using a soldering iron can pose risks to the integrity of a circuit board, particularly if not done with care and precision. When excess heat is applied, it can lead to burnt traces, damaged components, or even complete failure of the board. It’s essential to remember that every component on a circuit board is critical, and a moment of carelessness can have lasting consequences. Therefore, understanding the potential for damage is the first step in preserving your circuit board’s functionality.
Implementing best practices while soldering is crucial to mitigate these risks. Always ensure you use the correct temperature on your soldering iron and don’t overheat the components. Invest in quality soldering tools, and practice on scrap circuit boards if you’re a beginner. Moreover, taking your time and being meticulous during the soldering process will significantly reduce the chances of mishaps.
Keeping your workspace organized can also help you work more effectively, limiting distractions that might lead to mistakes. Always use the proper techniques for applying solder; for example, don’t add too much solder to joints, as this can lead to bridging and short circuits.
In your soldering projects, it’s vital to balance efficiency with carefulness. By understanding the potential impacts of soldering on circuit board integrity and adhering to best practices, you can significantly enhance the success of your electronic repairs and projects. Remember, a little patience and precision today can save you from major headaches tomorrow.