Soldering Copper Pipes: Can a Soldering Iron Get the Job Done?
When it comes to plumbing, one common question arises: can you solder copper pipes using a soldering iron? As a DIY enthusiast or someone tackling plumbing issues, you may want to know if a standard soldering iron is adequate for this task. In the realm of plumbing, understanding the tools and techniques available can save you time, money, and frustration.
Soldering copper pipes is a process used to join two pieces of copper together by melting solder, usually a combination of tin and lead, which fills in the gap between the pipes. While many think a soldering iron would work fine for smaller tasks, using a propane torch is typically recommended for copper pipe soldering. Let’s dive into the reasons why and explore what you should know about this process.
Why You Should Consider a Propane Torch
While a soldering iron can be used for various electrical applications, it generally lacks the necessary heat output required for soldering copper pipes effectively. Here are some key points to consider:
- Heat Output: A standard soldering iron typically maxes out at around 400°F. However, soldering copper pipes often requires temperatures of about 600°F or more to ensure a strong bond.
- Heat Distribution: A soldering iron applies heat to a single point and may not distribute heat evenly across the joint of the copper pipes. This can lead to weak, ineffective seals.
- Pipe Size: If you’re working with larger pipes or joints, the surface area increases, requiring more heat than what a soldering iron can provide.
Steps for Soldering Copper Pipes with a Torch
If you decide to use the appropriate tool—a propane torch—here’s a step-by-step guide to soldering copper pipes correctly:
- Gather the Right Materials: You will need copper pipes, fittings, propane torch, solder, flux, a wire brush, and a wet rag for cooling down.
- Clean the Pipes: Use a wire brush to clean the ends of the pipes and the inside of the fittings where they will connect. This will ensure a better bond as dirt and oxidation can prevent the solder from adhering properly.
- Apply Flux: Use flux on the cleaned surfaces. Flux helps to prevent oxidation and helps the solder flow better when applied. It can also improve joint strength.
- Assemble the Joint: Fit the pipes and fittings together and ensure they are snug. Make sure to leave enough space for solder all around the joint.
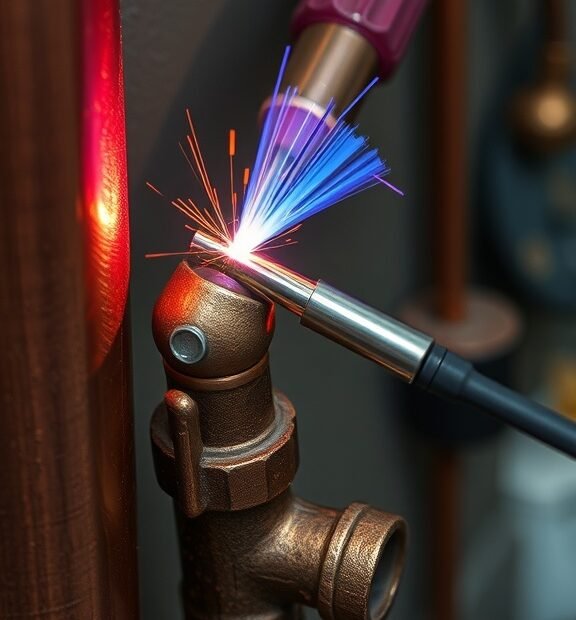
- Heat the Joint: Use the propane torch to heat the area where the pipes meet. Make sure to move the torch in a circular motion to evenly distribute the heat.
- Apply Solder: Once the joint is hot enough, bring the solder to the joint. It should melt and flow into the joint through capillary action. Don’t add solder directly to the flame.
- Cool and Clean: Allow the joint to cool naturally. Once cool, wipe away any excess solder and flux with a wet rag.
Safety Precautions
When soldering, safety should be a top priority. Here are few tips to keep in mind:
- Wear Protective Gear: Safety goggles and gloves can help protect you from burns or solder splashes.
- Work in a Ventilated Area: Ensure good airflow to avoid inhaling any fumes that may arise from heating the materials.
- Keep a Fire Extinguisher Nearby: Open flames can be dangerous—having an extinguisher within reach is wise when working with a torch.
While the idea of using a soldering iron for copper pipe work might seem appealing, it’s important to understand the limitations of the tool. A propane torch is far more effective for achieving the necessary heat and joint strength required in plumbing tasks. By using the right approach and tools, you can successfully solder copper pipes with confidence and ease.
Essential Tools and Techniques for Successfully Soldering Copper Pipes
Soldering copper pipes is a skill that can save you time and money on plumbing projects. But to achieve the best results, you need the right tools and techniques. Let’s explore the essential tools you’ll need and the best practices to follow for successfully soldering copper pipes.
Gather the Necessary Tools
Before diving into soldering, make sure you have the following tools at your disposal:
- Soldering Iron or Torch: A high-quality soldering iron or propane torch is crucial for heating the copper pipe and melting the solder.
- Solder: Choose lead-free solder for plumbing applications. 95/5 tin-antimony solder is a popular option.
- Flux: This helps clean and prepare the copper surface to ensure a good bond. Look for plumbing-specific flux.
- Cleaners: Use a pipe cleaner or sandpaper to scrub the copper pipe’s surface before soldering.
- Plumber’s Tape: This can help seal joints and prevent leaks.
- Safety Gloves and Goggles: Protect your hands and eyes from heat and solder splashes.
Preparation Steps for Soldering
Taking the time to prepare your workspace and materials is essential. Here’s how to ensure everything is ready:
1. Clean the Copper Pipes
Use a pipe cleaner or sandpaper to remove any oxidation or debris from the ends of the copper pipes. Both surfaces should be shiny to guarantee a proper bond.
2. Apply Flux
Apply a thin layer of flux to the cleaned areas of both copper ends. This step is important as it helps the solder flow and adhere correctly.
3. Assemble the Joint
Join the copper pipes together. Make sure they fit snugly. If the connection is loose, it may not solder well.
Mastering the Soldering Technique
Now that you have everything ready, it’s time to solder. Follow these techniques for optimal results:
1. Heat the Joint Evenly
Using your soldering iron or torch, heat the joint evenly. Focus the flame on the pipe rather than the solder itself. This method allows the copper to absorb the heat before applying the solder.
2. Apply Solder
Once the joint is hot enough, introduce the solder to the joint. It should melt and flow into the gap between the pipes. If the solder doesn’t flow, the joint may not be hot enough.
3. Let it Cool
After the solder has been applied, remove the heat and allow the joint to cool naturally. Do not rush this process as cooling too quickly may create a weak joint.
Testing Your Solder Joint
Once everything has cooled, it’s essential to test your solder joint:
Fill the pipes with water and check for leaks. If you notice any moisture, you may need to reheat and apply more solder.
Safe Practices While Soldering
Safety should always be your top priority. Here are a few key practices:
- Ventilation: Ensure your workspace is well-ventilated to avoid inhaling fumes from solder.
- Heat Protection: Use heat-resistant gloves to protect your hands from burns.
- Watch for Fire Hazards: Clear any flammable materials from the vicinity while you work.
With the right tools and techniques, soldering copper pipes can be an enjoyable and rewarding task. By carefully preparing your materials, mastering the soldering process, and practicing safety, you can create strong seams that will stand the test of time. Whether you’re performing a minor repair or tackling a major plumbing project, these techniques will help ensure success in soldering copper pipes.
Conclusion
Successfully soldering copper pipes is a skill that many enthusiasts and DIYers can master with the right tools and techniques. While you may wonder, "Can I solder copper pipe with a soldering iron?" it’s important to note that a standard soldering iron might not provide sufficient heat for larger pipes. However, for smaller soldering tasks or repairs on thin-walled copper, a soldering iron can indeed get the job done effectively, especially when used correctly.
Understanding the essential tools needed for soldering is key. Proper fittings, high-quality solder, and flux are all vital components of a successful soldering project. Additionally, mastering techniques such as cleaning surfaces properly, applying the right amount of heat, and observing the right cooling time can lead to strong, leak-proof joints. Always remember to follow safety precautions, as working with tools and hot materials requires care.
Investing time in learning these skills not only empowers you as a DIYer but also saves you money on professional plumbing services. Each successful soldering job boosts your confidence and enhances your ability to tackle more complex plumbing tasks in the future. So, whether you use a soldering iron for smaller projects or transition to a blowtorch for larger copper pipes, remember that practice, patience, and safety are your best allies in perfecting the art of soldering copper pipes. With the right approach, you can achieve professional-quality results right in your own home.