Operating a Soldering Iron: Essential Techniques and Safety Tips
Operating a soldering iron can be a straightforward process, but it requires some knowledge and care to get the best results while ensuring your safety. Whether you are working on electronics projects, repairing wires, or creating artwork with solder, understanding the essential techniques is vital. Here, we will explore how to use a soldering iron effectively while emphasizing necessary safety precautions.
Understanding Your Soldering Iron
The first step to successfully operate a soldering iron is to familiarize yourself with its parts. A typical soldering iron consists of:
- Heating Element: This heats up the tip of the soldering iron.
- Tip: The metal part that touches the solder and the circuit; it’s essential to keep it clean and well-maintained.
- Handle: The insulated part where you hold the soldering iron.
- Power Source: Most soldering irons plug into an electrical outlet, while others might be battery-operated.
Once you know your tool, you’re ready to start soldering, but remember to choose an appropriate soldering iron for your task. For electronics, a soldering iron rated at 25 to 60 watts is typically suitable.
Getting Set Up
Before you begin, ensure you have the following items on hand:
- Soldering iron
- Rosin-core solder
- Soldering iron stand
- Sponge or copper scrubber for cleaning
- Safety glasses
- Ventilation (for safety)
Having a designated workspace is crucial. A well-lit area will allow you to see what you’re doing clearly. Keeping your tools organized can help maintain efficiency as you work.
Basic Soldering Techniques
To operate a soldering iron effectively, follow these steps:
- Heat the Iron: Plug in your soldering iron and let it heat up for a few minutes. The tip needs to reach the correct temperature to melt the solder properly.
- Clean the Tip: Before you start, clean the tip with a damp sponge or copper scrubber. This will remove any oxidation and ensure a good connection.
- Prepare the Components: If you are soldering electronic parts, position them together on a soldering board or similar setup.
- Apply the Solder: Touch the tip of the soldering iron to the connection point for about a second, and then feed solder into the joint. Remove the solder and then the soldering iron, allowing the joint to cool.
Always use enough solder to create a strong connection between components, but avoid using too much as it can create a messy joint. The goal is a shiny and smooth finish.
Safety Tips
Operating a soldering iron comes with risks. Here are some safety tips to keep in mind:
- Wear Safety Glasses: Protect your eyes from solder splashes and fumes.
- Use a Stand: Always place your hot soldering iron in a safe stand when not in use to prevent burns.
- Keep It Ventilated: Working in a well-ventilated area helps disperse any harmful fumes.
- Avoid Touching the Tip: The soldering iron tip can reach very high temperatures, and accidental contact can lead to serious burns.
Be mindful of your surroundings. Keep flammable materials away from your workspace, and do not rush through your projects.
Maintaining Your Soldering Iron
To prolong the life of your soldering iron, regular maintenance is essential. Here are a few tips:
- Clean the Tip: After every use, clean the tip to remove any residue.
- Proper Storage: Unplug the iron when not in use and store it in a safe location.
- Replace Worn Tips: If the tip is worn down, consider replacing it to maintain effective heat transfer.
With these techniques and safety tips, you will be better equipped to operate a soldering iron effectively. Remember that practice is key. Feel free to experiment and improve your skills over time, ensuring safety is always your top priority.
Common Mistakes to Avoid When Using a Soldering Iron
Using a soldering iron can seem tricky at first, but with practice, it becomes a valuable skill for electronics work. However, many people make mistakes that can lead to subpar results or even damaged components. By being aware of the common pitfalls, you can improve your soldering technique and achieve better results.
One of the most frequent mistakes is not using the right temperature. A soldering iron needs to be hot enough to melt solder quickly, but too high a temperature can damage components or melt circuit boards. Aim for a temperature between 350°C to 400°C (662°F to 752°F) for typical soldering tasks. Always give your iron enough time to heat up before you start working.
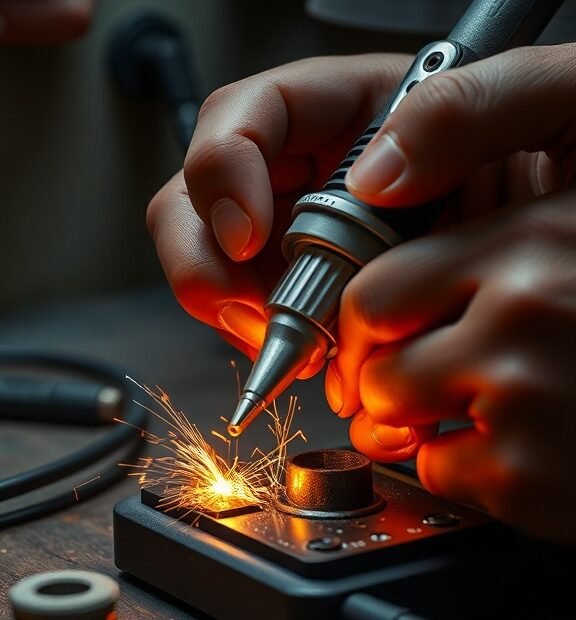
Another issue arises from how you hold the soldering iron. Many beginners grip the soldering iron like a pen, which can lead to improper control. Instead, hold the soldering iron closer to the tip with your thumb and forefinger for better stability and precision. This grip allows for greater control when you are soldering delicate connections.
Be sure to avoid applying too much solder. Many solder joints fail because of excess solder creeping into unwanted areas, causing bridges or shorts between circuits. It is often better to start with a small amount of solder and, if necessary, add more as needed. Aim for a clean and shiny solder joint instead of a blob.
Cleaning the soldering iron tip is crucial but often overlooked. A dirty tip can lead to poor heat transfer and weak joints. Regularly clean the tip using a damp sponge or brass wool. This practice is essential for maintaining good conductivity and ensuring that solder flows well.
Not properly preparing your materials is another common mistake. Before you begin, ensure all parts are clean and free from oxidation. Use isopropyl alcohol for cleaning circuit boards or components. When surfaces are clean, solder adheres better, resulting in stronger bonds. A clean working environment can also help prevent contamination.
Timing is vital when soldering. Many beginners tend to hold the iron on the joint for too long, which can overheat the components and damage them. Ideally, you should heat the joint for just a few seconds—just enough for the solder to flow and bond. Knowing when to remove the iron is part of mastering this skill.
Don’t underestimate the benefits of practice. An important mistake many make is not spending time honing their soldering skills. The more you practice, the more proficient you will become. You can practice on scrap electronics or kits designed specifically for beginners. Each attempt will teach you something new and help you refine your technique.
- Use Proper Temperature: Aim for 350°C to 400°C.
- Correct Grip: Hold closer to the tip for better control.
- Right Amount of Solder: Avoid using too much; start small.
- Clean the Tip: Regularly clean it for better performance.
- Prepare Your Materials: Clean parts with isopropyl alcohol.
- Watch Your Timing: Limit heat application to a few seconds.
- Practice Regularly: Hone your skills using scrap materials.
By avoiding these common mistakes when using a soldering iron, you can enhance your skills and become more effective in your electronics projects. Remember that every soldering job might require slight adjustments in your technique, and being mindful of these errors will certainly lead to better outcomes.
Conclusion
Mastering how to operate a soldering iron is both a skill and an art that opens up a world of possibilities in electronics. By employing essential techniques—such as proper tip maintenance, heat control, and effective soldering methods—you are well on your way to creating reliable and clean electronic connections. Always prioritize safety by using protective eyewear, working in a well-ventilated area, and managing your workspace effectively to avoid hazards.
Understanding the common mistakes that can occur when using a soldering iron is equally important. Avoid issues like overheating components, using the wrong solder, or neglecting to clean the tip. These pitfalls can lead to frustrating projects and unwanted defects, hindering your journey in DIY electronics or repairs. By staying aware of these challenges, you can save time, material, and effort, ultimately enhancing the quality of your work.
The journey of learning how to operate a soldering iron may seem daunting at first, but with practice and awareness, you will gain confidence in your abilities. Don’t rush the process; take your time to refine your technique. Whether you’re a hobbyist or a professional, the skills you develop from mastering soldering will serve you well in many future projects. Embrace the experience, remain patient, and let each soldering session be a step toward greater craftsmanship and innovation in your electronics ventures.