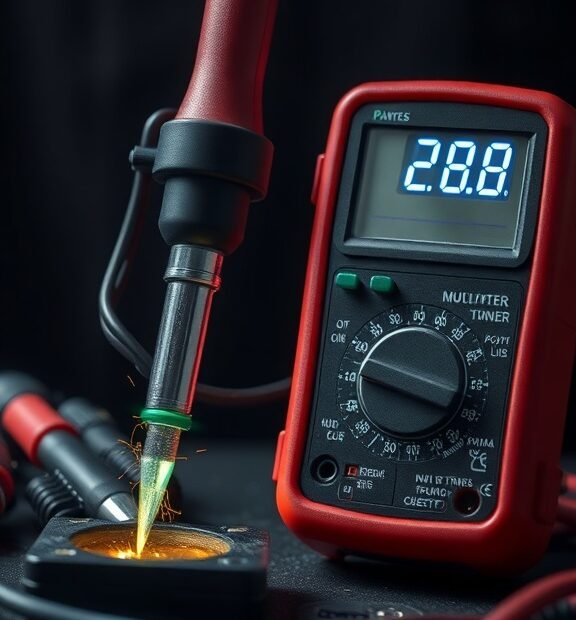
How to Check a Soldering Iron with a Multimeter: Step-by-Step Guide
Checking your soldering iron with a multimeter is a straightforward process that ensures your tool is working effectively. Here’s a step-by-step guide to help you through the process. By following these steps, you can ensure that your soldering iron is functional and ready to tackle your projects.
Gather Your Tools
Before you get started, ensure you have the following items:
- A multimeter
- Your soldering iron
- A clean, safe working surface
- Safety goggles (optional but recommended)
Understanding the Multimeter Settings
Familiarizing yourself with your multimeter is crucial. Most multimeters have two primary settings you’ll use:
Soldering Stations | Easy 60 Day Return
- Resistance (Ohms): This setting checks the conductivity of the soldering iron tip.
- Continuity: This indicates whether there is a complete circuit, which is vital for testing the heating element.
Steps to Check the Soldering Iron
Step 1: Power Down and Unplug
Safety first! Ensure your soldering iron is completely powered down and unplugged from the electrical outlet. Give it a moment to cool down if it was recently used. This prevents any accidents during testing.
Step 2: Measure the Tip Resistance
Now you’ll check the resistance of the soldering iron tip:
Soldering Stations | Easy 60 Day Return
- Turn your multimeter dial to the resistance setting (Ω).
- Touch one probe to the metal tip of the soldering iron and the other probe to the body of the iron.
- Read the resistance value on the multimeter display.
A healthy soldering iron tip generally has a resistance between 1 and 3 ohms. If the reading is significantly higher, or if it shows infinite resistance, this indicates that there is a problem with the tip, such as corrosion or a break in the connection.
Step 3: Test for Continuity of the Heating Element
This step ensures that the heating element inside the soldering iron is intact:
Soldering Stations | Easy 60 Day Return
- Switch your multimeter to the continuity setting (often marked with a sound wave symbol).
- Place one probe on the end of the soldering iron power cord and the other probe on the metal tip.
If the multimeter beeps or shows a low resistance, the circuit is complete, indicating that the heating element is functioning correctly. If there is no sound or a high resistance reading, this could mean that the heating element is faulty and the soldering iron will not heat up.
Step 4: Inspect the Power Cord
A frayed or damaged power cord can also cause issues:
Soldering Stations | Easy 60 Day Return
- Check the length of the power cord for any obvious signs of wear, such as cuts, frays, or exposed wires.
- To test the cord, use the continuity setting on your multimeter. Place one probe at the plug end and the other at various points along the cord. You should get a beep indicating continuity.
If there are points along the cord where there is no continuity, that part of the cord may be damaged and require replacement.
Step 5: Evaluate the Results
After conducting these tests, evaluate the results:
Soldering Stations | Easy 60 Day Return
- If the soldering iron tip shows a good resistance and the heating element has continuity, your soldering iron is in working condition.
- If you find problems with the readings, consider cleaning the tip, replacing it, or servicing the soldering iron.
Final Thoughts
Checking your soldering iron with a multimeter is an essential part of maintaining your tool. Regularly testing can help identify issues before they become significant problems, saving you time and frustration in your soldering projects. By following these steps, you can ensure your soldering iron is always ready for use.
Common Electrical Issues Indicated by Multimeter Readings on Soldering Irons
Knowing how to use a multimeter with your soldering iron is essential for both beginners and experienced users. A multimeter can help you detect common electrical issues that can affect the performance of your soldering iron and ensure that it’s safe to use.
When you measure your soldering iron with a multimeter, there are a few key readings to look for. Using the correct settings and understanding what the readings mean is crucial for troubleshooting any problems. Here are some of the common electrical issues that might be revealed by your multimeter readings:
Soldering Stations | Easy 60 Day Return
1. Resistance Issues
One of the first tests you can perform is to check the resistance of the heating element. Set your multimeter to the resistance (Ω) setting. A typical reading for a good soldering iron will usually fall between 10 to 100 ohms. If you see:
- High resistance (infinite or very high ohms): This could indicate a broken heating element. If no continuity exists, the iron won’t heat up.
- Low resistance (close to 0 ohms): This often signals a short circuit that can be dangerous. You should not use the soldering iron until the issue is fixed.
2. Voltage Check
Next, you’ll want to check the voltage output from your soldering iron. This can help ensure that it’s supplying the appropriate amount of power. To do this:
Soldering Stations | Easy 60 Day Return
1. Set the multimeter to the voltage (V) setting.
2. Plug in your soldering iron and allow it to heat up. Then carefully touch the multimeter probes to the metal tip of the soldering iron.
Soldering Stations | Easy 60 Day Return
3. You should see a reading that matches your iron’s rated voltage.
- No voltage: Indicates that something is wrong with the internal connections or fuse.
- Higher than expected voltage: Could mean there’s an issue with the power supply or transformer, which might be unsafe.
3. Temperature Consistency
If your soldering iron seems to take too long to heat or doesn’t get hot enough, checking its temperature consistency might help. By measuring the resistance when the iron is heated and comparing it to its cold resistance, you can verify if the soldering iron is operating efficiently.
Soldering Stations | Easy 60 Day Return
Here’s how:
- Measure the resistance when the iron is cold.
- Allow the iron to reach its operational temperature, then measure the resistance.
- A significant increase should not occur; otherwise, it indicates a problem with the heating element.
4. Continuity Test
A continuity test checks if electrical flow is possible through the soldering iron, which is essential for it to function correctly. To perform this test:
Soldering Stations | Easy 60 Day Return
- Turn off and unplug the soldering iron.
- Set the multimeter to the continuity setting, often marked by a soundwave icon.
- Touch the probes to the tip of the iron and the power cord connection.
If you hear a beep, it means there is continuity, which is good. If there is no sound, it indicates a break somewhere in the wiring or connections, which needs urgent attention.
5. Safety Precautions
While using a multimeter, always prioritize safety:
Soldering Stations | Easy 60 Day Return
- Ensure that the soldering iron is unplugged during resistance and continuity tests.
- Use insulated probes to avoid accidental electric shock.
- Avoid touching exposed wires or metal parts while the iron is plugged in.
By regularly performing these tests, you can catch issues before they become serious problems. Understanding these multimeter readings can save you time, money, and enhance the safety of your soldering tasks. If you notice any unusual readings during your tests, it may be best to consult with a professional or consider replacing your soldering iron for optimal performance.
Conclusion
Understanding how to check a soldering iron with a multimeter is essential for ensuring that your tool functions effectively. By following a step-by-step guide, you can easily diagnose potential issues with your soldering iron. Regularly checking the temperature and continuity of your iron not only prolongs its lifespan but also enhances your soldering experience.
Common electrical issues indicated by the multimeter readings can help you identify anything from a damaged heating element to internal wiring faults. If you see irregular resistance or voltage readings, it’s a sign that your soldering iron may need repairs or replacement. Staying proactive about these checks allows you to maintain your tools, ensuring safe and efficient work on your projects.
Soldering Stations | Easy 60 Day Return
By incorporating these practices into your routine, you can effectively troubleshoot problems and improve your soldering capabilities. Whether you’re a hobbyist or a professional, keeping your soldering iron in top shape is crucial for achieving high-quality results. With the right knowledge and tools at hand, you can enjoy the full benefits of your soldering equipment, producing precise and reliable work that meets your standards.