Understanding the Importance of Tinning a Soldering Iron for Effective Electronics Work
When working on electronics, one of the most essential steps is understanding what tinning a soldering iron means. Tinning is the process of coating the tip of your soldering iron with solder, creating a conductive layer that enhances the efficiency and quality of your soldering work. This practice is vital for anyone involved in electronics, from hobbyists to professionals, as it contributes significantly to the performance of the soldering iron.
The benefits of tinning a soldering iron are numerous. First and foremost, tinning improves thermal conductivity. A well-tinned soldering iron heats more evenly, allowing for better joining of components. When the iron tip is coated with solder, it conducts heat more effectively, which in turn ensures that you can work with precision and speed.
Additionally, tinning protects the soldering iron tip from oxidation. If a soldering iron tip is left bare, it can easily oxidize when exposed to air, significantly reducing its lifespan and performance. Oxidation creates a barrier that prevents effective heat transfer. By tinning the tip, you create a protective layer that helps to keep it in good condition for longer.
It’s also important to note that tinning helps improve solder flow. When you have a properly tinned soldering iron, the solder flows smoothly and adheres better to the surfaces you are joining. This results in stronger and more reliable connections. A clean solder joint is less likely to fail over time, ensuring the longevity of your electronic projects.
Now, let’s look at how to effectively tin your soldering iron:
- Clean the Iron Tip: Begin by cleaning the tip of your soldering iron with a damp sponge or a brass cleaning pad. This removes any old solder, dirt, or oxidation that could hinder the tinning process.
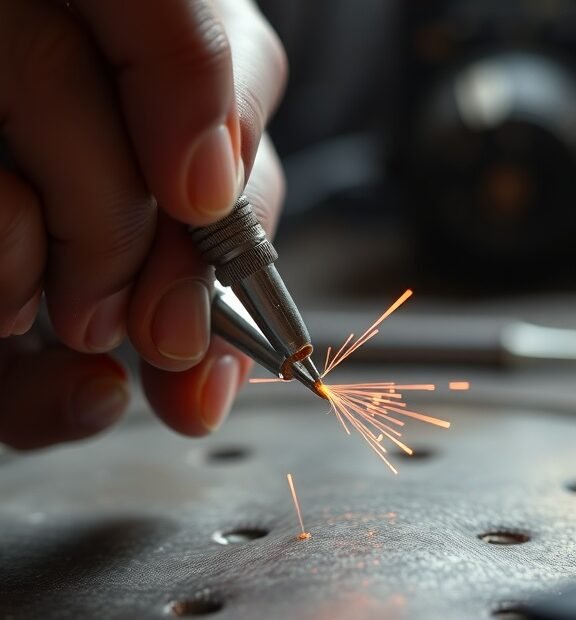
- Heat the Iron: Turn on your soldering iron and let it reach the appropriate temperature. A temperature of around 350°C (662°F) is usually best for most solder types.
- Apply Solder: Once the iron is hot, touch a small amount of solder directly to the tip. You’ll notice that the solder will begin to melt and coat the surface evenly.
- Spread the Solder: Use the soldering iron to spread the melted solder over the tip, ensuring that it coats all surfaces completely.
- Remove Excess Solder: If there’s too much solder, gently tap it against the edge of your solder spool or use a sponge to remove the excess while still ensuring the tip is adequately coated.
- Final Check: Look at the tip. It should have a shiny, silver appearance. If it looks dull or crusty, you might need to repeat the process.
It’s a good habit to tin your soldering iron before you start any soldering task. Whether you’re assembling a circuit board, connecting wires, or repairing devices, a well-tinned iron will make your job easier and yield better results. Regular maintenance of the soldering iron, including tinning, will extend its life and enhance your overall soldering experience.
Moreover, if you’re working with a variety of solder materials or types, consider tinning the tip with the specific solder you plan to use for your project. This can assist in achieving optimal results since different solders may have different melting points and flow characteristics. Ensuring compatibility between your iron tip and solder will minimize issues such as solder bridging or misalignment.
Tinning a soldering iron is not just an optional step; it’s a crucial part of effective electronics work. It promotes better heat transfer, protects the iron tip, and improves solder flow, leading to stronger connections. As you dive deeper into electronics, make sure you prioritize this simple yet powerful technique. By mastering the art of tinning, you will enhance both your confidence and competence in any soldering project you undertake.
Embrace this practice, and watch as your soldering skills improve, making each project a little bit easier and a lot more enjoyable.
Tips and Tricks for Properly Tinning Your Soldering Iron
Tinning a soldering iron is an essential skill that every DIY enthusiast and professional technician should master. Properly tinning your soldering iron can greatly enhance its performance, prolong its life, and ensure that your soldering projects go smoothly. Here are some effective tips and tricks to help you tin your soldering iron properly.
Understanding the Importance of Tinning
Before diving into the techniques, it’s crucial to understand why tinning is so important. Tinning helps create a smooth, conductive surface on the tip of your soldering iron. This not only promotes efficient heat transfer but also prevents oxidation, which can hinder soldering performance. When the iron is properly tinned, it allows you to solder more easily and with greater accuracy.
Gather Your Materials
To begin, you’ll need a few key materials:
- Soldering iron
- Solder (preferably rosin-core)
- Sponge or brass cleaning pad
- Optional: Flux
Ensure that your workspace is clean and well-lit, as this will make the process easier and safer.
Cleaning the Iron Tip
The first step is to clean the tip of the soldering iron. If you haven’t used the iron in a while, it may have oxidized or accumulated dirt.
Use a damp sponge or a brass cleaning pad to remove any old solder or tarnishing. Wipe the tip gently but thoroughly. If you notice stubborn oxidation, dip the tip in flux before cleaning it to help break down the residue.
Applying Solder
Once your soldering iron tip is clean, it’s time to apply solder. Here’s how:
- Plug in your soldering iron and allow it to heat up for a few minutes.
- When heated, take your solder and touch it to the tip of the iron. You should see the solder melt and spread.
- Rotate the iron slightly to ensure even coverage on all sides of the tip.
- Do not apply too much solder; just enough to coat the tip is ideal.
This process not only coats the tip but also maximizes conductivity, making subsequent soldering tasks more efficient.
Advanced Tinning Techniques
If you want to take your tinning process to the next level, consider these advanced tips:
- Use Flux: Applying flux before tinning provides extra lubrication, making it easier for solder to adhere to the iron.
- Temperature Control: Avoid overheating your soldering iron. Excessive heat can damage the tip coating and lead to premature wear.
- Regular Maintenance: Regularly tinning your soldering iron after use can keep it in top condition, preventing oxidation between uses.
- Avoid Contaminants: Be mindful of the materials you are soldering. Contamination from greasy or dirty surfaces can affect your soldering quality.
Storing Your Soldering Iron
After you’ve finished tinning and soldering, how you store your soldering iron can have a significant impact on its longevity. Always clean the tip of the soldering iron again after use before storing it. Once clean, apply a final coat of solder while the iron is warm to protect the tip from oxidation during storage. Store your iron in a safe location, preferably in a stand or holder that keeps it upright and away from direct contact with other materials.
Common Mistakes to Avoid
Even with the best techniques, common mistakes can hamper your efforts. Here are a few pitfalls to watch out for:
- Overheating: Prolonged exposure to high temperatures can destroy the tip.
- Using Dirty Tips: Failing to clean the tip before tinning can lead to poor soldering results.
- Inconsistent Tinning: Inconsistent application can leave parts of the tip uncovered, leading to heat loss.
By following these tips and tricks for properly tinning your soldering iron, you will enhance your soldering proficiency and ensure your tools remain in excellent condition. With practice, you’ll become more comfortable with the tinning process, making your soldering projects enjoyable and successful!
Conclusion
Tinning a soldering iron is a vital step for anyone working in electronics, whether you are a beginner or a seasoned professional. By understanding its importance, you can ensure better heat conduction and make smoother solder joints. A well-tinned soldering iron not only enhances your efficiency but also prolongs the lifespan of the tool. This practice prevents oxidation and prepares the tip for optimal performance, allowing you to work effectively on your projects.
To achieve the best results, follow the tips and tricks discussed in the article. Always use the right solder for tinning, as it contributes to a stronger bond and better electrical connections. Remember to clean your soldering iron before tinning, and ensure it is heated properly to allow the solder to flow easily. By maintaining a good technique—like wiping the tip on a damp sponge instead of using a dry cloth—you can avoid adding contaminants that could hinder the process.
Regularly tinning your soldering iron is a small yet essential task that can greatly impact your overall work quality. By implementing these practices, you’re not just enhancing your soldering skills; you’re also laying the groundwork for more complex projects in the future. Embrace this simple yet effective practice in your routine to elevate your electronics work to the next level. With patience, practice, and proper tinning, you’ll find yourself more confident and adept in soldering tasks, making your experience in electronics not just productive, but also enjoyable.