Choosing the Right Soldering Iron for Stained Glass: Key Features to Consider
When it comes to creating beautiful stained glass art, one essential tool stands out: the soldering iron. Choosing the right soldering iron can significantly impact your crafting experience and the quality of your finished work. Here are some key features to consider when selecting the best soldering iron for stained glass projects.
Power Rating
First and foremost, consider the power rating of the soldering iron. A higher wattage generally means quicker heating times and more consistent temperature control, which are crucial when working with stained glass. For most stained glass projects, a soldering iron with a power rating between 25 to 100 watts is ideal. Starting at around 40 watts is a good balance, providing enough heat without overwhelming you as you learn to solder.
Temperature Control
Temperature control is another vital feature. Soldering involves melting metal without scorching the glass, so having an iron with adjustable temperature settings is a considerable advantage. Look for models that can reach at least 600°F to 800°F. This allows you to choose the best temperature for different soldering tasks, ensuring you have the right heat for delicate glass pieces while soldering stronger connections.
Soldering Iron Kits & Accessories
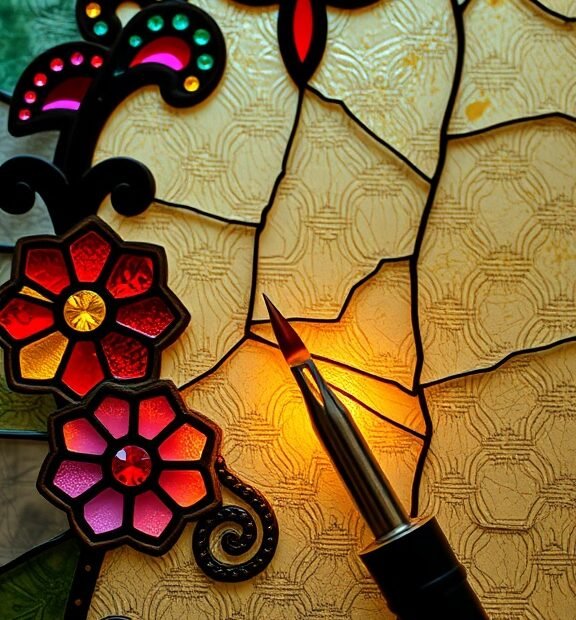
Tip Types and Sizes
The tip of your soldering iron is meant for precision. There are several types of tips available, such as chisel, pointed, and conical. For stained glass work, a chisel tip can be very helpful for quickly heating larger areas of solder, while a finer tip is excellent for intricate detailing. Additionally, consider the size of the tip; a medium-sized tip, typically around 1/8 inch wide, strikes a balance between versatility and precision for your projects.
Weight and Ergonomics
Since stained glass crafting often takes time, the weight and design of the soldering iron can affect your comfortability. A lightweight iron can help prevent fatigue during extended use. An ergonomic design with a comfortable handle ensures ease of use, allowing you to create intricate designs without straining your hand. Check user reviews for feedback on comfort and usability before making a purchase.
Soldering Iron Kits & Accessories
Corded versus Cordless
Another aspect to consider is whether you want a corded or cordless soldering iron. Corded models provide consistent power without the concern of batteries dying mid-project. However, cordless options offer more freedom to move around your workspace. If you choose a cordless model, look for one with a long-lasting battery that can easily recharge, ensuring you won’t be left without power in the middle of your creative endeavors.
Safety Features
Safety should always be a priority when working with hot tools. Look for soldering irons that have built-in safety features, such as a stand that prevents accidental burns or built-in heat shields. Some irons also come with LED indicators to show when they are hot, helping you maintain awareness during your projects. Safety gloves and eye protection are additional recommendations when soldering.
Soldering Iron Kits & Accessories
Price and Warranty
When choosing a soldering iron for stained glass, budget considerations do come into play. Prices can range widely based on features and brand. Generally, a good quality soldering iron will cost between $30 to $100. While it might be tempting to go for the cheapest option, investing in a reliable soldering iron with a warranty can save you from future headaches. A warranty is a strong indicator of the manufacturer’s confidence in their product.
Brand Reputation
Consider the brand reputation of the soldering iron. Companies with a longstanding history of manufacturing soldering tools often provide better quality and support. Read user reviews and ratings to gauge customer satisfaction and find out which brands are favored by experienced stained glass artists.
Soldering Iron Kits & Accessories
These key features when choosing a soldering iron for your stained glass projects will enhance your crafting experience and improve the quality of your art. From power ratings to ergonomics, every detail matters in making your process as smooth as possible. Happy soldering!
Tips for Maintaining Your Soldering Iron for Optimal Performance in Stained Glass Projects
When it comes to stained glass projects, having a well-maintained soldering iron is essential for achieving optimal results. A soldering iron that works well ensures clean joints, smooth lines, and a polished final product. Here are some essential tips to help you maintain your soldering iron for the best performance in your stained glass endeavors.
Keep it Clean
Cleaning your soldering iron regularly is crucial for its longevity and efficiency. Residues from solder and flux can accumulate on the tip, which can affect heat transfer and lead to poor soldering quality. Here are a few cleaning methods:
Soldering Iron Kits & Accessories
- Sponge Method: Dampen a clean sponge and wipe the tip of the soldering iron while it is hot. This removes oxidation and solder buildup.
- Brass Coil Cleaner: Use a brass coil cleaner designed for soldering. It’s effective and gentle on the tip.
- Copper Wool: A fine copper wool pad can also effectively clean the tip without causing damage.
Keep the Tip Tinned
Tinning involves applying a thin layer of solder to the tip of the iron. This practice helps protect the tip from oxidation and promotes better heat conductivity. After cleaning, reapply solder to the tip to keep it tinned. Make sure to do this periodically, especially before and after a work session.
Use the Right Temperature
Different soldering projects require different temperatures. Using a high temperature for too long can damage the soldering iron tip and the glass. Typically, a temperature range between 350°F to 400°F is ideal for stained glass projects. Always adjust your soldering iron to suit the specific solder you are using, as lead solder and lead-free solder can have different optimal temperatures.
Soldering Iron Kits & Accessories
Avoid Excessive Pressure
Applying too much pressure while soldering can lead to premature wear and tear on your soldering iron. It can cause the tip to wear down, leading to a less effective soldering process. Use a light hand and let the heat of the iron do the work. If you notice that the solder isn’t flowing well, try adjusting the temperature rather than applying more pressure.
Store Properly
Proper storage of your soldering iron is just as important as regular maintenance. Here are few tips for safe storage:
Soldering Iron Kits & Accessories
- Stand or Holder: Always place your soldering iron in an appropriate holder when not in use. This keeps the tip from touching surfaces that might damage it.
- Cool Down: Let the soldering iron cool completely before storing it away. This prevents accidental burns and prolongs the life of the iron.
Check Electrical Connections
If your soldering iron is electric, inspect the cord and connections regularly. Look for frays or exposed wires, which can pose a safety risk. If you notice any issues, replace the soldering iron immediately to avoid electrical hazards.
Replace the Tip When Necessary
Even with diligent care, soldering iron tips won’t last forever. If you notice that cleaning and tinning no longer restore the tip’s effectiveness, it may be time for a replacement. Purchase a tip compatible with your soldering iron model for optimal results.
Soldering Iron Kits & Accessories
Use Quality Solder and Flux
The quality of solder and flux can impact not just your finished product but also the longevity of your soldering iron. Low-quality products can produce more residue and cause your tip to corrode faster. Invest in good quality solder and flux to ensure a cleaner experience.
Regular Maintenance Schedule
Setting up a regular maintenance schedule can streamline your workflow and ensure your soldering iron is always ready for your next stained glass project. Consider the following:
Soldering Iron Kits & Accessories
- Clean the tip after every project.
- Check for wear and tear weekly.
- Replace the tip when you notice a significant drop in performance.
By following these maintenance tips, you can keep your soldering iron functioning optimally, enhancing your ability to create beautiful stained glass works. Regular care not only ensures functionality but can save you money in the long run by prolonging your iron’s lifespan. Remember, a well-maintained tool contributes to the quality of your artistic creations.
Conclusion
Selecting the best soldering iron for stained glass projects can significantly enhance your crafting experience. By focusing on key features like wattage, tip size, and temperature control, you can find an iron that suits your specific needs. A soldering iron with adjustable temperature settings allows for flexibility when working with various glass types, ensuring you achieve clean, smooth solder joints every time.
Maintaining your soldering iron is equally crucial for its longevity and performance. Regularly cleaning the tip and checking for wear will prevent any disruptions in your work. Investing time in proper maintenance can save you from frequent replacements and costly errors in your stained glass projects. Simple practices like wiping the tip with a damp sponge and using soldering iron tips designed for glass can keep your tool in optimal working condition.
Soldering Iron Kits & Accessories
As you embark on your stained glass journey, remember that the right soldering iron is just as important as your skill and creativity. By choosing wisely and maintaining your equipment, you’ll not only improve the quality of your work but also enjoy the entire process more. Happy crafting!