Effective Techniques on How to Remove Solder with a Soldering Iron
Removing solder can be a tricky task, especially if you’re a novice. However, with the right techniques and tools, you can easily remove solder using a soldering iron. Here are some effective techniques to make the process smoother and more efficient.
Understanding Solder Composition
Before diving into solder removal, it’s crucial to understand what solder is made of. Solder is typically an alloy, most often a blend of tin and lead. Knowing this will help you choose the right tools and methods for removal. Lead-free solder, for example, requires higher temperatures to melt compared to traditional solder.
Gather Your Tools
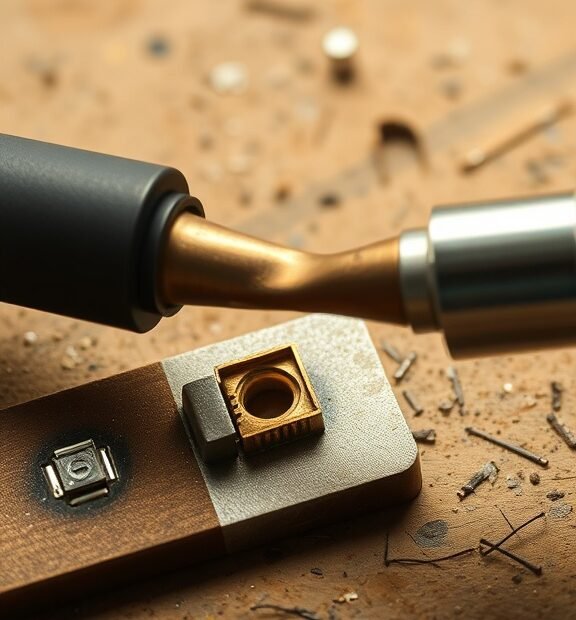
To effectively remove solder, you will need a few essential tools:
- Soldering Iron: A high-quality soldering iron with a fine tip is ideal for precision work.
- Solder Wick: This copper braid helps soak up melted solder.
- Solder Pump: A suction tool that allows you to remove solder quickly and efficiently.
- Flux: This helps to improve the flow of solder, making it easier to remove.
- Soldering Iron Stand: Keeps your soldering iron secure when not in use.
Preparing the Area
Safety is paramount when working with solder. Ensure you’re in a well-ventilated area and wear safety goggles. Place your components on a heat-resistant surface and keep flammable materials away from your workspace.
Step-by-Step Techniques for Removing Solder
Using a Soldering Iron with Solder Wick
This method is effective and commonly used:
- Heat your soldering iron to the appropriate temperature.
- Place the solder wick over the solder joint you wish to remove.
- Press the heated soldering iron onto the wick. The heat will melt the solder, which will then be absorbed by the wick.
- Remove the wick and let it cool down before disposing of it. Repeat if necessary for any remaining solder.
Using a Solder Pump
This method is faster, especially for larger solder joints:
- Heat the solder joint using your soldering iron until the solder melts.
- Quickly place the solder pump over the molten solder.
- Press the button on the pump to create a vacuum and quickly lift the melted solder away.
- Inspect the joint; if any solder remains, repeat the process as needed.
Applying Flux for Enhancing Flow
If you’re having trouble with stubborn solder, applying some flux can help:
- Apply a small amount of flux to the solder joint to lower the melting point.
- Heat the joint with the soldering iron until the solder begins to flow.
- Use either the solder wick or pump method to remove the solder as described above.
Tips for Effective Solder Removal
Here are some additional tips to ensure your solder removal process is efficient:
- Practice Makes Perfect: Don’t hesitate to practice on scrap materials if you’re new to soldering. This builds your confidence.
- Temperature Control: Adjust your soldering iron’s temperature based on the type of solder you’re working with.
- Work Quickly: Solder cools fast, so you have to act quickly when using a solder pump.
- Inspect Your Work: After removing solder, check for any residual solder that might lead to further issues.
By mastering these techniques on how to remove solder with a soldering iron, you can confidently tackle soldering projects. Being aware of your tools and correctly managing the soldering process will lead to cleaner results and fewer mistakes. Remember, each project is a chance to improve your skills. Happy soldering!
Common Mistakes to Avoid When Removing Solder
When you work with electronics, knowing how to remove solder is essential. Incorrect solder removal can damage your components or lead to frustration. Here are some common mistakes to avoid when you’re in the process of removing solder.
Rushing the Process
One of the most common mistakes is hurrying through solder removal. Patience is key. If you rush, you risk not heating the solder enough, making it harder to remove. Take your time to ensure the solder is fully liquefied before using any tools.
Using the Wrong Tools
Using inappropriate tools can create extra work for you and potentially damage your circuit board. Ensure you have the right equipment at hand:
- Soldering Iron: A fine-tipped soldering iron is ideal for most electronic components.
- Pump: A solder sucker (or desoldering pump) is useful to remove molten solder.
- Wick: Desoldering braid can absorb solder effectively if used correctly.
Always check that your tools are in proper working condition to avoid further complications.
Neglecting Safety Precautions
Soldering and solder removal can pose several risks, so safety should never take a backseat. Make sure to wear safety goggles and work in a well-ventilated environment. It’s crucial to avoid inhaling fumes from melting solder. Additionally, let your soldering iron cool down properly before putting it away.
Overheating Components
Applying too much heat can damage both your circuit board and the components you’re trying to desolder. Keep the soldering iron on the joint for only a few seconds and remove it once you see the solder melt. If you notice discoloration or melting of nearby components, stop immediately and let the area cool down.
Not Prepping Before Removing Solder
Failure to prepare the area can lead to mistakes. Ensure the components are accessible and that you have a clear view of the solder joint. Cleaning the area with isopropyl alcohol before you start can also help make the removal easier.
Forgetting to Observe the Solder Behavior
Every solder behaves differently based on its composition and surrounding environment. When you’re attempting to remove solder, watch how it responds to heat. If it becomes shiny and pliable, you’re on the right path. If it stays dull and chunky, it’s likely not hot enough. Pay attention to these details to achieve successful solder removal.
Overlooking the Power Supply
One common oversight is forgetting to power down the device before desoldering. Always ensure the power supply is disconnected to avoid electrical shock or short circuits. Taking a few moments to double-check can save you from substantial damage and ensure your safety.
Choosing Incorrect Solder Wick Use
If you opt to use solder wick for removal, incorrect placement can lead to failure. Position the wick over the solder and then place the soldering iron on top. If you place the wick incorrectly or don’t use enough heat, the solder won’t be absorbed effectively, requiring multiple attempts.
Ignoring the PCB Damage
Overlooking potential damage to the printed circuit board (PCB) is another mistake. Excessive heat can lift pads or create cracks. Take care while applying heat and always inspect the soldering area after removal. Repairing a damaged PCB can be significantly more complicated than the original solder removal.
Failing to Test the Circuit
After you successfully remove solder, don’t forget that your job isn’t done yet. Always test the circuit after removal to ensure that everything is functioning as it should. A missing or badly soldered joint can lead to problems later on, so double-check for continuity.
By avoiding these common mistakes, you make solder removal easier and safer, leading to better overall results in your electronic projects. Practice these tips on scrap boards before tackling your main projects to build your confidence.
Conclusion
Successfully removing solder with a soldering iron is a skill that can greatly enhance your electronics repair and assembly projects. Utilizing effective techniques, such as heating the solder with the tip of your soldering iron and employing a desoldering pump or solder wick, can streamline the process and result in cleaner connections. Whether you’re addressing a faulty component or upgrading your circuits, mastering these methods will serve you well in achieving a professional finish.
However, being aware of the common mistakes that many make can save you time and frustration. Rushing the process can lead to overheating the circuit board, damaging delicate components, or even creating cold solder joints. It’s crucial to take your time and ensure that you have a steady hand to avoid these pitfalls. Always monitor the temperature of your soldering iron and make sure it’s appropriate for the materials you’re working with, as using too high a temperature can cause unnecessary damage.
By combining the right techniques with awareness of potential errors, you can become proficient at removing solder with ease and confidence. Each successful attempt builds your skills and knowledge, bringing you closer to mastering the art of soldering. Whether it’s a DIY project or professional work, remember to focus on precision and care to ensure the best results. When you practice consistently and learn from your experiences, you’ll find that solder removal becomes a seamless part of your electronic endeavors.