Techniques to Increase the Temperature of Your Soldering Iron Effectively
If you’re working on electronics, you know how important temperature control is for effective soldering. Sometimes, your soldering iron just doesn’t heat up enough for a clean, solid joint. You might be wondering how to make your soldering iron hotter. Here are several techniques to boost the temperature of your soldering iron effectively.
First, check the wattage of your soldering iron. Typically, the higher the wattage, the hotter it can get. A soldering iron with at least 30-40 watts is ideal for most household projects. If your iron is lower than this, consider upgrading to a more powerful model.
Use a Quality Soldering Iron Tip
The tip of your soldering iron plays a key role in transferring heat. Make sure you use a high-quality copper tip. Copper tips tend to hold heat better than other materials. In addition, keeping your tip clean helps maintain its heat conductivity. Use a damp sponge to wipe off oxidation and residue between uses.
Adjust the Temperature Settings
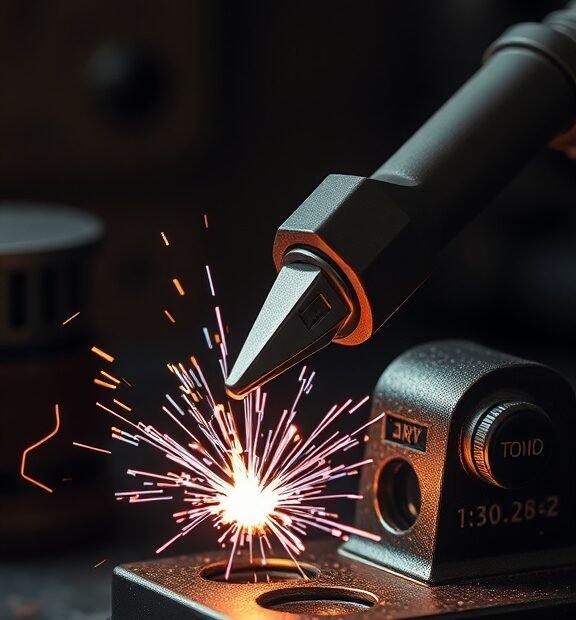
If you have a temperature-controlled soldering iron, don’t hesitate to adjust the settings. Many models allow you to choose the temperature based on your project needs. Aim for a temperature between 350°C to 400°C for most soldering tasks. This temperature range is usually sufficient for components without risking damage.
Use the Right Technique for Soldering
Your soldering technique can significantly impact how quickly your iron heats up the joint. Here are some key pointers:
- Angle: Hold the soldering iron at a slight angle, making sure the tip touches both the component lead and the PCB pad simultaneously. This technique helps the heat spread quickly.
- Time: Don’t linger too long on the joint. Proper heating should only take a few seconds. If you find you’re holding the iron on the joint for too long, that can be a sign your iron isn’t hot enough.
Consider Using a Soldering Iron Stand
While this might sound basic, a proper stand can help keep the iron in a good position for heating. This allows the solder to melt more efficiently when you are in the right position. Additionally, it can help prevent the iron from losing heat too quickly when you set it down between uses.
Keep the Soldering Iron Plugged In
Always keep your soldering iron plugged in for a few minutes before starting your project. This ensures it reaches the desired temperature before you begin work. If it cools down during use, try to reheat it by giving it a moment to regain its heat.
Utilize Flux for Better Heat Transfer
Applying flux to the area you’re soldering can help improve heat transfer. Flux acts as a conductor and will allow the solder to flow more smoothly. This helps keep the soldering iron from working harder to create the necessary heat.
Upgrade to a Digital Soldering Station
If you’re serious about your soldering projects, consider investing in a digital soldering station. This type of equipment allows for precise temperature control and often comes with a powerful iron that heats quickly and efficiently. Digital stations also offer a variety of tips that can adapt to different types of work, ensuring you always have the right tools for the job.
Regular Maintenance is Essential
Regularly maintain your soldering iron to keep it operating at peak conditions. Clean the tip frequently, check for damage, and replace worn parts when necessary. A well-maintained soldering iron will heat more effectively and lead to better soldering results.
By applying these techniques, you’ll notice a significant improvement in the effectiveness of your soldering tasks. Whether you’re a hobbyist or a seasoned pro, understanding how to make your soldering iron hotter can make all the difference in your work.
Common Mistakes to Avoid When Trying to Make Your Soldering Iron Hotter
Soldering iron tools are essential for assembling electronic components and circuits, but many users struggle with getting them to the optimal heat levels for effective soldering. Knowing how to make a soldering iron hotter can lead to better results in your projects. However, mistakes during this process can hinder your success. Here are some common pitfalls to avoid when trying to increase the temperature of your soldering iron.
Using the Wrong Power Setting
Many soldering irons come equipped with adjustable power settings. A common mistake is failing to set the temperature to the appropriate level for the task at hand. Each soldering project may require a different temperature based on the components involved. For example, lead-free solder typically requires higher temperatures than traditional leaded solder. Always check the specifications of the solder you are using and adjust your soldering iron accordingly.
Neglecting to Clean the Tip
A dirty soldering iron tip can dramatically reduce heat transfer, making it challenging to work efficiently. Oxidation and residue buildup can insulate the tip, preventing it from reaching the desired temperature. Regularly clean your soldering iron tip using a damp sponge or brass sponge before you start soldering. This simple maintenance task ensures better heat conductivity and helps your soldering iron to operate at its maximum efficiency.
Overlooking the Importance of the Right Tip
Choosing the appropriate soldering tip is critical in achieving the right heat for your project. Using a fine tip can concentrate heat in a small area, which is helpful for precise work but may require a higher temperature setting. Conversely, a broader tip distributes heat over a larger surface area and might work well with lower settings. Ensure you are using the correct type of tip for your soldering needs to avoid overheating components or leaving solder joints weak.
Ignoring the Need for Proper Ventilation
When you’re working with higher temperatures, the fumes released during soldering can be harmful. Not utilizing proper ventilation might not directly affect the iron’s heat, but it can lead to poor working conditions. Always solder in a well-ventilated area to protect your lungs and maintain your focus on the task at hand. A soldering fume extractor can be a great addition to your workstation.
Failing to Allow Proper Warm-Up Time
An often overlooked aspect is giving your soldering iron adequate time to heat up before starting your work. Many beginners plug in their soldering iron and immediately begin soldering, resulting in poor joint quality. Always allow your soldering iron to reach the desired temperature (as indicated by the temperature gauge if your model has one) before you start soldering. Generally, allowing 5-10 minutes is recommended for a thorough warm-up.
Using Incompatible Accessories
- Lead-Free Solder: Ensure your solder is compatible with the max temperature of your soldering iron.
- Work Surface: Using a surface that absorbs heat can lower your iron’s effectiveness.
- Low-Quality Extension Cords: If you’re using an extension cord, ensure it can handle the wattage of your soldering iron. Poor-quality cords can lead to power loss.
Forgetting to Maintain Your Tool
A well-maintained soldering iron functions much better than one that has been neglected. It’s similar to how your car requires regular maintenance to run smoothly. Replace worn tips, check for electrical connections, and perform regular tests to ensure proper operation. Keeping your soldering iron in optimal condition helps it reach and maintain higher temperatures.
Not Practicing Proper Technique
Even with a hot soldering iron, poor technique can lead to unsatisfactory results. Make sure you are familiar with soldering techniques such as melting time and contact duration. Aim to keep your tip on the join for just the right amount of time to ensure proper melting of the solder without damaging other components.
Avoiding these common mistakes will not only help you make your soldering iron hotter but also enhance your overall soldering experience. By ensuring proper settings, maintaining cleanliness, using the correct accessories and techniques, you’ll find that effectively raising the temperature of your soldering iron becomes a seamless part of your workflow.
Conclusion
Making your soldering iron hotter can significantly improve your soldering tasks, providing you with cleaner joints and quicker results. The techniques discussed highlight the importance of proper temperature settings, maintaining tip cleanliness, and using the right power supply. By adjusting the temperature dial (if available on your soldering iron), you can achieve optimal heat levels for different types of solder and materials, ensuring that your work is efficient and effective.
However, it’s equally crucial to be aware of common mistakes that could undermine your efforts. Many enthusiasts often overlook the importance of let the soldering iron reach the desired temperature before starting work, which can lead to weak joints and increased consumption of solder. Another frequent error is using the wrong type of solder or flux, which can affect the performance of the iron and the quality of your work. Additionally, neglecting to clean the tip regularly can lead to heat transfer issues.
To maximize the effectiveness of your soldering iron, always strive to incorporate these techniques while avoiding common pitfalls. Stay informed and practice good soldering habits to ensure that you maintain a high level of quality in your projects. With a little patience and the right approach, you’ll enjoy a better soldering experience and achieve superior results. Armed with this knowledge, you can tackle any soldering task confidently, knowing that you’re preparing your tools for success.