Step-by-Step Guide on How to Make a Soldering Iron at Home
Creating your own soldering iron at home can be a rewarding project, especially if you’re looking to explore electronics and DIY crafts. A homemade soldering iron can be a simple solution for various soldering tasks. In this guide, we will walk you through the steps to make a reliable soldering iron using common materials.
Gather Your Materials
Before starting, make sure you have the following materials:
- Old power supply or transformer
- Metal rod (copper or iron)
- Insulated wire (preferably heat-resistant)
- Soldering tip (you can use a metal bolt or nail)
- Heat-resistant base (ceramic or metal plate)
- Electrical tape
- Wire cutter and stripper
- Screwdriver
- Drill (optional, for making holes)
Preparing the Heating Element
The heating element is crucial for your soldering iron. Use an old power supply, like a computer power supply unit (PSU), which can provide the necessary voltage and current for heating the metal tip. Alternatively, you can use a transformer that converts AC to lower voltage DC. Here’s how to prep it:
- Disconnect the power supply from any electronic device.
- Identify the output wires, usually colored red (positive) and black (negative).
- Strip the ends of these wires using your wire stripper to prepare for connections.
Creating the Soldering Tip
The soldering tip is where the heat will be transferred to the solder. To make your tip:
- Take your metal rod and cut it to a length of about 6 to 8 inches.
- Drill a hole at one end if using a bolt so that it can attach snugly to the heating element.
- Attach the soldering tip to the metal rod using screws or by welding if possible. Make sure it’s secure and won’t come loose during use.
Assembling the Soldering Iron
Now it’s time to bring everything together. Follow these steps for assembly:
- Attach the insulated wire to the power supply’s output. Connect the positive wire to the bottom of the heating element (the metal rod).
- Connect the negative wire to the heat-resistant base where the metal rod will rest. Ensure there’s a firm connection to prevent arcing.
- Wrap any exposed wires with electrical tape to enhance safety and prevent short circuits.
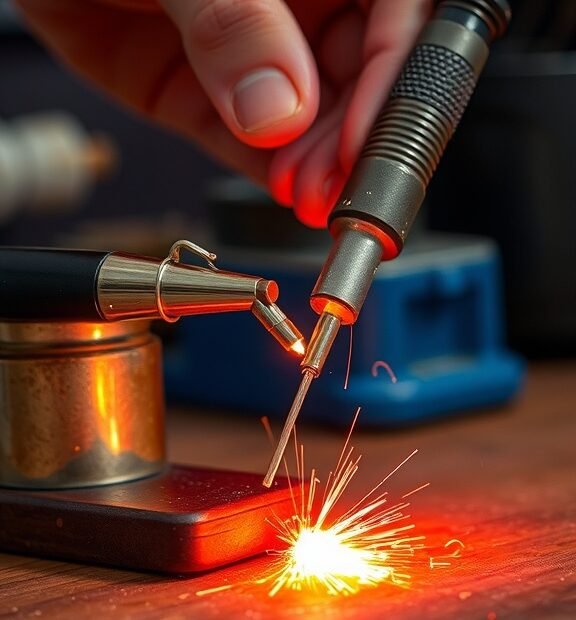
Testing Your Soldering Iron
Once your soldering iron is assembled, it’s time to test it. Here’s how:
- Plug in your power supply and turn it on.
- Wait a few minutes for the soldering tip to heat up.
- Carefully touch the tip to a piece of solder. It should melt easily if the soldering iron is working correctly.
Safety Precautions
When using your homemade soldering iron, safety should always come first. Here are some key precautions to take:
- Always work in a well-ventilated area to avoid inhalation of fumes.
- Use protective eyewear to shield your eyes from potential splashes of solder.
- Be aware of your surroundings and keep flammable materials away from your work area.
- Unplug the soldering iron when not in use and allow it to cool before handling it.
By following this guide, you can successfully create a homemade soldering iron that serves your electronic repair needs. While it may seem straightforward, always prioritize safety and quality to ensure your projects go smoothly. With a little patience and care, you’ll have a functional tool that can help you with various soldering tasks around the house.
Essential Safety Tips for DIY Soldering Projects
When engaging in DIY soldering projects, safety must always come first. Whether you are a beginner or have some experience, following essential safety tips will help you minimize risks and create an effective working environment. Here are some crucial safety practices to keep in mind.
Use Personal Protective Equipment (PPE)
Your safety should be your priority. Always wear personal protective equipment while soldering. This includes:
- Safety Goggles: Protect your eyes from flux fumes and flying solder bits.
- Heat-Resistant Gloves: Wear gloves to prevent burns from hot tools or surfaces.
- Protective Clothing: Use long sleeves and aprons to shield your skin from heat and accidental burns.
Work in a Well-Ventilated Area
Soldering can release harmful fumes, especially when using lead-based solder. To ensure your health and safety, always solder in an area with good ventilation. If you can’t achieve proper airflow, consider using a fume extractor to draw harmful vapors away from your workspace.
Handle Soldering Iron with Care
The soldering iron is the primary tool in your project, and it can reach high temperatures quickly. To avoid accidents:
- Always place the soldering iron in a stand: This keeps it stable and reduces the risk of burns.
- Never touch the tip: The metal tip can burn you severely; treat it with care.
- Unplug when not in use: Disconnect the soldering iron from the power source to prevent accidental activation.
Keep a Clean Workspace
Clutter can lead to accidents. Organize your workspace by keeping tools and materials neatly arranged. Clean up any solder spills immediately to avoid slipping and falling hazards. Additionally, ensure there are no flammable materials nearby, as this could lead to fires.
Choose the Right Soldering Materials
Using the appropriate solder and flux is crucial for safety. Opt for lead-free solder whenever possible, as lead is toxic and poses health risks. Moreover, select solder that fits your project requirements to prevent excess work, which can lead to fatigue and careless mistakes.
Maintain Your Tools
Well-maintained tools are safer tools. Regularly inspect your soldering iron and other equipment for wear and damage. Replace any frayed wires or broken components promptly to prevent accidents. A clean soldering tip helps improve quality and reduces the risk of short circuits.
Follow Correct Soldering Techniques
Proper soldering techniques not only improve your work but also enhance safety. Here are some tips:
- Heat the joint: Apply the soldering iron to the joint before adding solder to ensure even melting.
- Don’t overload solder: Use just enough solder for a good connection to avoid dripping.
- Allow cooling: Let solder cool naturally. Never blow on it to speed up the process as this can cause splattering.
Be Aware of Electrical Hazards
If you’re working with electronics, there are additional electrical safety risks. Always disconnect power supplies before you start soldering. Be mindful of capacitor discharges, which can cause electric shocks. Use insulated tools to protect yourself from accidental electricity flow.
Store Materials Safely
Proper storage of soldering materials is key to safety in your workspace. Store your solder and flux in cool, dry places, away from heat sources. Ensure caps are securely closed to prevent spills and contamination. Keep the workspace free from any hazardous materials that could ignite during soldering.
By following these essential safety tips, you can make your DIY soldering projects both enjoyable and safe. Remember, taking precautions ensures that you focus on the creativity of your projects without unnecessary interruptions or injuries. Stay safe and happy soldering!
Conclusion
Creating your own soldering iron at home can be a rewarding project that not only saves you money but also gives you a deeper understanding of the tools you use in electronics and repairs. By following the step-by-step guide outlined above, you’ll have a functional soldering iron tailored to your specific needs. Remember that the materials you choose and the precision with which you assemble your iron play a crucial role in its effectiveness.
Safety should always be your top priority whenever you engage in DIY projects. Proper precautions can prevent accidents and ensure a smooth soldering experience. Always wear protective gear such as goggles and gloves, work in a well-ventilated space, and keep flammable materials away from your workspace. Understanding the tools and materials you’re working with allows you to enjoy the process while minimizing risks.
Once you’ve completed your homemade soldering iron, practice makes perfect. Start with simple projects to get a feel for the tool’s handling and capabilities, and gradually work your way up to more complex tasks. With time and experience, you’ll not only enhance your soldering skills but also appreciate the effort you’ve put into creating and utilizing your own soldering iron.
By combining creativity with safety and a little bit of patience, you’re well on your way to mastering the art of soldering at home. Embrace your new skill, and let your DIY journey begin!