Techniques for Effective Desoldering with a Soldering Iron
Desoldering is a vital skill for anyone working with electronic components or circuit boards. Knowing how to desolder with a soldering iron can save time, ensure the protection of circuits, and maintain integrity in your projects. If you want to effectively desolder, there are several techniques and tips to keep in mind.
Understanding the Basics
Before diving into the desoldering process, it’s essential to understand how soldering works. Solder is used to create a strong electrical connection between components and a circuit board. When it’s time to remove a component, you need to melt the solder to free the piece. This is where a soldering iron comes in handy. Make sure you have a good quality soldering iron with a fine tip for precision.
Essential Tools for Desoldering
Having the right tools can make a huge difference in your desoldering experience. Consider gathering the following items:
Soldering Stations | Easy 60 Day Return
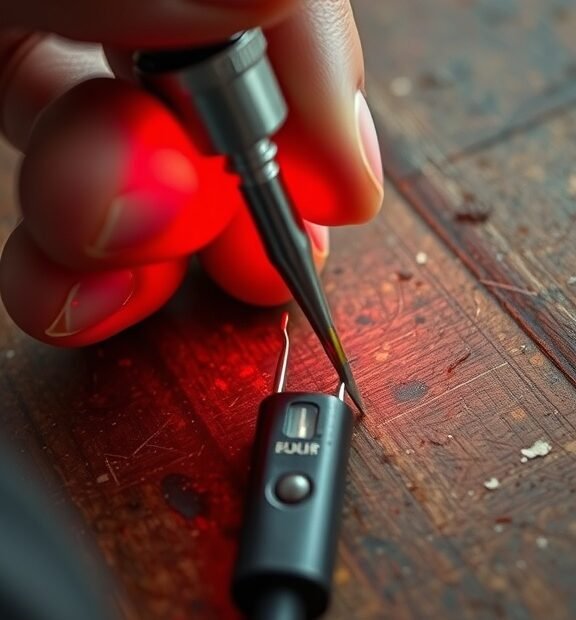
- Soldering Iron: A well-maintained, temperature-controlled soldering iron allows for better heat management.
- Solder Wick: A copper braid that absorbs molten solder when placed over it.
- Pump Suction Tool: A tool that creates a vacuum to suck up molten solder.
- Flux: Helps with the flow of solder, improving the efficiency of the desoldering process.
- Safety Glasses: Protect your eyes from any solder splashes.
- Desoldering Clamp: Holds down components to prevent movement during the process.
Step-by-Step Techniques for Desoldering
Once you have your tools, you’re ready to start desoldering. Follow these steps for effective desoldering:
Heating the Solder
Begin by powering on your soldering iron and allowing it to reach the desired temperature, typically around 350°C (660°F). Then, touch the tip of the soldering iron to the solder joint you wish to melt. It should take only a few seconds for the solder to become molten.
Soldering Stations | Easy 60 Day Return
Using the Solder Wick
After the solder has melted, place the solder wick over the joint. Press the soldering iron down onto the wick. The heat causes the solder to flow into the wick, effectively removing it from the joint. Lift the wick and soldering iron away together, then cut off the used wick to reuse the remaining length.
Using the Pump Suction Tool
If you prefer a suction method, a pump suction tool is effective. Once you melt the solder with your soldering iron, quickly position the suction tool over the joint and press the button to suck up the molten solder. It might take a few tries to get a feel for the timing, so don’t get discouraged!
Soldering Stations | Easy 60 Day Return
Applying Flux for Better Results
Before starting, you might want to apply a bit of flux to the solder joints. Flux helps the solder melt and can make desoldering easier. Once you’ve removed the old solder, you can clean the area with isopropyl alcohol and a brush to ensure the surface is ready for new components.
Tips for Success
Here are some additional tips to keep in mind when desoldering:
Soldering Stations | Easy 60 Day Return
- Practice: If you’re new to desoldering, practice on old circuit boards to gain confidence.
- Work Slowly: Rushing can lead to mistakes, so take your time to ensure proper technique.
- Avoid Overheating: Excess heat can damage the circuit board, so be mindful of your soldering iron’s contact time.
- Keep a Steady Hand: A steady hand helps avoid damage to surrounding components and pads.
By mastering these techniques, you’ll find that desoldering becomes a straightforward task rather than a daunting one. With practice, you’ll improve your skills and ensure successful removal of components with minimal risk to your projects. Happy desoldering!
Common Mistakes to Avoid When Desoldering Electronics
Desoldering electronics can seem like a daunting task, especially for beginners. However, avoiding common mistakes can make the process much smoother and more efficient. Here’s what you should keep in mind when learning how to desolder correctly.
Using the Wrong Temperature
One of the most frequent errors is using a soldering iron set to the wrong temperature. A lower temperature may not heat the solder enough to melt it, while a higher temperature can damage the components. Aim for a moderate temperature, usually between 350°C to 400°C (662°F to 752°F). Pay attention to the type of solder you’re working with, as different solders have different melting points.
Soldering Stations | Easy 60 Day Return
Neglecting to Use Solder Wick or a Desoldering Pump
Many people jump right in with their soldering iron without realizing that tools like solder wick and desoldering pumps can make the job much easier.
- Solder Wick: This braided copper wire absorbs molten solder when heated, allowing for a cleaner desoldering experience. Make sure to place it directly over the solder joint and then apply the soldering iron on top.
- Desoldering Pump: This vacuum device allows you to suck up melted solder immediately after heating it. Be quick and precise for the best result.
Not Practicing Good Technique
Your technique matters immensely. Hold the soldering iron at the right angle, generally 45 degrees, to ensure even heat distribution. Apply heat directly to the joint where the lead meets the PCB (Printed Circuit Board) and not onto the solder itself. This ensures the solder melts cleanly and you can remove the component without tearing pads or traces off the board.
Soldering Stations | Easy 60 Day Return
Overheating Components
Excessive heat can damage surrounding components, pads, or traces on the board. Be mindful of how long you hold the soldering iron on one spot. A rule of thumb is to limit contact time to a few seconds before moving to another joint. If needed, allow time for the component to cool down before continuing.
Ignoring Safety Precautions
Safety should always be a priority. Wear safety glasses to protect your eyes from any flying debris. Contain your workspace to minimize hazards and be cautious of hot solder and surfaces. Keep a damp sponge or brass cleaner handy to clean your soldering iron tip frequently; this maintains good heat transfer.
Soldering Stations | Easy 60 Day Return
Not Cleaning the Joint
After desoldering, it’s crucial to clean the area before attempting any repairs. Residue can interfere with future solder joints. Use isopropyl alcohol and a small brush to remove any leftover flux or debris from the desoldered area to ensure a clean workspace for any new solder.
Assuming All Solder is the Same
Solder comes in various types, with different compositions and melting points. Make sure you know whether you’re dealing with leaded or lead-free solder, as well as the specific requirements for each type. Using the wrong solder can complicate the desoldering process.
Soldering Stations | Easy 60 Day Return
Forgetting to Double-Check Your Work
Even seasoned technicians can make mistakes. After desoldering, take a moment to double-check that you’ve removed all the solder and that no small pieces are left behind. Failure to do so can lead to shorts or unreliable connections in the future.
Rushing the Process
It’s easy to rush through desoldering, especially if you’re eager to see the results. However, taking your time will yield better results in the long run. Focus on each joint carefully, and don’t hesitate to pause and reassess if something feels off. Patience is key to actively ensuring successful operations.
Soldering Stations | Easy 60 Day Return
By keeping these common mistakes in mind when you desolder electronics, you’ll be on your way to improving your skills and resulting work. Learning the ropes may take time, but avoiding these missteps will set you on the right track and help you gain confidence in your abilities.
Conclusion
Successfully desoldering components with a soldering iron requires practice and the right techniques. Understanding the various methods, such as using a desoldering pump or solder wick, can greatly improve your efficiency and accuracy during the process. Remember to apply the soldering iron’s tip to the joint adequately while proactively using your desoldering tool, ensuring you don’t overheat the PCB.
Avoid common pitfalls that often lead to frustration or damage. For instance, rushing through the desoldering process can lead to overheating and potential harm to surrounding components. Always double-check the polarity of the components you’re working with and be cautious of solder splashes that can create unintended short circuits. Taking your time and being meticulous will save you time in repairs in the long run.
Soldering Stations | Easy 60 Day Return
No matter your experience level, nurturing these skills can make a significant difference in your electronic repair projects. With practice, you will build confidence in your ability to desolder effectively and correctly, reducing wastage of components and increasing your enjoyment while working on electronics. Keep refining your techniques, avoid common mistakes, and you’ll find that desoldering becomes a straightforward part of your electronic toolkit. Embrace the learning process, and soon you’ll be tackling desoldering jobs with ease and precision. Harnessing these methods not only enhances your skills but also encourages safe and efficient practices in your DIY endeavors.