Techniques for Effectively Burning Wood with a Soldering Iron
Working with wood can be a satisfying and creative pursuit. If you’re interested in adding unique designs or patterns to your wooden projects, using a soldering iron can be an excellent method for burning wood. It allows for precision and control, making it suitable for both beginners and seasoned crafters alike.
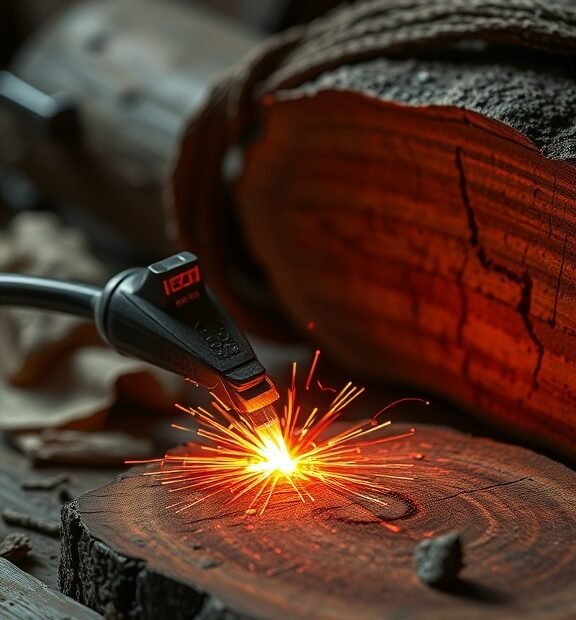
The first step in utilizing a soldering iron effectively for burning wood is to choose the right equipment. A soldering iron with a fine tip is ideal for detailed work. You may want to look for types of soldering irons that have adjustable temperatures. Lower temperatures are better for delicate work, while higher temperatures work well for creating bold lines and deeper burns.
Before you begin, prepare your workspace. Ensure it is well-lit and ventilated. You will also need a clean and stable surface to work on. Keep safety in mind; use protective eyewear and make sure to have a fire extinguisher nearby. Remember, safety comes first when handling hot equipment!
Soldering Iron Kits & Accessories
Once you have your soldering iron ready and workspace set up, it’s time to prepare the wood. Select a piece of wood that suits your project. Softwoods like pine and cedar are easier to burn than hardwoods like oak or maple. Additionally, ensure the wood is smooth and free of dust and debris. You might also want to draw your design lightly with a pencil. This will guide you as you burn the wood.
To begin burning, plug in your soldering iron and allow it to heat up. Depending on your soldering iron model, this may take several minutes. Once the tip is hot, test it on a scrap piece of wood to gauge its effectiveness. Always remember to handle the soldering iron with care. Its tip can reach extremely high temperatures, and it can cause burns.
Soldering Iron Kits & Accessories
When you’re ready to start, use a steady hand to follow the lines of your design. Focus on creating slow and consistent strokes. If you rush, you may lose control and end up with burnt areas you didn’t intend. For intricate designs, a light touch is recommended, whereas, for bold, dark lines, you may apply slightly more pressure.
As you burn the wood, you will notice a gradual color change. Lighter burns create a gentle contrast while deeper burns result in dark, rich tones. Experiment with various techniques, such as:
Soldering Iron Kits & Accessories
- Slow and Steady Burns: Moving the iron slowly allows the wood to char evenly, giving you a clean line.
- Quick Flicks: For a more rustic or aged appearance, use quick flicking motions that leave small, varied patterns.
- Pointed Tips: Use a pointed tip to add fine details to your designs, creating textures or shading.
While you’re burning, take breaks to prevent the soldering iron from overheating. This will help maintain control and keep your project moving forward smoothly. Make it a point to frequently check the temperature of the soldering iron during work, ensuring it’s effective but not too hot to control.
If your design requires shading, try holding the soldering iron at an angle. This technique allows you to create gradient-like effects that can add depth to your work. Also, remember that different woods will react differently to burning. Practice and experiment to get the feel for how your soldering iron interacts with various wood types.
Soldering Iron Kits & Accessories
After completing your design, let the wood cool down if it needs to be moved or processed further. If there’s any smoke, ensure the area is well-ventilated. to preserve your hard work, consider applying a finish. Wood finishes like sealers or stains can enhance the appearance of your burn and protect it from wear.
Using a soldering iron for burning wood opens up a world of creative possibilities. With practice, you’ll develop your own style and techniques that will enhance not just your woodworking skills but also your enjoyment of the craft. Remember to be patient with yourself as you learn and grow through this artistic process.
Safety Precautions When Using a Soldering Iron for Wood Burning
Using a soldering iron for wood burning can be a fun and creative way to add personalized touches to your projects. However, it is critical to prioritize safety while working with this tool. Proper precautions can prevent accidents and make your crafting experience enjoyable.
Soldering Iron Kits & Accessories
Before you start, ensure you have the right materials on hand. Always work in a well-lit and ventilated area. This is essential because burning wood can produce smoke and fumes. Good airflow can help dissipate harmful substances. Consider using protective equipment such as goggles, gloves, and a mask to shield yourself from sparks and smoke.
One of the first steps to safety is to inspect your soldering iron before each use. Look for any signs of damage such as frayed cords or cracks in the iron. A damaged soldering iron can pose significant risks, including electric shock or fire hazards. If you find any issues, do not use the tool until it’s repaired or replaced.
Soldering Iron Kits & Accessories
When you are ready to use the soldering iron, choose a sturdy, heat-resistant surface to work on. It’s crucial to avoid surfaces that could catch fire easily, like wood tables or carpets. A metal or glass pad is ideal as these materials can withstand high temperatures.
As you begin your wood burning project, remember the following safety tips:
Soldering Iron Kits & Accessories
- Keep flammable materials away: Remove any paper, fabric, or other flammable items from your workspace. Sparks could ignite these materials, leading to a fire.
- Use tools wisely: Hold the soldering iron at a comfortable angle and allow it to heat up fully before making contact with the wood. This ensures smooth burning and reduces the likelihood of accidents.
- Stay focused: Concentrate on your project and avoid distractions. Engaging with your friends or multitasking can lead to careless mistakes, which might be dangerous.
- Don’t leave it unattended: Always keep the soldering iron in sight when it’s on. Accidental contact with a hot surface can lead to severe burns.
- Turn it off properly: When you finish your work, turn off the soldering iron and unplug it immediately. Let it cool down in a secure place away from children and pets.
In addition to these tips, consider having a fire extinguisher nearby. Familiarize yourself with its operation before starting your project. Knowing how to react can save you time, property, and even lives in case of an emergency.
It’s also a good idea to have a first aid kit on hand when working with tools like soldering irons. Keep band-aids, antiseptics, and burn ointments accessible in case of minor injuries. While you hope to avoid injuries, it’s better to be prepared than to be caught off guard.
Soldering Iron Kits & Accessories
Another important aspect of safety is choosing the right wood type. Softwoods, like pine or cedar, are easier to burn but can produce more smoke. Hardwoods, such as oak or maple, might require more time and care but can yield finer details. Regardless of the wood type, ensure it is dry and clean, as moist or dirty wood can release harmful fumes when burned.
After your project is complete, always store your soldering iron safely. Make sure it is completely cool before placing it in a safe storage area. Using a designated case can help in protecting the tip and ensuring that no one accidentally comes into contact with it.
Soldering Iron Kits & Accessories
Educate anyone else who may be in your workspace about the dangers associated with using a soldering iron. Children, especially, should understand how not to touch hot tools and be aware of the hazards. Even adults can benefit from a quick refresher on safe practices before starting any wood burning project.
Using a soldering iron for wood burning can be a rewarding hobby or craft when it’s done safely. By following these precautions and practices, you can ensure a safe and enjoyable experience while expressing your creativity. Your safety is the most important aspect to remember as you dive into this exciting craft!
Conclusion
Effectively burning wood with a soldering iron opens up a world of creativity for DIY enthusiasts and crafters. By employing various techniques, such as adjusting the temperature and using different tips, you can create intricate designs and add personal touches to your wooden projects. From simple patterns to detailed artwork, the soldering iron allows for precision and control, making it a favored tool for wood burning.
Soldering Iron Kits & Accessories
However, it’s crucial to prioritize safety while working with this powerful tool. Always wear safety goggles and work in a well-ventilated area to minimize exposure to fumes. Using a heat-resistant surface and keeping flammable materials away from your workspace will further reduce risks. Remember to handle the soldering iron carefully, as it can reach high temperatures quickly. Allow it to cool before storing or cleaning, ensuring you prevent accidental burns.
By combining your artistic skills with the fundamental techniques of wood burning and observing proper safety measures, you can enjoy a satisfying and productive crafting experience. Whether you’re personalizing gifts, creating home decor, or exploring a new hobby, mastering the art of burning wood with a soldering iron can lead to beautiful, unique creations. Embrace your creativity, take safety seriously, and let your imagination guide you as you embark on this exciting crafting journey. With practice, the results can be truly rewarding and showcase your unique style. Happy burning!