Troubleshooting a “Can’t Tin Soldering Iron”: Common Issues and Solutions
Soldering iron tips can sometimes present challenges, especially when you encounter a “can’t tin soldering iron” situation. Tinning is the process of coating the tip with solder, making it easier to transfer heat and solder components together. If your soldering iron is failing to tin properly, it could hinder your soldering work. Let’s explore some common reasons for this issue and their solutions.
Common Issues with Tinning a Soldering Iron
When your soldering iron won’t tin, several factors could be to blame. Here are some common issues:
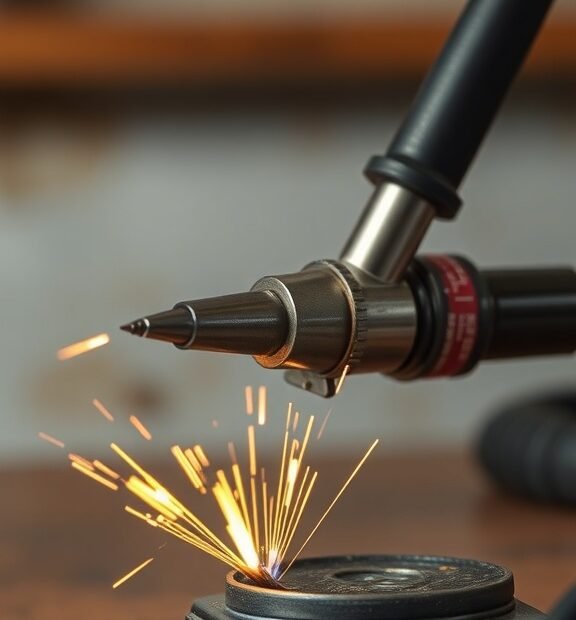
- Oxidation: Over time, the tip of your soldering iron can become oxidized, which prevents solder from adhering properly.
- Incompatible Solder: Not all solder works well with every soldering iron. Ensure that the solder you’re using is suitable for your tool.
- Temperature Settings: If your soldering iron isn’t hot enough, it won’t be able to melt solder effectively.
- Dirty Tip: If the tip has dirt, grease, or old solder, it won’t tin properly.
- Worn-Out Tip: Tips wear out over time, making them less effective at tinning.
Solutions to Fix Your Soldering Iron
Here are some actionable solutions to consider when your soldering iron can’t tin:
Soldering Stations | Easy 60 Day Return
1. Clean the Tip
Keeping the soldering iron tip clean is crucial for effective tinning. Use a damp sponge or brass cleaning pad to remove oxidization and debris. Make sure to wipe the tip while it is hot, as this helps eliminate unwanted grime more effectively.
2. Use the Right Fume Extractor
If you’re working in a dusty environment or you’re in a professional setting, consider using a fume extractor. Dust can accumulate on the tip and affect its ability to tin properly.
Soldering Stations | Easy 60 Day Return
3. Check the Temperature
Ensure your soldering iron is adequately heated. It should typically reach temperatures between 350°C to 400°C (662°F to 752°F) for effective soldering. Adjust your settings, and give your iron a few moments to reach the correct temperature before attempting to tin.
4. Choose Compatible Solder
Make sure you’re using solder that is compatible with your soldering iron. For example, lead-free solder requires higher temperatures, so the soldering iron must reach the appropriate heat level to melt it. Always read the specifications on the solder packaging.
Soldering Stations | Easy 60 Day Return
5. Replace the Tip
If your soldering iron tip appears worn or is beyond cleaning, it may be time for a replacement. Investing in a good-quality tip can greatly enhance your soldering experience and make tinning much easier.
6. Use Flux
Applying flux can help increase the adherence of solder to the iron tip. Flux acts as a cleaning agent and helps remove oxidation. When you apply flux, it allows solder to bond more effectively to the tip.
Soldering Stations | Easy 60 Day Return
Additional Tips for Effective Soldering
Beyond fixing the “can’t tin soldering iron” issue, here are some additional tips for effective soldering:
- Tin Your Soldering Iron Regularly: Make it a habit to tin your soldering iron tip each time you finish using it. This prevents oxidation and keeps the tip in good condition.
- Store Your Iron Properly: When not in use, keep your soldering iron in a designated holder and cover the tip to prevent damage.
- Practice Makes Perfect: If you’re new to soldering, practice on scrap pieces until you gain confidence in your technique.
Relying on effective techniques can make your soldering work more enjoyable and successful. Always remember to maintain your tools and stay informed about the materials and methods you use for the best results.
Soldering Stations | Easy 60 Day Return
By understanding and addressing the issues that prevent your soldering iron from tinning, you’ll enhance your overall soldering experience. Start incorporating these solutions today for a more efficient workflow in your projects!
The Importance of Proper Soldering Techniques in Electronics Repair
Soldering is a critical process in electronics repair, and mastering proper techniques can mean the difference between a successful fix and a permanent failure. Whether you’re a seasoned technician or a DIY enthusiast, following strong soldering practices ensures you work efficiently and safely.
Understanding Solder and Its Role
Solder is a fusible metal alloy used to create a permanent bond between electronic components. It typically consists of tin, lead, or silver, and melts at relatively low temperatures. Using the right solder is key because it can influence the conductivity and reliability of the connections. Ensure you choose solder that suits your application, as some types are designed for specific tasks.
Soldering Stations | Easy 60 Day Return
The Importance of Temperature Control
Temperature control is essential when soldering. Too much heat can damage sensitive components or circuit boards. Conversely, too little heat may result in weak joints that can easily fail. Here are some tips for ensuring proper temperature control:
- Use a soldering iron with adjustable temperature settings to suit various types of solder and components.
- Allow the iron to heat adequately before touching the solder to ensure a quick, effective joint.
- Keep the iron’s tip clean for optimal heat transfer, avoiding overheating of components.
Preparing the Workspace
An organized workspace is vital for effective soldering. Here’s how to set up a conducive environment:
Soldering Stations | Easy 60 Day Return
- Work on a heat-resistant surface to minimize fire hazards.
- Ensure good lighting to see the components clearly.
- Gather all necessary tools, such as wire strippers, tweezers, and solder sucker, before starting.
Executing Proper Soldering Techniques
Now that you’ve set the stage, proper execution is the next step. Some effective techniques include:
- Always clean the surfaces to be soldered. Dirt or oxidation can disrupt the connection.
- For through-hole components, make sure to insert the leads completely through the PCB.
- Apply heat to both the lead and the pad on the board simultaneously, resulting in a better bond when you introduce solder.
- Be mindful of the solder amount. Too much can create bridges, while too little can lead to weak joints.
Evaluating the Repair
After soldering, take a moment to evaluate your work. Look for these signs of a successful repair:
Soldering Stations | Easy 60 Day Return
- A shiny, smooth solder joint indicates good bonding.
- The solder should form a “volcano” shape—concave and well-defined.
- Check for any solder bridges that could cause short circuits.
Common Mistakes to Avoid
Even experienced technicians make mistakes. Here are pitfalls to watch for:
- Overheating components can lead to permanent damage.
- Not using enough solder can result in poor connections.
- Ignoring safety precautions, like using eye protection or working in a ventilated area.
Regular Maintenance of Soldering Equipment
Maintaining your soldering equipment ensures longevity and superior performance. Consider these maintenance tips:
Soldering Stations | Easy 60 Day Return
- Regularly clean the soldering iron tip with a damp sponge or brass sponge.
- Replace worn-out tips to maintain precise heat application.
- Store your soldering iron in a safe place away from moisture to prevent corrosion.
By mastering these techniques and understanding the importance of a well-structured approach to soldering, you can enhance your skills and ensure that your electronics repairs are not just quick fixes, but long-lasting solutions. Proper soldering is not just a technical skill; it’s an art that enhances the reliability and quality of electronic devices.
Conclusion
Understanding the reasons behind a “can’t tin soldering iron” issue is crucial for anyone involved in electronics repair. By troubleshooting common problems—such as a dirty tip, incorrect temperature settings, or using the wrong type of solder—you can often bring your soldering iron back to life. Remember that a well-tinned tip is essential for effective soldering, as it not only improves heat transfer but also ensures reliable connections between components.
Emphasizing proper soldering techniques cannot be overstated. Whether you’re a hobbyist or a professional, mastering the art of soldering helps you avoid frustrating setbacks down the line. Techniques such as ensuring the iron is adequately heated, applying solder in the right areas, and using appropriate materials can vastly improve your results. Orientation of the soldering iron, the timing of solder application, and the quality of the solder itself all play significant roles in creating strong, lasting joints.
Soldering Stations | Easy 60 Day Return
Moreover, regularly maintaining your soldering iron can prevent future issues and enhance your overall soldering experience. Investing a little time in care and technique pays off in more reliable work and cleaner repairs. With a well-maintained soldering iron and efficient techniques, you can confidently tackle any electronics project. Armed with this knowledge, you’re well on your way to becoming more adept and efficient in your soldering efforts, ensuring that your work is not just functional but also accomplished with professionalism and care.