The Practicality of Using Solder Paste with a Soldering Iron: Benefits and Techniques
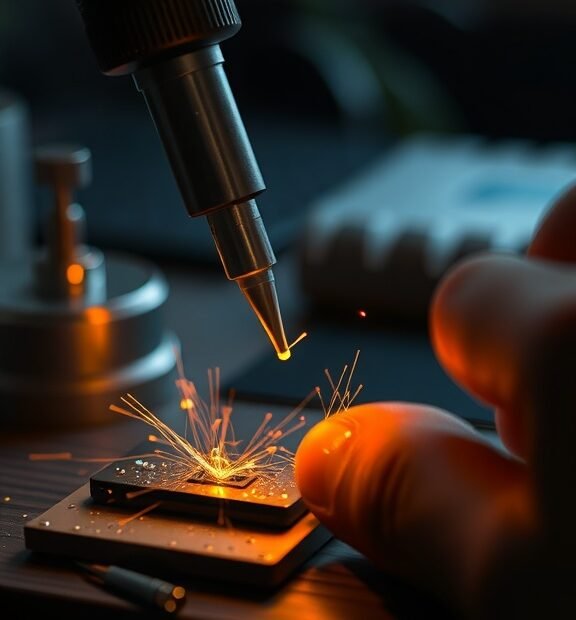
Using solder paste with a soldering iron can be a practical solution for many electronics projects. Solder paste is a mixture of tiny solder particles and flux, making it an excellent choice for soldering components on printed circuit boards (PCBs) or when working with fine-pitched components. This article explores the benefits of using solder paste with a soldering iron, along with techniques to maximize its effectiveness.
One of the key benefits of solder paste is its ease of application. Unlike traditional solder wire, you can apply solder paste precisely where you need it, making it ideal for surface-mount devices (SMDs). The paste can be dot-applied onto PCB pads using a syringe or stencil, ensuring that solder reaches the right areas. Here are some advantages of using solder paste:
- Precision: Solder paste allows for targeted application, reducing the risk of bridging connections.
- Versatility: It works well with various types of components, including fine-pitch and BGA (Ball Grid Array) components.
- Less waste: You can use exactly the amount you need, minimizing excess material.
- Improved heat transfer: The flux in solder paste aids in heat distribution, enhancing the soldering process.
To effectively use solder paste with a soldering iron, proper techniques must be followed. First, ensure you choose the right solder paste for your project. Pastes come with different solder compositions and flux types, so read the specifications to select one that matches your needs.
Preparation is essential. Clean the area where you will apply the solder paste to remove any dirt, grease, or oxidation. This step can significantly impact the adhesion and quality of your soldered joints. After cleaning, apply the solder paste directly to the PCB pads where you need solder using a syringe. For more extensive applications, consider using a stencil for uniform coverage.
Once the solder paste is applied, it’s time to use your soldering iron. Here are some helpful techniques to follow:
- Choose the right tip: Use a fine soldering iron tip to heat small solder paste areas without disturbing neighboring components.
- Adjust the temperature: Set your soldering iron to a temperature that works well with the solder paste. Typically, this is between 350°C to 400°C (662°F to 752°F), but refer to the solder paste instructions for specific guidance.
- Apply heat carefully: Hold the soldering iron against the paste for a few seconds until it melts. Be careful not to touch other components.
- Let it cool: After soldering, allow the joint to cool undisturbed. This step is crucial for a solid connection.
Understand that solder paste can also be used in conjunction with other soldering techniques, such as reflow soldering, where heat is applied through a hot air gun or in an oven to melt and bond the solder paste. However, if you’re primarily using a soldering iron, ensure that you are focusing on accurate and controlled application.
It’s essential to keep your workspace clean and organized. Solder paste can be messy, and a tidy area will help you avoid accidents and ensure that your project runs smoothly. Have cleaners, wipes, or isopropyl alcohol on hand to clean any spills or smudges.
Using solder paste with a soldering iron can enhance the quality of your solder joints while providing ease of use for both beginners and experienced users alike. The key lies in understanding how to apply it effectively and maintaining optimal conditions for soldering. With practice, you will find that solder paste opens avenues for more precise applications in your electronic assembly tasks.
Comparing Solder Paste to Traditional Solder: Which is Better for DIY Projects?
When it comes to DIY electronics projects, choosing between solder paste and traditional solder can be a crucial decision. Each method has its pros and cons, and understanding their differences can help you make the right choice for your specific needs.
Solder paste is a mix of solder alloy and flux, making it ideal for surface mount devices (SMD). This paste is usually applied to printed circuit boards (PCBs) before reflowing, which uses heat to melt the solder and create strong, reliable connections. Traditional solder, on the other hand, consists of metal wires that you melt with a soldering iron. This method is well-known and widely used for through-hole components.
Here are some key considerations to help you decide which option might be better for your DIY project:
- Application: If you are working with SMD components, solder paste is your best bet. Its application allows for precise placement and can handle small, delicate components effectively. Traditional solder is better suited for larger, through-hole components.
- Ease of Use: For beginners, using a soldering iron with traditional solder can be more intuitive. Melting solder with a soldering iron is straightforward, whereas applying solder paste requires a stencil or a syringe to get the right amount on the PCB.
- Temperature Control: Solder paste is typically reflowed at specific temperatures using a hot air tool or reflow oven. The advantage here is that you can achieve consistent results with the right equipment. Traditional solder needs careful temperature management to avoid damaging components.
- Storage: Solder paste has a shelf life and must be stored properly to avoid drying out. Traditional solder can last longer if kept in a cool, dry place. You won’t have to worry about expiration dates with standard solder wiring.
- Cleanup: Using solder paste can create less mess in some instances since it’s applied in a controlled manner. However, you must clean the PCB after soldering to remove any flux residue. Traditional solder also requires cleaning, particularly to ensure that no oxidation occurs.
In many cases, the choice will depend on the type of project you are undertaking. For instance, if you’re building a circuit board with a lot of SMD components, solder paste may be the favored choice. However, for general repairs or projects involving older electronics, traditional solder can be more accessible and effective.
Both options require specific tools to work properly. For solder paste, you’ll need a stencil or a dispensing syringe, a hot air tool or reflow oven for proper melting, and a cleaning system to remove flux residue. The traditional approach demands a soldering iron, solder wire, and possibly a desoldering tool for corrections.
Prices can also vary. While solder paste might seem slightly more expensive due to its multi-component formulation, traditional solder wire is usually quite affordable. However, consider the value of having the right tools, as they can also influence the overall cost of your project.
Ultimately, both solder paste and traditional solder have their unique advantages in DIY projects. Your decision should be based on the complexity of the project, the components involved, and your personal comfort level with the materials. Understanding these nuances will enable you to confidently select the right soldering method for your next DIY electronics project.
As you move into your projects, remember that skills factor significantly into how successful your soldering will be. Practice will improve your experience, whether with solder paste or traditional soldering techniques. Therefore, be open to experimenting with both methods on various projects to determine which one best fits your style and needs.
Whether you decide to use solder paste for its precision or stick with traditional solder for its simplicity, the key is to enjoy the process of building and creating. Happy soldering!
Conclusion
Using solder paste with a soldering iron can be a practical choice, especially for DIY enthusiasts. One of the main benefits lies in the ease of application and the ability to create clean, precise solder joints. Techniques such as applying solder paste with a stencil or syringe can enhance your efficiency and accuracy, making complicated soldering tasks much more manageable. Plus, solder paste is ideal for surface mount devices, which are commonly used in modern electronics.
When comparing solder paste to traditional solder, each option has its own merits. Traditional solder can provide strong joints and is widely recognized and trusted by many hobbyists. However, for those looking to tackle more intricate or delicate electronics projects, solder paste is often the preferred choice. It allows for finer control and can significantly reduce the risk of overheating components.
Ultimately, the decision between solder paste and traditional solder boils down to your specific project needs. If you’re venturing into detailed work or working with surface mount circuits, investing in solder paste can vastly improve your results. On the other hand, if you’re focused on basic repairs or less intricate projects, sticking with traditional solder might be just right for you. Embrace the benefits of both techniques to enhance your soldering skills and achieve success in your projects. Whether you’re a seasoned pro or a curious beginner, understanding these options will empower you to make informed choices in your DIY soldering endeavors.