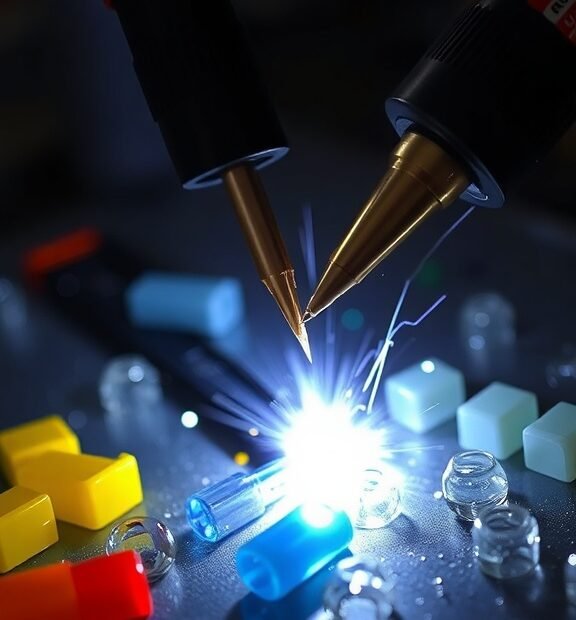
Can You Use a Soldering Iron to Melt Plastic?
When working on DIY projects or repairs, you might wonder if a soldering iron can be used to melt plastic. The quick answer is yes, but there are important details to consider. Melting plastic with a soldering iron can be effective, but it requires knowledge and precaution to do so safely and effectively.
A soldering iron generates significant heat, typically between 350°F (180°C) and 900°F (482°C), which can indeed melt certain types of plastic. However, not all plastics respond in the same way to heat. Here’s a quick overview of how various plastics behave when exposed to the heat of a soldering iron:
- Polyethylene (PE): This type of plastic melts around 240°F (116°C). It’s commonly used in plastic bags, containers, and pipes.
- Polystyrene (PS): Melting point is around 330°F (165°C). Items made of polystyrene include disposable cutlery and certain packaging materials.
- Polyvinyl Chloride (PVC): This plastic melts at approximately 320°F (160°C) and is used in plumbing and electrical cable insulation. However, it can release toxic fumes when heated, so caution is necessary.
- Polypropylene (PP): It has a melting point of about 320°F (160°C) and can be found in food containers and automotive parts.
- Nylon: This plastic requires higher temperatures to melt, typically around 400°F (204°C).
Before using your soldering iron on plastic, keep a few key points in mind:
Soldering Iron Kits & Accessories
- Safety First: Work in a well-ventilated area. When certain plastics melt, they can release harmful fumes. A mask and safety goggles are recommended.
- Choose the Right Tip: Using a chisel or flat tip can help spread the heat more evenly across the plastic. This minimizes the risk of burning and allows for smoother melting.
- Control the Temperature: If your soldering iron has adjustable temperature settings, opt for a lower heat setting to prevent damage to the plastic.
- Test on Scrap Material: Always test your technique on a scrap piece of the same type of plastic. This helps you gauge how the plastic responds to the heat and avoid any surprises on your actual project.
So, how exactly do you melt plastic with a soldering iron? Here’s a step-by-step guide:
- Prepare Your Workspace: Ensure you have a clean, flat surface. Lay down a heat-resistant mat if possible to protect the underlying surface.
- Heat the Soldering Iron: Plug in the soldering iron and allow it to reach the desired temperature.
- Begin Melting: Gently press the tip of the soldering iron against the plastic. Move the iron consistently, allowing the heat to flow into the plastic.
- Watch for Changes: As the plastic melts, it may change color or begin to bubble. Remove the iron promptly when you achieve the desired melt.
- Let It Cool: Once you’ve melted the plastic in the way you want, allow it to cool completely before handling it further.
Keep in mind that not every project will lend itself to using a soldering iron to melt plastic. For extensive remodeling or larger projects, consider using a heat gun designed specifically for melting thermoplastics. This tool offers more control and is better suited for heating larger areas without damaging adjacent materials.
Soldering Iron Kits & Accessories
When working with a soldering iron and plastic, patience is key. Take your time to understand how different plastics respond, and always prioritize safety to ensure an efficient and effective melting process. With the right approach, using a soldering iron to melt plastic can be a valuable skill in your DIY toolbox.
Safe Practices for Melting Plastic at Home
When it comes to melting plastic at home, safety should always be your top priority. While it can be a creative and fun process for crafts or repairs, using the right techniques and precautions is vital to avoid hazards. Here are some safe practices to consider when melting plastic at home.
Choosing the Right Plastic
Before you start melting plastic, it’s essential to know which types are safe to use. Not all plastics melt at the same temperature, and some can release harmful fumes when heated. Here’s a brief guide to commonly used plastics:
Soldering Iron Kits & Accessories
- Polyethylene (PET): Found in bottles and containers, it can be safely heated for recycling or crafting.
- Polypropylene (PP): Often used in food containers, this plastic is also safe for melting.
- Polystyrene (PS): Common in disposable cups and packaging, be cautious as it may release toxic fumes.
- Acrylic: A popular choice for crafts, this plastic melts well but should be handled in a well-ventilated area.
Gathering Materials
Make sure you have all the necessary materials before you start. This includes:
- Soldering iron or heat gun: Choose one that allows you to control the temperature.
- Heat-resistant surface: Use a surface that won’t be damaged by heat, like a metal tray or ceramic tile.
- Protective gear: Wear safety goggles, gloves, and a mask to protect against fumes.
- Ventilation: Ensure your workspace is well-ventilated. Open windows or use a fan to circulate air.
Preparing Your Workspace
A clutter-free workspace is essential when melting plastic. Follow these steps for an organized setup:
Soldering Iron Kits & Accessories
- Clear all unnecessary items from your work table.
- Cover your work surface with an old newspaper or plastic sheet for easy cleanup.
- Keep flammable materials away from your melting area.
Melting Techniques
There are a couple of effective methods to melt plastic at home. Below are two of the most common approaches:
- Soldering Iron: This method provides precise control. Plug in your soldering iron and allow it to heat up. You can use the tip to carefully touch the plastic and melt it where needed.
- Heat Gun: A heat gun disperses warm air over a larger area. Hold it a few inches away and move it in circular motions over the plastic to avoid overheating any spots.
Safety Precautions
Even when following all the tips above, certain safety precautions should be adhered to:
Soldering Iron Kits & Accessories
- Monitor Temperature: Never exceed the recommended melting temperature of the plastic. This helps avoid releasing toxic fumes.
- Take Breaks: Give yourself breaks while working to avoid inhaling fumes for extended periods. Rest in a well-ventilated area.
- Child Safety: Keep children and pets away from your workspace when melting plastic. The equipment and fumes can be dangerous.
Cleansing and Disposal
After you finish your project, it’s crucial to clean your work area and dispose of any leftover materials responsibly. Follow these guidelines:
- Allow melted plastic to cool down completely before handling it.
- Use a safe method to discard any leftover or scrap plastic. Check for local recycling options.
- Clean your tools with rubbing alcohol or a suitable cleaner to avoid contamination.
By following these safe practices when melting plastic at home, you can enjoy a creative crafting experience while keeping hazards at bay. Always remember that your safety comes first! Happy melting!
Conclusion
Using a soldering iron to melt plastic can be a practical solution for various DIY projects, repairs, or crafting needs. However, it’s crucial to be mindful of the type of plastic you’re working with since some materials can release harmful fumes when heated. Before you jump in, ensure you have a good understanding of the specific plastics that can safely be melted with a soldering iron, such as low-density polyethylene (LDPE) and polystyrene, while avoiding those that emit toxins.
Soldering Iron Kits & Accessories
Implementing safe practices is essential when performing any task that involves melting plastic. Always work in a well-ventilated area to minimize exposure to potentially harmful vapors. Wearing protective gloves and eyewear can also safeguard against burns or splashes of molten plastic. It’s wise to have a fire extinguisher nearby as a precautionary measure, as working with high heat always involves some risk.
By following these guidelines, you can effectively use a soldering iron to melt plastic while prioritizing safety. This method not only saves time but can also yield impressive results for your repair or creative projects. Remember to take your time, work carefully, and embrace this handy tool as an asset in your crafting toolkit. Whether you’re fixing items around the house or experimenting with new creations, a soldering iron can open the door to countless possibilities when handling plastic.